


UPDATED: 10/4/2023 – Next content(images, text and videos) update anticipated 10/15/2023 – Refreshing our block and identifying and confirming bearing purchase.
We haven’t even dialed in the last of “The Ultimate Volvo S40/V50/C30 Auto to Manual Swap Guide“, still had some clutch bleeding to do, but when your engine blows, you really don’t have a choice. So here we are again, completing another first ever documentation for the Volvo community. Our aim in this guide is to keep P1s and other chassis’ using the Volvo T5 engine OUT OF JUNKYARDS!!! But more specifically, show anyone with these engines that clicking, clanking, knock knock who’s there’ing and more, that those sounds are not the end of your engine or your car. As always, step by step, bolt by bolt will be documented and EVERYTHING you will need to know to knock out your own Volvo T5 engine rebuild will be covered. The quick link table of contents below outlines the complete article, but also provides a solid overview as to what to expect as this article evolves. We will be updating as we go, so new content, charts, videos and more will be coming up as we go. As of now, we’ve already started, ran into issues, had a natural disaster crush our car and more… but we put our heads down, spin those wrenches and push this rebuild to completion.
Special thanks to all our sponsors, who you will see referenced throughout the article, the videos and more. We were able to source more than 95% of the parts for this Volvo T5 engine rebuild from Volvo community companies.
IPD: Factory parts for the rebuild
Elevate Cars: Performance parts for the rebuild
Special thanks to Greg, a regular importsauce.com donor, who would remind you to pay it forward if you can. Shoot him a follow on IG @therealstegtva
This Volvo T5 Engine Rebuild At a Glance – Table of Contents
- Overview: Why are we doing it? – Video Above
- The Costs to Rebuild Your Volvo T5 Engine: Full stock build vs race spec build.
- Parts Overview: A complete list with part numbers and links for a stock or race spec Volvo T5 engine rebuild.
- Completing the Job: Step by step
- Removing bolt-ons: Bolt-on parts, wire harnesses and more
- Draining fluids
- Removing tires and axels
- Disconnecting angle gear (AWD only)
- Plucking the Engine Out
- T5 Engine Dismantling: Break it down to main components
- T5 Engine Component Dismantling: Down to nuts and bolts
- Dismantling the head
- Dismantling the block
- Removing All other components
- The Machine Shop: Get the core of the T5 engine ready for rebuild
- Not Required: But why not dress it up: Engine Bay Overhaul, Wire Looming, Painting Block, Head and Cam Gears.
- Rebuilding The Engine: Build it up
- Rotating Assembly
- Oil Pan
- The Head
- Put them all together
- external bolt-ons
- timing belt
- Dropping the T5 Engine Back in
- Reconnect angle gear to tranny
- Install axles and mount wheels
- Reconnect all bolt-ons, wire harnesses and accessories
- Fill all fluids: oil, tranny fluid, coolant
- Charge battery
- Firing It Up: Cross your fingers, here goes everything!!!
END TABLE OF CONTENTS
The Costs to Rebuild/Replace Your Volvo T5 Engine
Many people would say that the cost to rebuild these engines is not worth the value of the car, and that may be true in many instances, but for many, and when compared to alternatives, it is still the cheapest route to keeping yourself in a running euro. Here are some general numbers with explanations as to the situation you may be in for a quick comparison.
For reference, and in most cases, you will want to compare the cost of the rebuild to the cost of replacement. Sure the rebuild may be more than the value of the car, likely only if your car is in bad shape for resell only. In most cases the rebuild wont bring any new value to the car, but it will keep it running and keep you in your respective KBB category for resell.
When looking at replacement, you have to see what the same car in running condition would cost to source, and it is probably more than rebuilding your current engine. If you have no car payment, and don’t want a car payment, and don’t have cash for a new daily then rebuild may also be the best route. Here was first will look at some alternative options in simply sourcing a used donor engine and doing a direct swap without cracking open the head or block.
Purchase a used donor engine (Free to $11,000.00) Five options here, and the work and cost would vary on your choice. This wouldn’t really be a rebuild, but simply sourcing the entire running engine assembly, pluck and replace.
Option 1: $11,000.00 Buy the replacement engine directly from Volvo… Don’t do this, but I am guessing if you are reading this write-up you wouldn’t do it. Zero miles is nice, but below we detail that you can get a fully race spec performance T5 engine build for less than what Volvo charges for their crate T5. Check it out here, currently $10,744.55!!! Keep in mind this is not the labor, you would still have to pay the dealer to install or install yourself.

Option 2: $4,500.00 Have a shop source the engine and drop it in your car for you. Easy as dropping your car off, and picking it up a week or two later. This will be a used engine from a totaled vehicle with low mileage (180 or lower), that’s not low at all. The shops will handle all the work in sourcing the engine, and labor to swap. The cost breakdown is about half parts and half labor. This gets really close to it may not be worth it to spend the money. At least for me, I would not spend that money on an engine with that many miles and then pay someone to simply swap it out for me. This options is more than rebuilding in almost any instance.
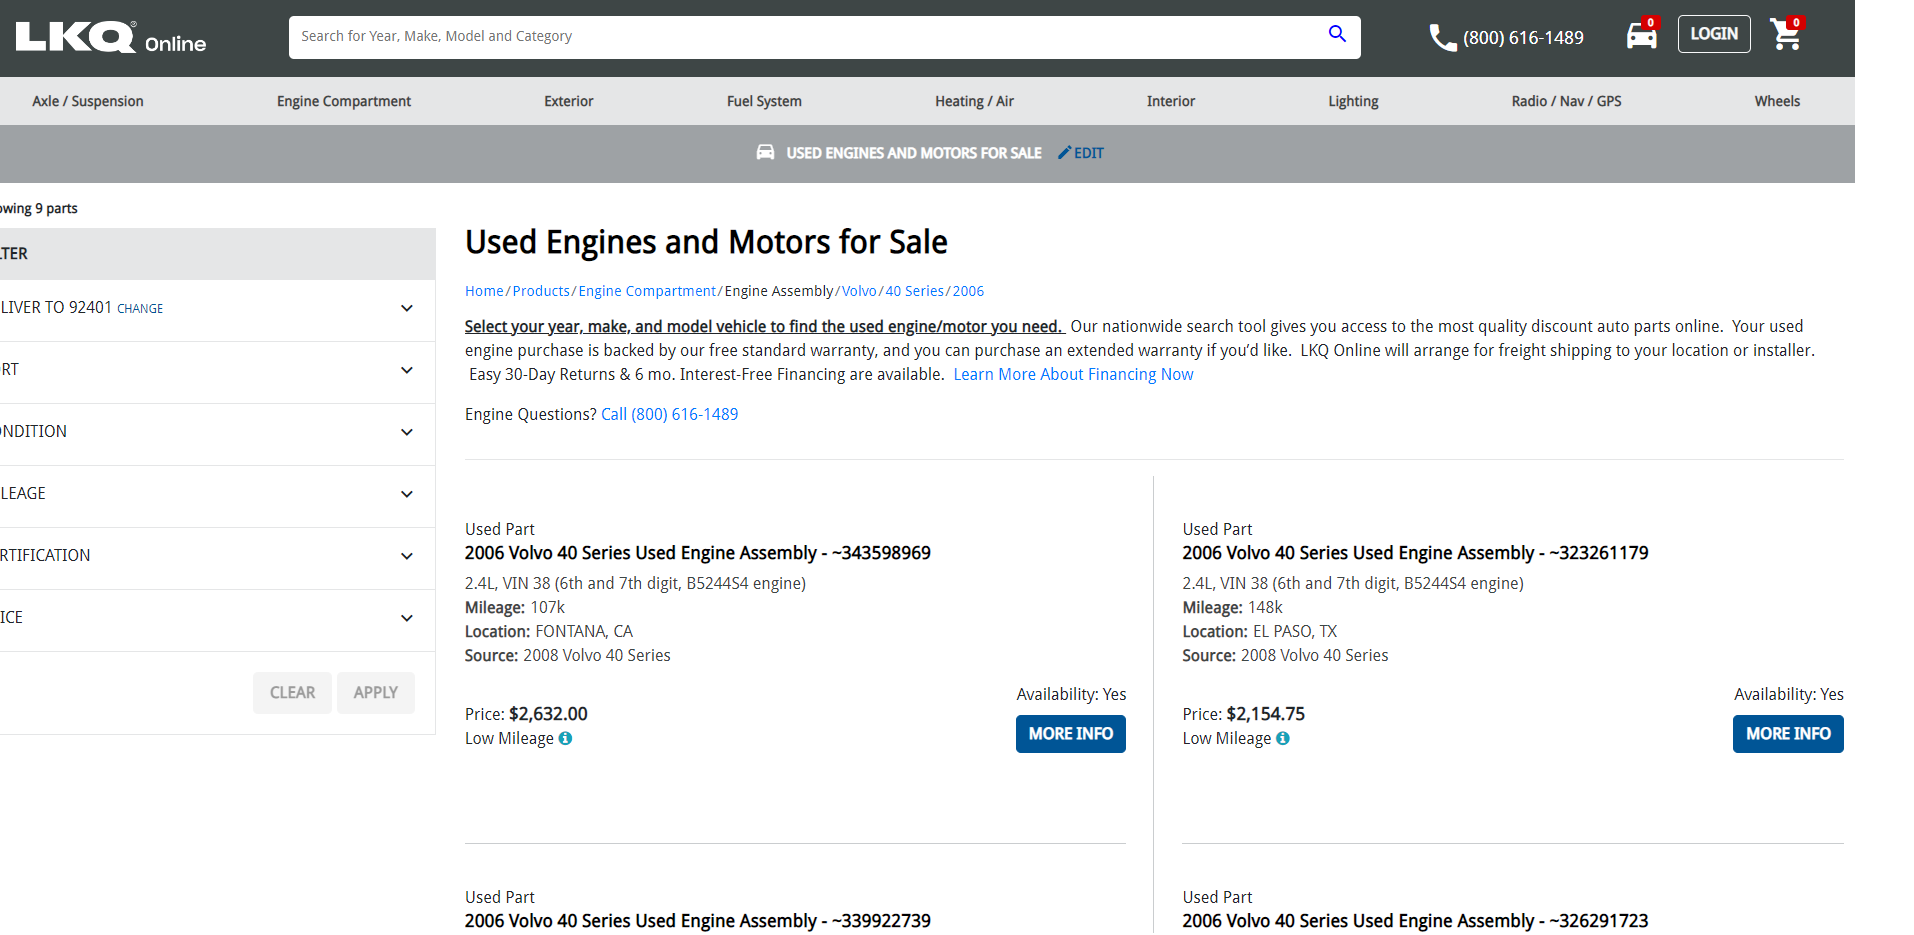
Option 3: $2,500.00 Purchase the used engine assembly and swap it yourself. In this instance, you would source the engine and you would do all the labor, in doing so save yourself about $2,000.00. These engines are not new, they likely have 110k+ miles, but have some guarantee to work. The cheapest and most expansive selection still lies with LKQ Online, you can see the current options available here. You would have to be comfortable working the engine out and dropping the new one in, which would be less work than the rebuild, but still involve dropping the tranny and some other major things.
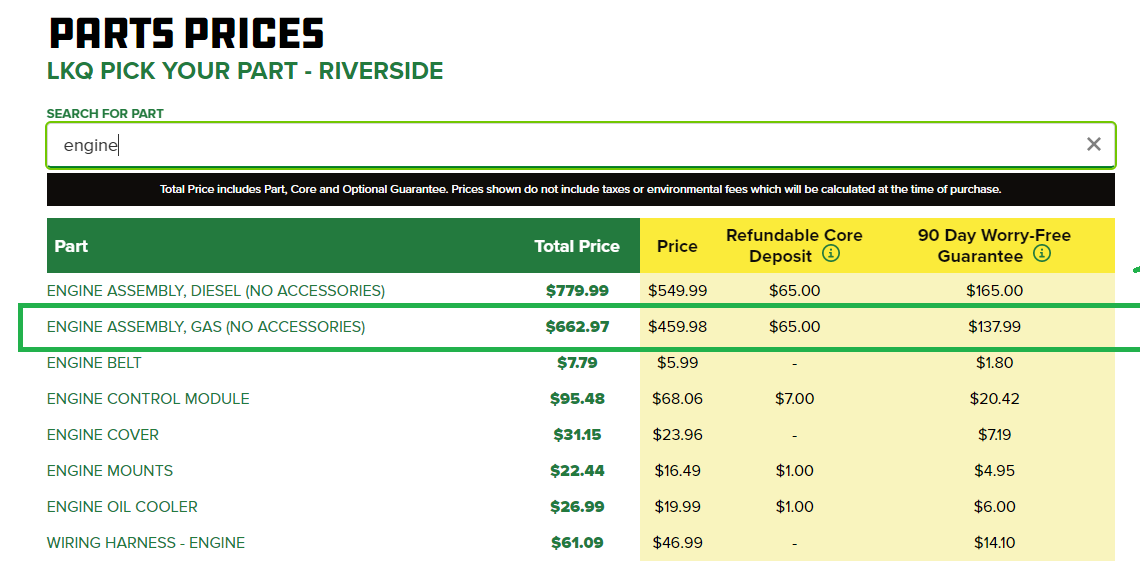
Option 4: $1,000.00 Pick your own donor engine at the local junkyard. Cost currently is about $800 for a complete engine with a 90 day warranty from LKQ yards. This is the cheapest sourcing option, but the most work. You would go to the yard yourself, pull the engine, take it home, pull your engine, then replace your engine bay with the new donor engine. For this option, which we considered when the engine was still working, but on its way out, you want to look for a newer model year car, with a rear-end total. New model year would give the best chance for lower miles, and rear-end total gives the best chance that the engine was running when the car came into the junkyard. While you do get a 90 day warranty to return the engine if it does not work, you would have to pull the donor engine back out, take it back to the yard, and swap for another, and if another not available, then you can have a refund.
Option 5: Free… after self financing. This option is great if you have the time and space. Essentially you would buy a completed totaled car with a running engine, to do the direct swap, and then completely part the donor car out later breaking even, minus your time. On our M66 swap we were able to get close to even after taking the parts we needed from the donor, and then listing every single part off the car on eBay. Took a year for all of it to sell, but we essentially got the donor car for free. A great place to look online would be Copart.
Now we can look at the different price options and paths to take for a rebuild, that would involve opening up the head and block. Each option has a price range, as in each situation, you would have to determine exactly the extend of how far you want to go. In some cases, you can get away with reusing certain parts, but can also opt for new. Each T5 engine rebuilt will be different depending on what damage you find when you open it up.
Partial Rebuild of the T5 ($500-$1,500.00) This would be for those who want to be as budget friendly as possible. This could be well under $1,000.00. This would simply be to pull the engine and disassemble and replace ONLY the parts that need it. Essentially get the machining done on the head and block and crank, and then replace a single set of bearings, or a single piston or rod… or whatever the reason for the engine not running. This would get you back on the road for cheap, but our main thoughts here are if one set of something broke, the other 4 are close behind, you you may be playing this game again. Also, since you have to go in a rebuild the entire thing anyways, why not use all new parts for your rotating assembly?
Full Stock Rebuild of the T5 ($1,000.00-2,000.00)This would be replacing most all the components inside the block, minus good rods and pistons. Most issues in the block would be bearing related, so here you can order all new bearings, and possibly a replace a single bad rod or piston. Balance everything and slap it back together, and note that the heads are usually pretty strong on these engines, so if nothing is broke up there, you leave as is. Assuming you have only top end damage, then replacing a single or multiple valves and or retainers would also be cheap and less intensive. Again, while you are in there some may opt to swap everything out and know that when you seal the engine back up, it is all new in there, and you wont be coming back anytime soon.
Complete Zero Mile T5 Engine Rebuild ($2,200.00-$3,200.00) This was our first choice for our project. This would be replacing everything inside the block and head AND everything that bolts to the exterior of the engine. While many of our external bolt-ons like the PCV system, pulleys, belts have less than 10k miles, we figured it would be nice for the extra $1,000.00ish to essentially have an engine that is 100% zero mile… everything is brand new. We ultimately decided to go even further, since we love our car, and why not. For us, you cannot find a car that would be as fun, as fast, as rare for $6,000.00 or less, which is what we are spending on our rebuild, and here is why……
Complete Zero Mile Full Performance T5 Engine Rebuild ($4,500.00-$10,000.00) Now this is where we landed. It’s too late, you can’t stop us, we already bought all the parts. This is taking the above concept of the above zero mileage engine rebuild, but adding in the obvious engine upgrades to take the T5 to the next level. A quick list includes forged rods and pistons, open deck cylinder sleeves from Elevate, upgrading oil feed lines, adding external oil cooler, AND everything inside the block and external will be brand new. When it is down the block would be rated for 1,000hp (not that a T5 would ever make that), and we will have an engine that has zero miles. ZERO MILES!!!! Brand new engine and built for performance. Compared to the buying the engine from Volvo above, it’s still about the same or could be cheaper going this route. There are a few things we did not add into this build, so ours will not be around the $10K mark. We did not do the T5 K16 Turbo Upgrade at this time, in the future for sure. We are also not doing a full upgrade of the internals on the heads. After talking to many other T5 builders, the internals on the heads are strong and have been proven to handle 600+hp in their stock form, so we will inspect and replace as needed. Going back into the head is a days work, so we saved a $1,000.00 here.
Parts Overview
Lets walk through the parts needed to rebuild this T5 engine. As mentioned above, depending on what your rebuild goal is, some or others of these parts would apply to you. I would guess if 10 people did a T5 engine rebuild at the same time, their online shopping cart would look very different. As always, we try to compile a complete list of every variation of parts needed so you all have them at your fingertips. The Microsoft excel spreadsheet here is as complete as we can get it, sure there could be more, but it covers about 95%+ of a rebuild. The sheet contains the following for each part noted (about 100 individual parts): part numbers with links to Volvo Online Webstore, price to use Volvo parts, price for aftermarket parts, price and links to performance part options, and a link and column for the best value we found for each part option. You can see and download the sheet here, or by clicking the image below. Also, below you will find the quick list of parts and the part numbers that go with them.

Here is a live linkable list of the major components to consider when shopping for your T5 rebuild. For space and formatting we have included the part name, and the Volvo part number (which links to the Volvo webstore). The sheet above however, will have additional columns when performance parts are available, as well as the link the to cheapest after market version of the part, which can easily save you $1,000+ over Volvo original for this size of build. Also, bearings for the piston rods and crankshaft are handled in their own section further in the article, since there are some many variables and very detailed explanations are needed to address this very important portion of the build.
| Category | Part Number | Best Deal |
| Block Assembly Internal | ||
| Crankshaft | 31293424 ~ | $830.00 |
| Piston – Single | 30731511 | 160-213 |
| Connecting Rods – Single | 31355860 ~ | $172.00 |
| Connecting Rods Screw- Single | 9497858 | $3.00 |
| Flexplate/flywheel Bolts – 10 needed | 9454743~ | $4.00 |
| Block Assembly External | ||
| crackshaft seal rear | 9458178 | $9.00 |
| crank seal front | 6842273 | $8.00 |
| Main Stud Kit | contains 5 bolt variations | 2-10 each |
| or | ||
| Performance Main Stud Kit | $313.00 | |
| Plastic Timing Covers | ||
| Rear | 30650687 | |
| Lower front | 30750852 | $28.00 |
| lower belt protector engine 3883574- | 30757554 | $8.00 |
| or – engine 3883573 | 8692804 | $8.00 |
| harmonic Balancer – oscillation damper | 30731045 | $148.00 |
| Special Block | ||
| Main Bearings Upper without flange | see bearings tab | |
| Main bearings lower without flange | see bearings tab | |
| Main Bearings Upper with flange | see bearings tab | |
| Main bearings lower with flange | see bearings tab | |
| connecting rod bearings | see bearings tab | |
| Oil Pan & Related | ||
| Oil Pump | 30650144 | $315.00 |
| Gasket Kit | 274260 | $34.00 |
| oil sump gaskets kit | 30750783 | $13.00 |
| Cylinder Head External | ||
| Head gasket kit complete | contains 10 individuals | $250.00 |
| Cylinder Head Bolts | contains 4 parts | $44,965.00 |
| or | ||
| Performance head bolts | 257 | |
| Spark Plugs | 30751806 | $54.00 |
| Coil Packs | 30713417 | $49.00 |
| Exhaust Studs (12 needed) | 982667 | $2.00 |
| Exhaust Nuts (12 needed) | 985868 | $1.00 |
| Exhaust stud washer – 12 needed | 419401 | $3.00 |
| Cylinder Head Internal | ||
| Exhuast Valve 10 needed | 9454610~ | $36.00 |
| Intake Valve 10 needed | 31251518~ | $25.00 |
| Valve Spring Retainers 20 needed | 3531102 | $4.00 |
| Valve Stem oil seal exhuast 10 needed | 31316151 | $9.00 |
| Valve Stem oil seal intake 10 needed | 9443787 | $9.00 |
| Valve Spring 20 needed | 31359507 | $8.00 |
| or | ||
| Valve Springs | ||
| valve seals | $45.00 | |
| keepers | $150.00 | |
| and more here…. | ||
| External Accessories | ||
| Drive Belt kit – 4 elements below | $144.00 | |
| Alternator Serpentine Belt Tensioner | 31251653 | $61.00 |
| Air Conditioning Serpentine Belt Tensioner | 31251654 | $53.00 |
| Alternator Serpentine Drive Belt | 30777531 | $12.00 |
| Air Conditioning Serpentine Drive Belt | 30777530 | $18.00 |
| Oil Cooler – engine serial number 4219447 and higher | 31201909 | $88.00 |
| oil cooler engine serial number up to and including 3889713 | 30637966 | $73.00 |
| oil cooler seal – need 2 | 30637339 | $4.00 |
| coolant hard pipe stuff | ||
| oil cooler hard pipe to block oring | 8670174 | $5.00 |
| pipe to water pump o ring | 31109233 | $2.00 |
| Timing Belt & Water Pump Kit – 2 elements below | $192.00 | |
| Water Pump Kit | 30751700 | |
| Timing Belt Kit | 30731727 | |
| Thermostat Housing | 31319606 | $39.00 |
| Thermostat | 31319608 | $15.00 |
| PCV Breather Kit Builder | contains 10 components | 236-500 |
| oil temp sensor | 30750926 | $36.00 |
| Fluids | ||
| oil change kit | $57.00 | |
| coolant | $60.00 | |
| Tranny fluid | $50.00 | |
| gasket liquid | $35.00 | |
| while you have tranny off | ||
| throwout bearing/slave | 31259889 | $145.00 |
| Vent Pipe | 30787651 | $44.00 |
| Auto Tranny Flexplate | 31325343~ | $311.00 |
| Clutch Flywheel Stock Dual-mass | 31325792 | $871.00 |
| Clutch Flywheel Performance Single-mass S60R | 30783258 | 475-540 |
| Clutch Pressure Plate bolts – 6 needed | 986321 | $3.00 |
| clutch alignment tool | $5.00 | |
| Other Performance Upgrades | ||
| Oil Feed Line | N/A | $77.00 |
| sleeves | N/A | $900.00 |
| K16 turbo | N/A | $5,000.00 |
| external oil cooler | N/A | $900.00 |
| Random | ||
| Axle Bolts | 30670602 | $5.00 |
| hilton forged build tune add on | $300.00 | |
| Fuel injector o ring kit | 30731083 | varies |
| crank shaft position sensor | 31331765 | $26.00 |
| variable timing solenoid | 31216221 | |
| 8653344 pcv hose elbow |
As you can see, we included many things you may opt not to replace, but since we had the whole thing out, and we had some extra cash, we chose to replace many other parts in this process. Here is a complete parts overview, walkthrough of the spreadsheet, AND a full walk through of all the parts we ordered:
The Plan of Attack To Get The T5 Engine Taken Apart and Removed & Disassembled
We decided to complete this task in 3 major sections as follows:
- Remove all bolt ons from the engine
- Pull the engine out of the car
- Disassemble the engine
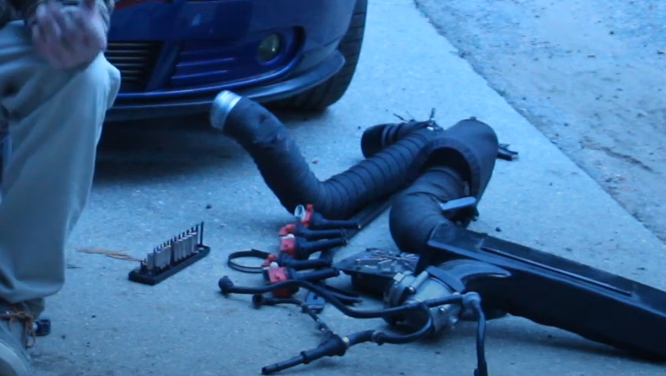
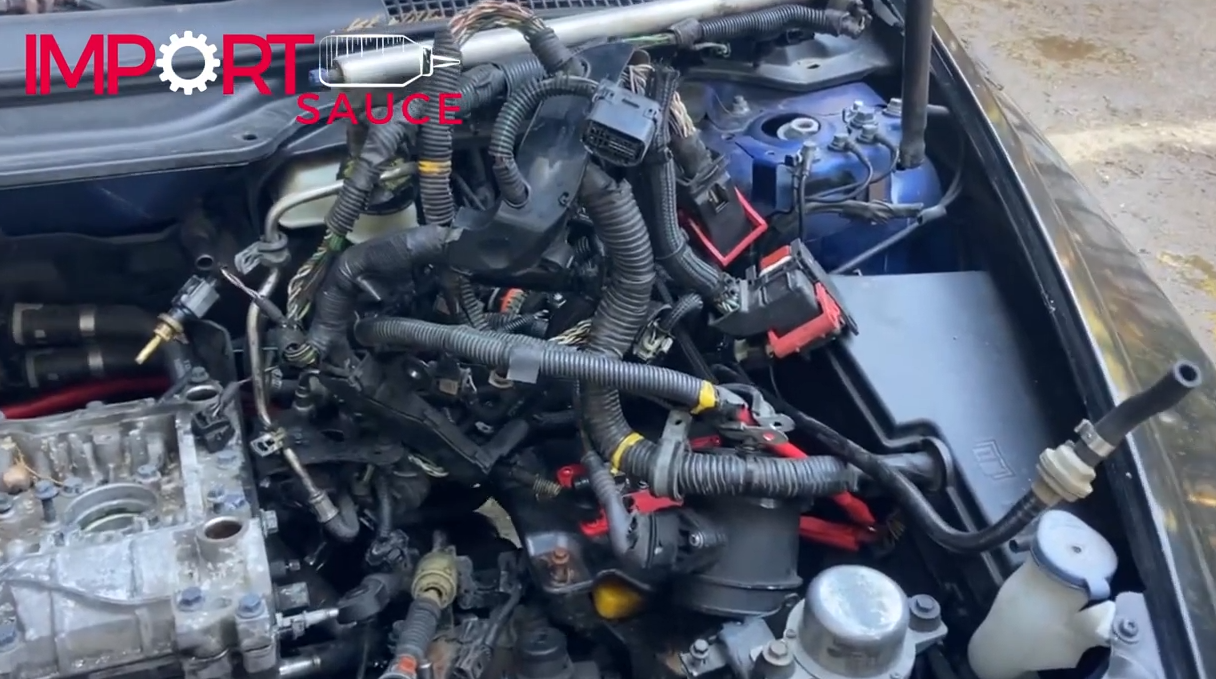
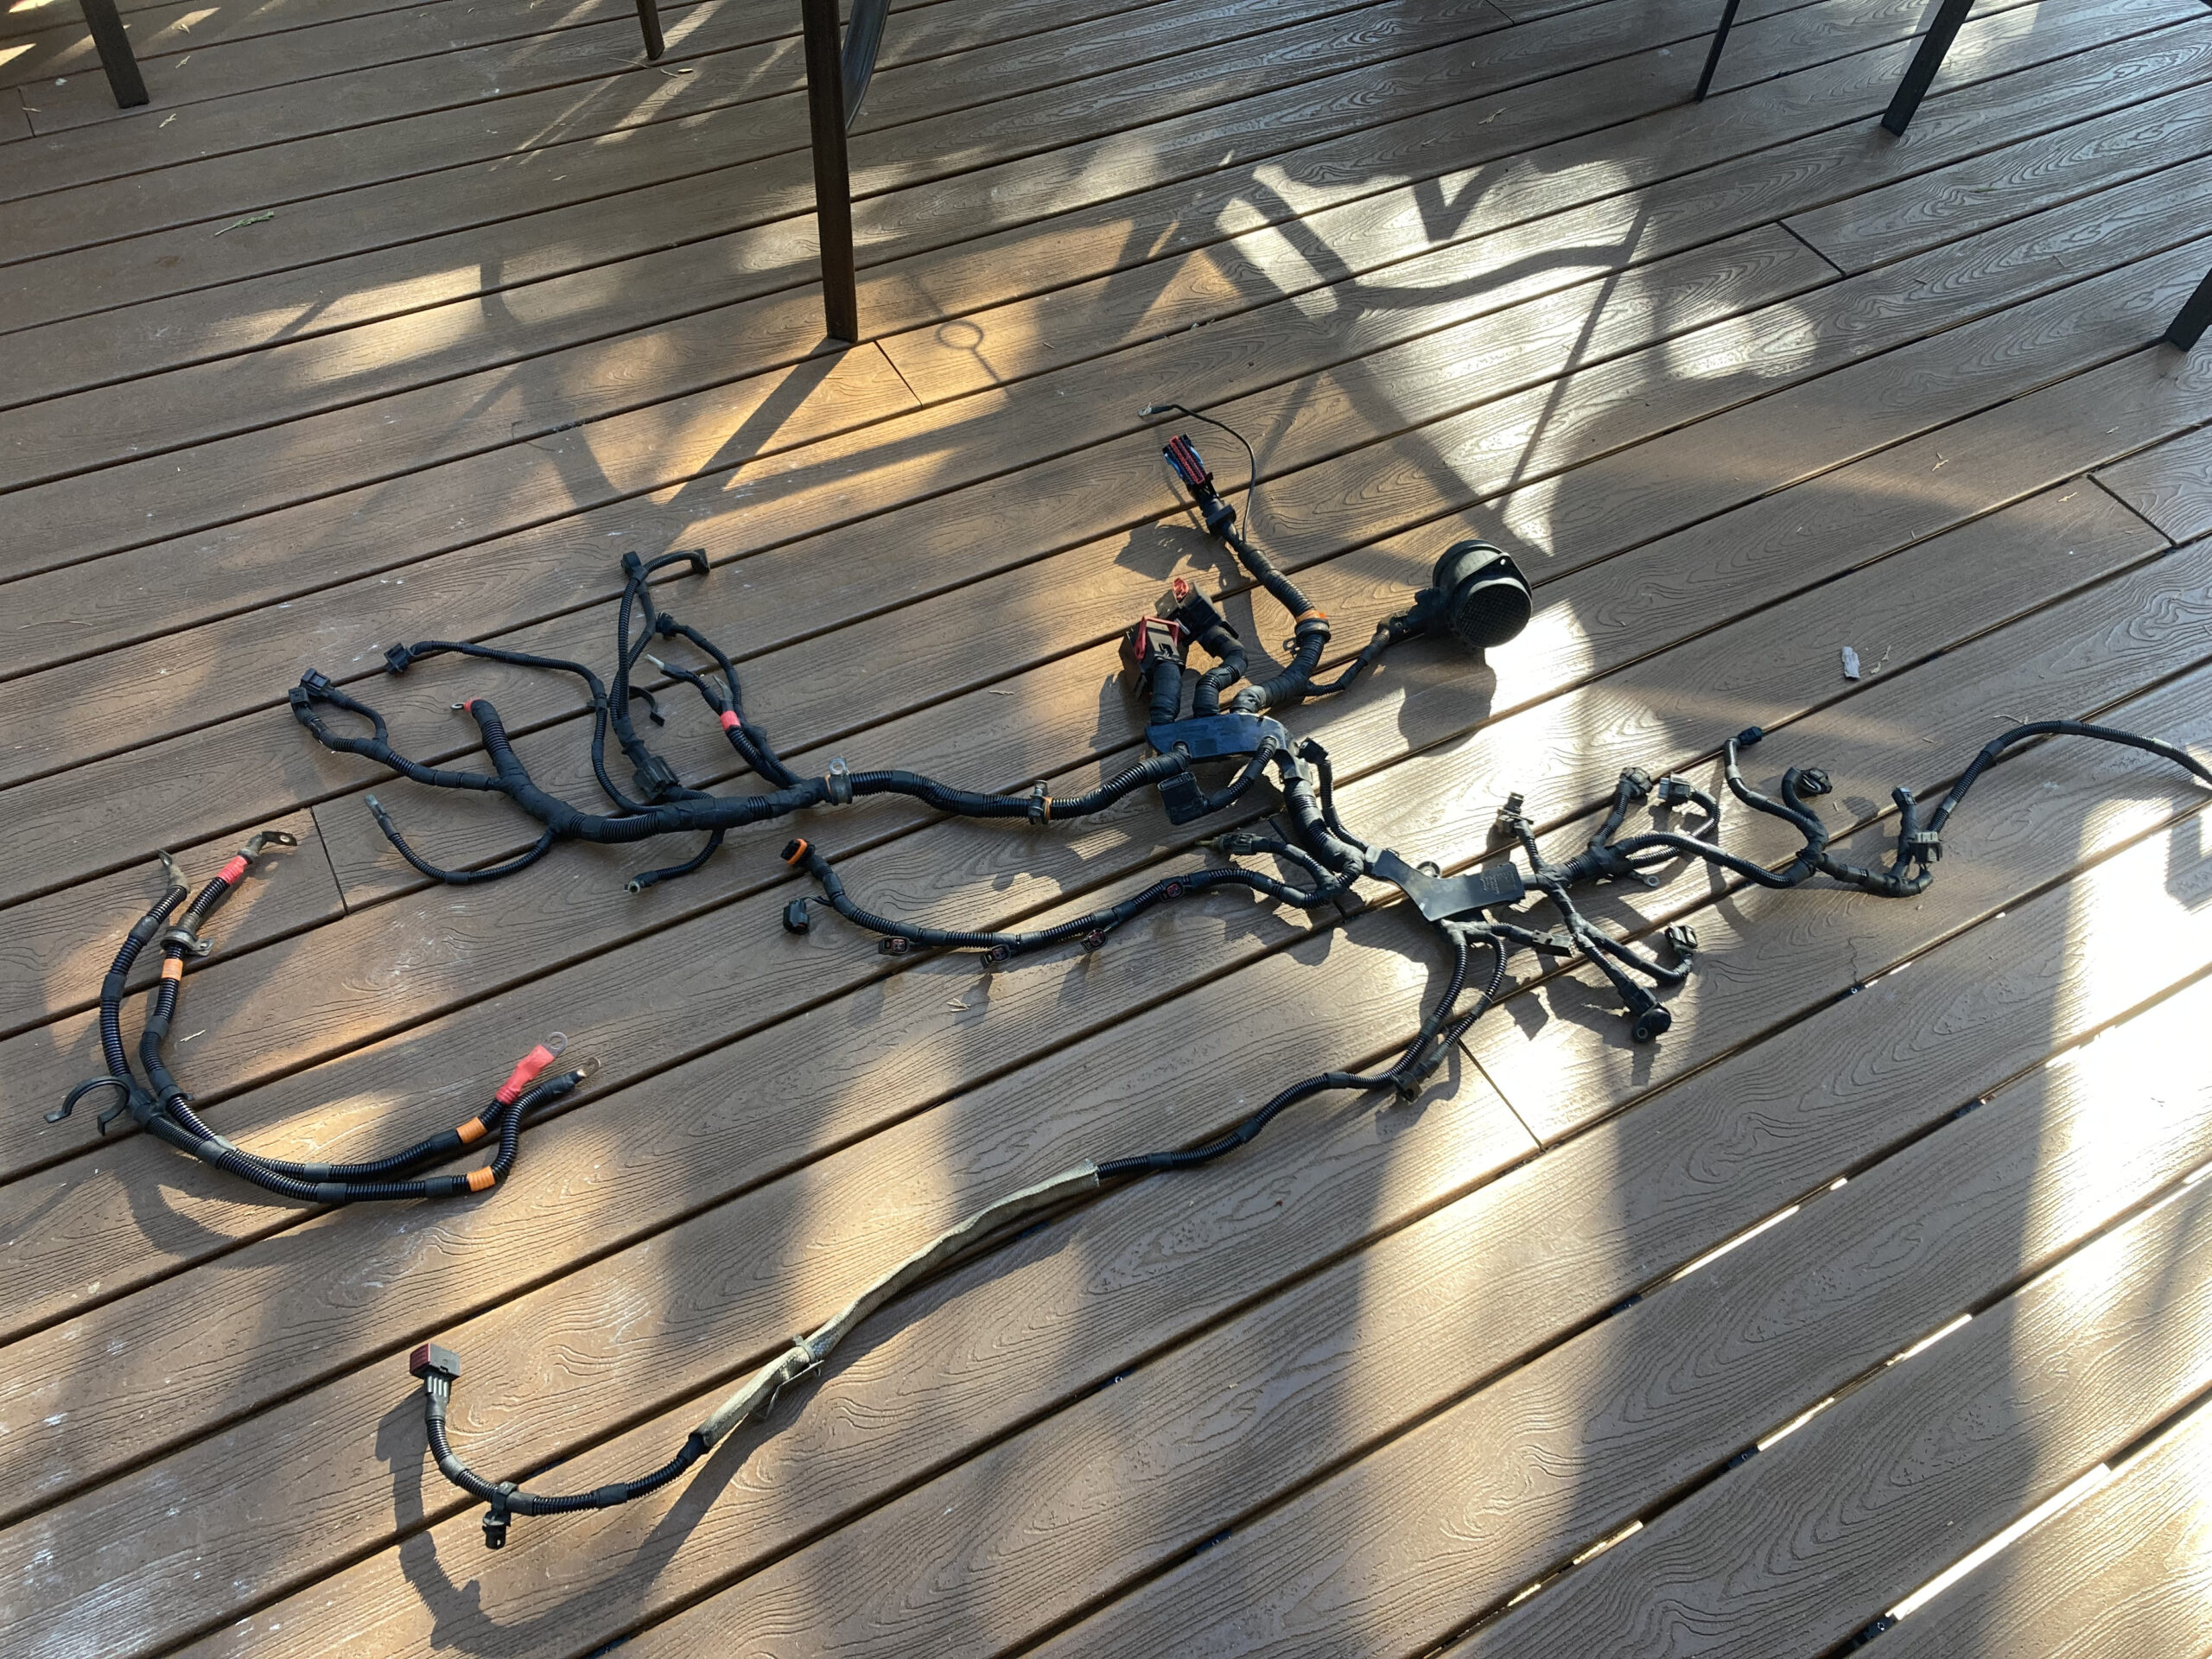
Removing all bolt-ons: Here we took all the external bolt-ons off the car, this includes the air intake pipe, the battery, the elevate upper intake manifold, the elevate turbo pipe, the coil packs, the ecu, the throttle body. We then pulled the wire harness than ran to the top of the head, as well as the fuel rail that mounts on the lower inlet manifold. These were all quick small bolts to pull off, and then bag and tag.
Next we removed the entire wire harness from the engine block and moved that aside. We then pulled the exhaust manifold bolts and studs off the rear of the engine, then drained the oil, coolant and tranny fluid. We also then removed the coolant reservoir and the transmission shift cables.

Then we had to remove the tires, and the wheel well liner to get access to remove the axles. In order to remove the axles we had to remove the strut assembly from the hub assembly. This gave us enough room to pull the axles from the transmission. Note that on the passenger side we removed the carrier bearing bracket to fully release the axle.
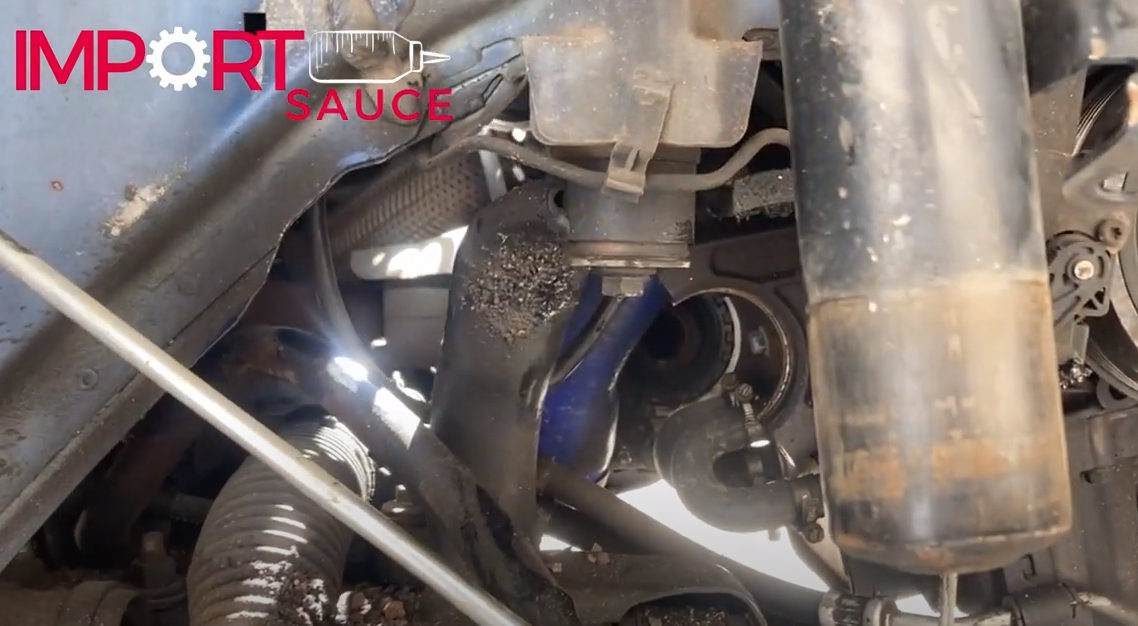
The two other accessories mounted to the block to come off before the engine came out was the power steering lines which have a total of four bolts by way of two brackets and then the AC compressor, which we dropped by removing the three bolts holding it to the block.
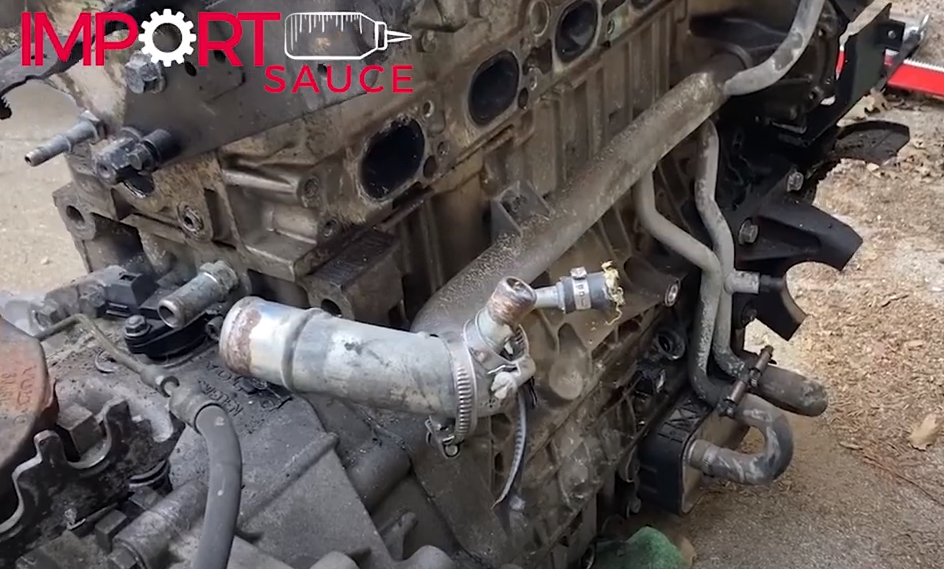
Next we moved to the turbo, where we had to pull the hard oil line, which was two bolts, one on the turbo and the other at the other end on the block. There were also two coolant lines, in which cv boot clamp style clamps were used, so we cut the rubber, and will replace with new hoses and standard hose clamps. One thing to note, we did not see, is a hard coolant line that runs from the turbo down tot he block, which is hard to see or access from above. We only notice when we pushed the turbo off the block and it popped out, so we will likely mount the turbo on the block before dropping the engine back in.
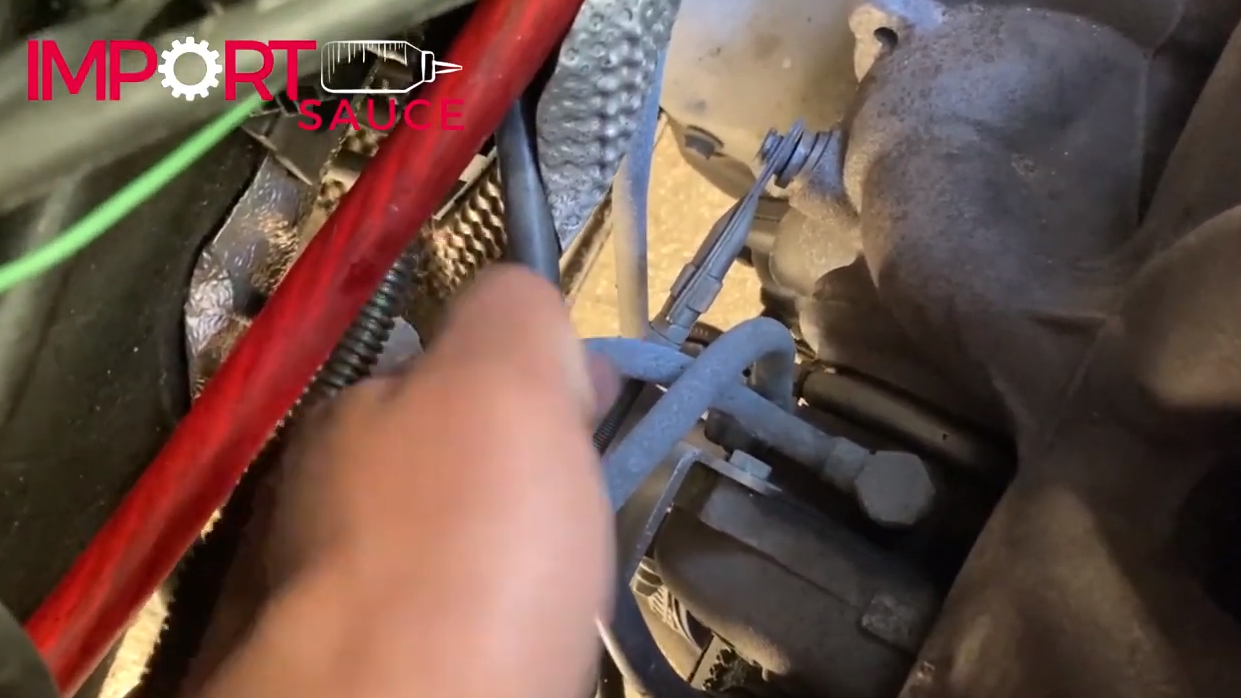
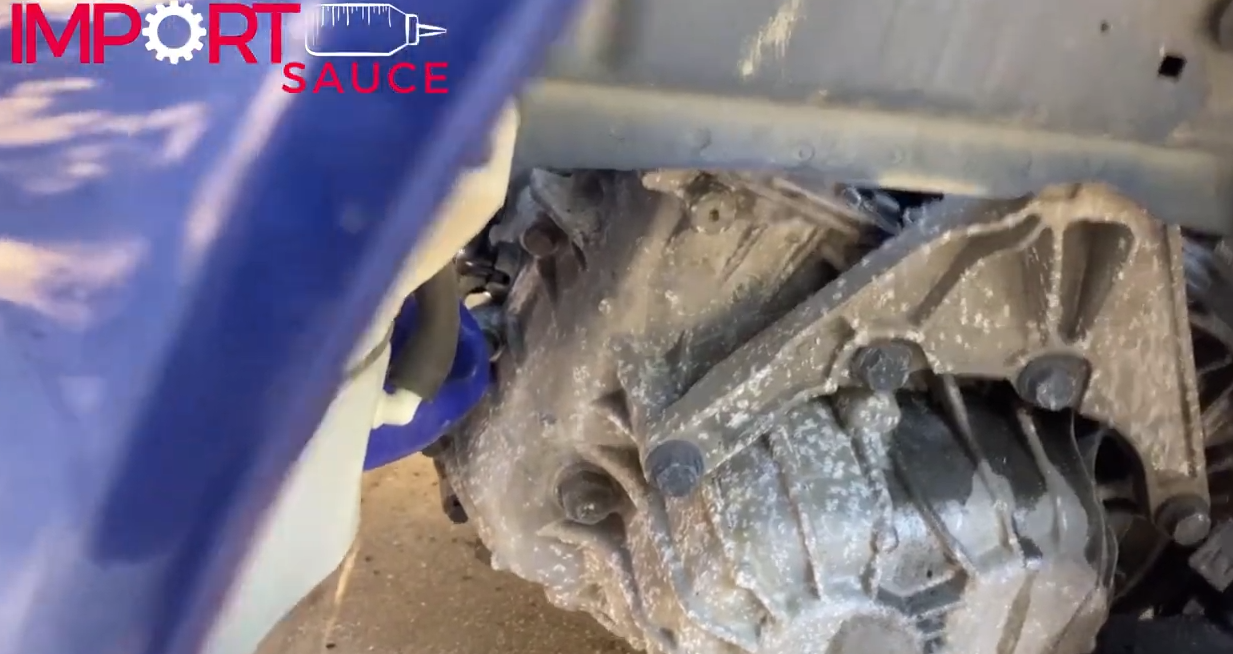
Removing the angle gear (AWD only): First we had to remove the lower transmission mount to get full clearance. This was 4 bolts which were 13mm and 15mm. Now we saw the 5 13mm bolts holding the angle gear to the trans. 4 of them were easy to pull, but the 5th was wedged close to the angle gear heat shield. We had to remove the 3 10mm bolts to move the heat shield away and grab that last angle gear bolt. Lastly, there is a bracket on the other side of the angle gear which holds the angle gear to the block. This was 2 10mm to the angle gear and 2 13mms on the block. Pry bar and the angle gear is off.
Pulling The Engine: Here we removed the battery plate on the driver side to access the single bolt holding that side to the chassis. On the passenger side we removed the top cover of the engine mount, and then loosened the 2 bolts holding the mount to the block.
After lifting the engine and trans a bit, we determined the trans side bracket would not clear, and then we had to remove the 5 bolts holding that to the tranny.
From there we were clean and clear to continue lifting.

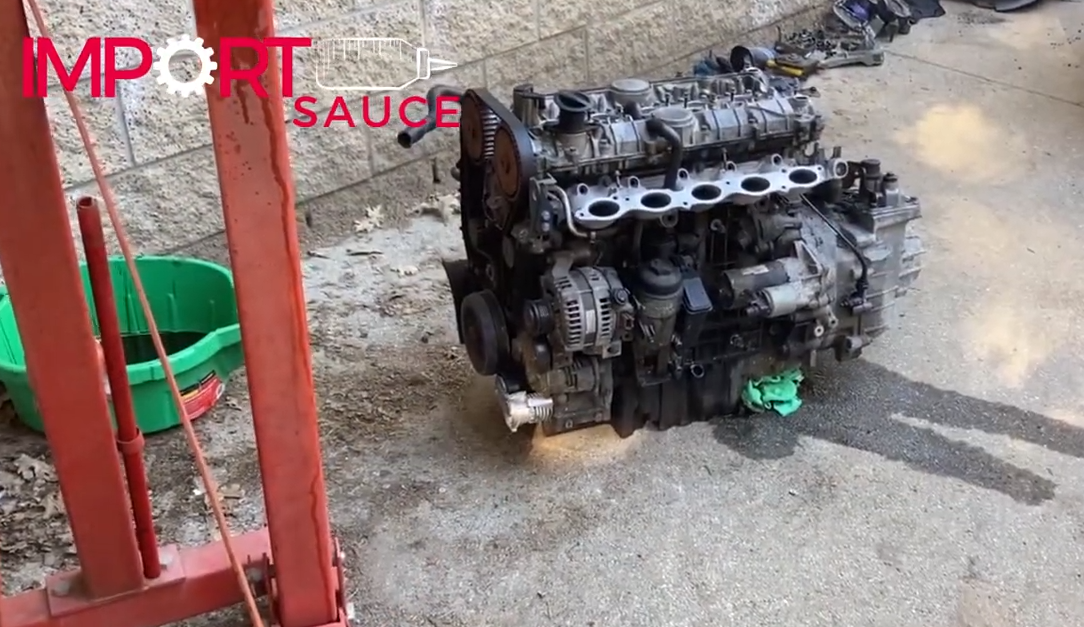
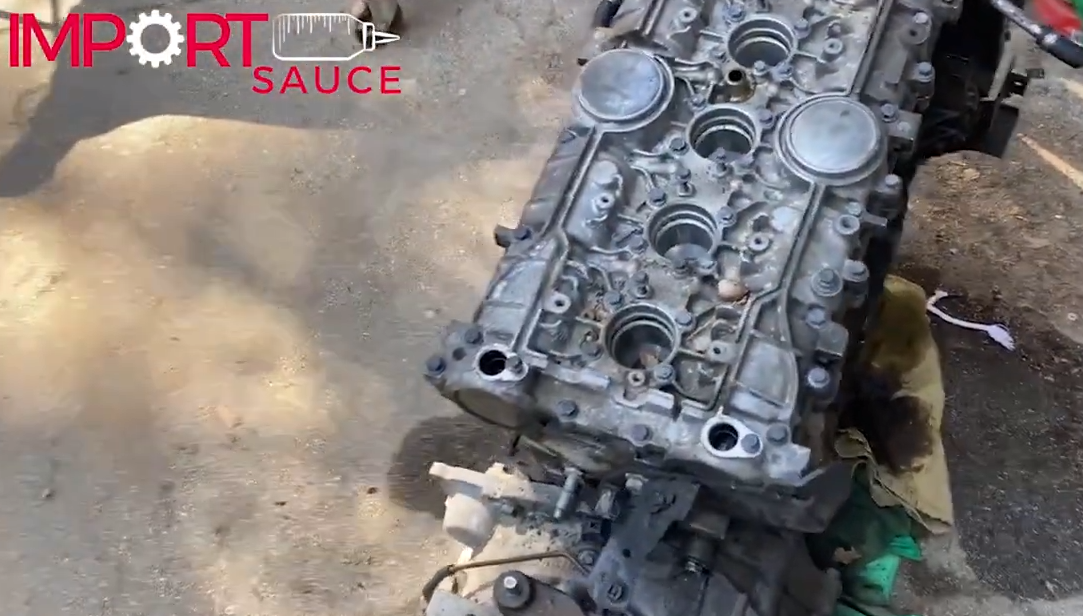
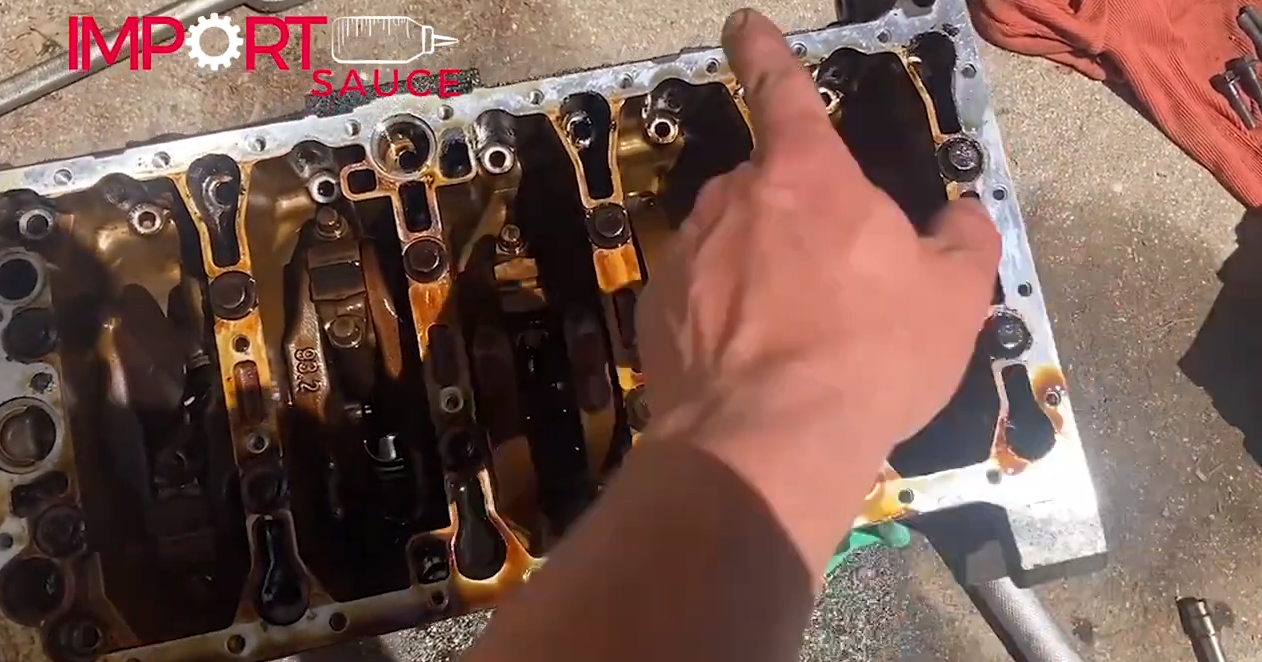
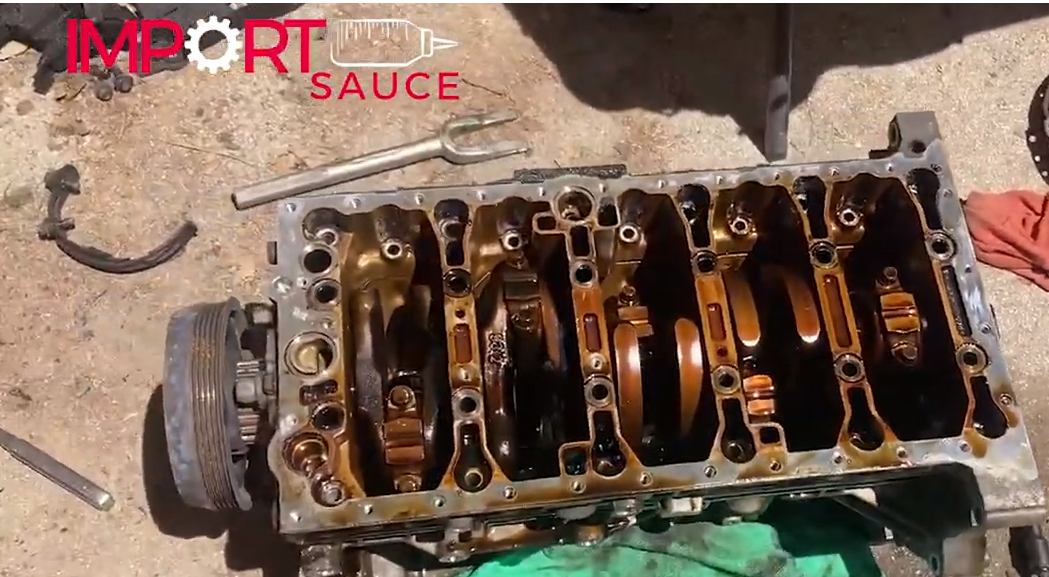
T5 Engine Dismantling – Engine is out, striping it apart
T5 Engine Primary Component Dismantling
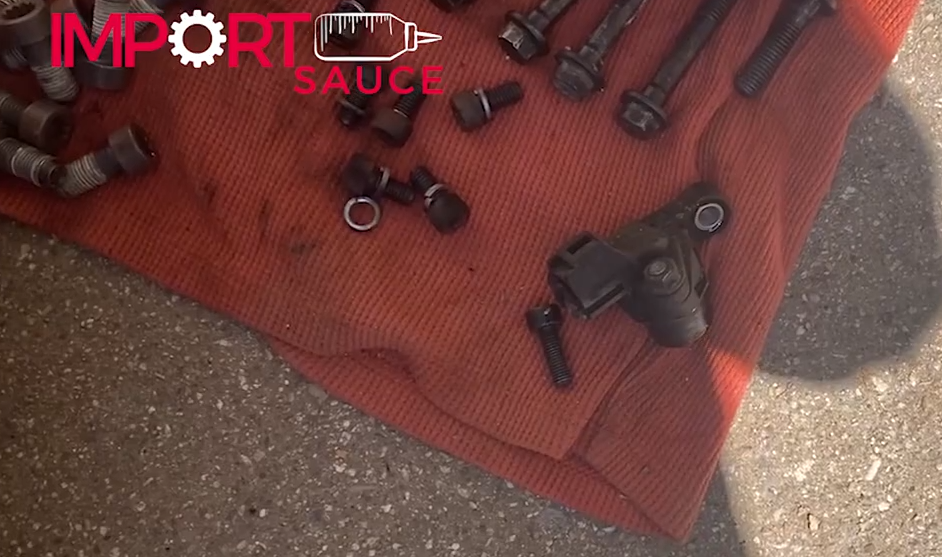
This all in only took about 4 hours start to finish, we did however complete it over a few day period. Below is a quick list of what we took off in the order, with any special notes we ran into worth mentioning, but for the most part, it was just removing bolts as follows:
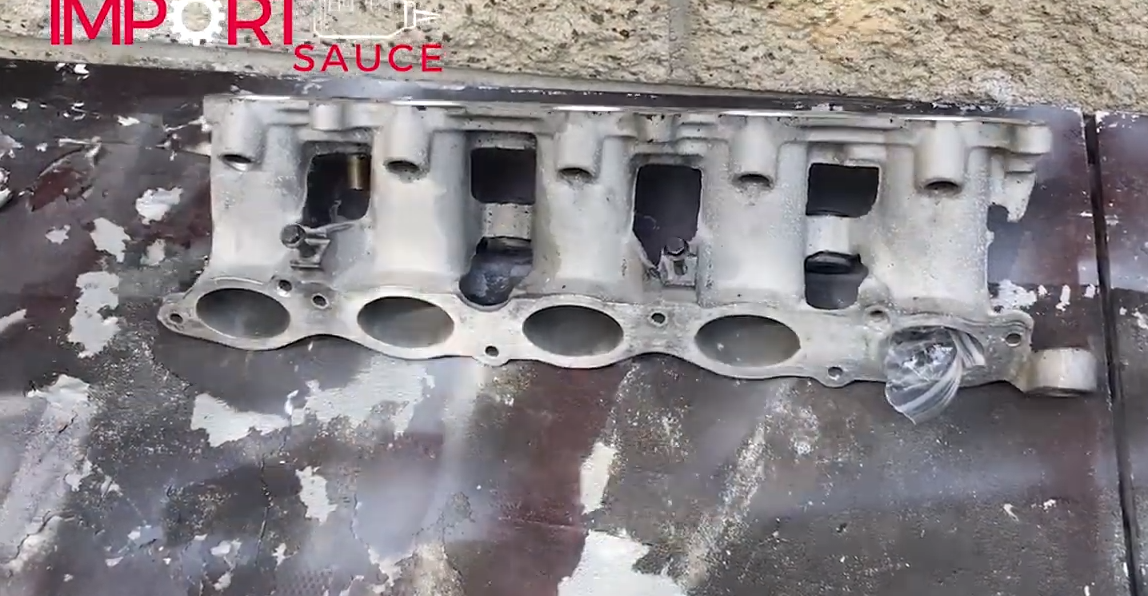
Lower inlet manifold: 6 10mm bolts, three on the top, three on the bottom, return vent breather hoses just pull off. Special tool: swivel attachment for ratchet.
PVC System: 4 10mm bolts. Be mindful of the 2 rubber gaskets/O-ring. Make sure you get them off and keep them close to match with the new ones going back on.
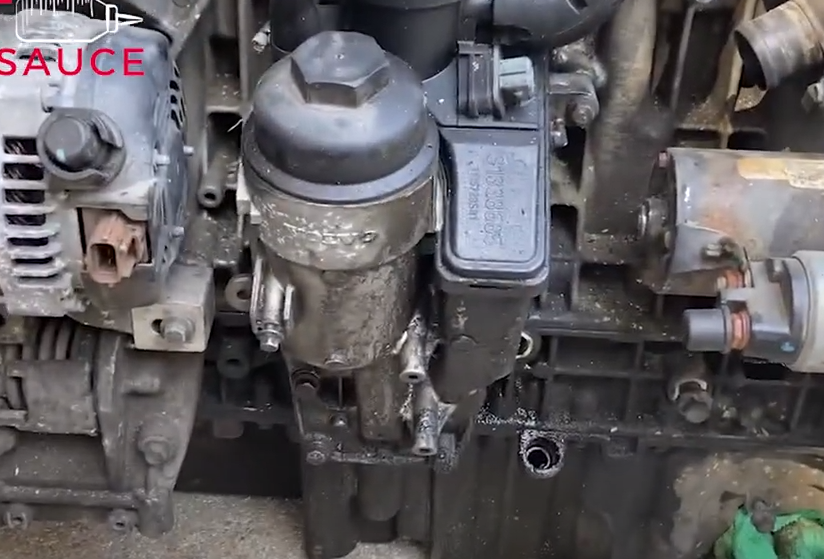
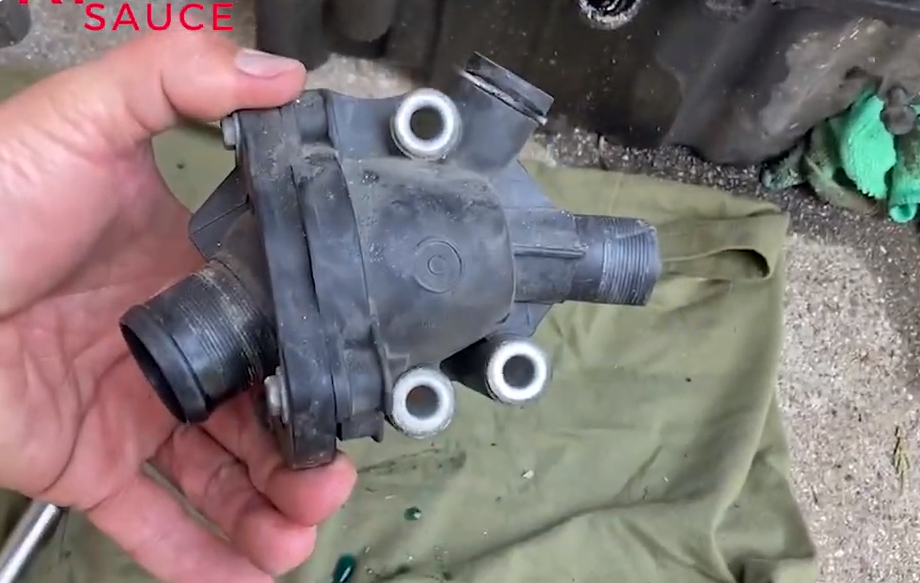
Thermostat Housing: 3 10mm bolts. Remove the rubber gasket and keep it with the thermostat.
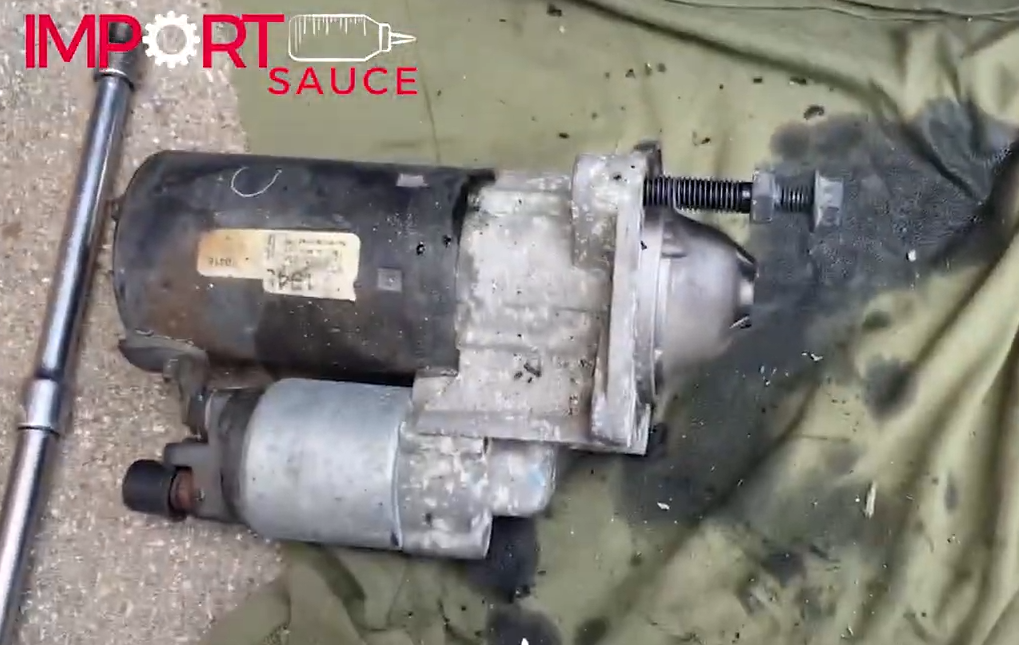
Starter: 2 13mms with 2 more 13mms on top of them which are used to retain a bracket. After removing, put the bolts back on the starter. Here we removed the clutch line to get a deep socket onto the top starter bolts.
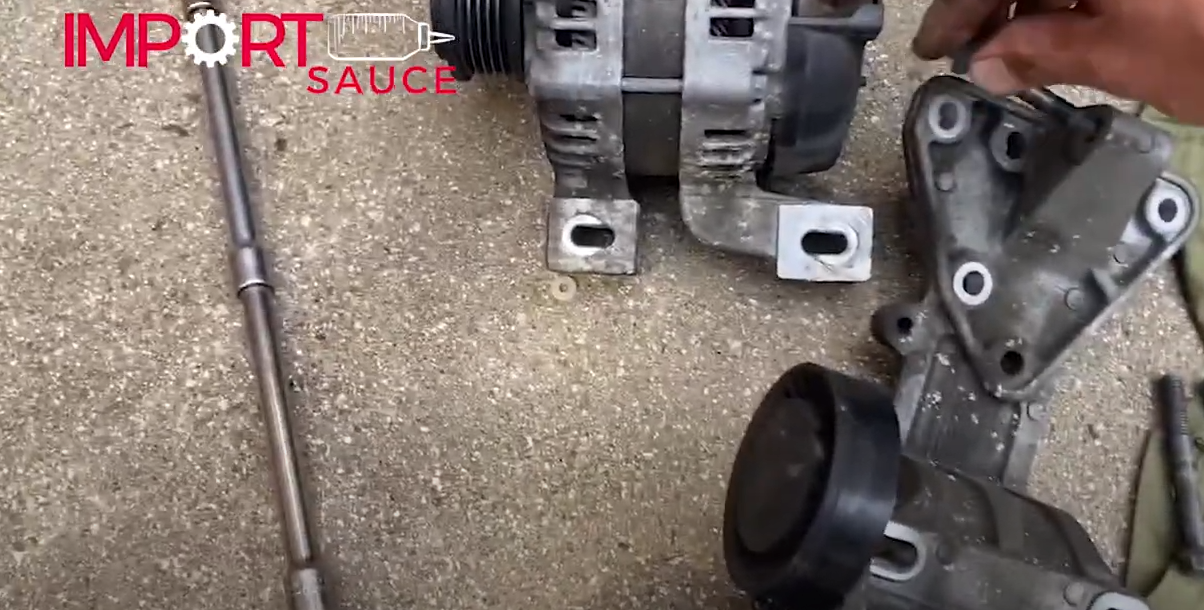
Alternator: Attached to a bracket attached to the block. Remove all bolts and the most important is the top bolt running side to side, which allows it to drop down and access the bracket completely. 3 10mms hold the bracket to block. 4 more bolts hold alternator to bracket.
Coolant Hard pipe: 1 10mm bolt – bracket to back of block. 2 hose clamps going to the external oil cooler. Behind it, a 10mm holding a single hard pipe going to the oil cooler. The large long hard pipe will slide left, out of the block.
Carrier Bearing Bracket (Passenger Axle):2 15mms on the top and on 10mm on the bottom.
Oil cooler: 4 T35 screws. Be ready for more oil to ooze out when separated from the block. 2 o-rings seal this to the block, make sure they come off and are kept together with the cooler.

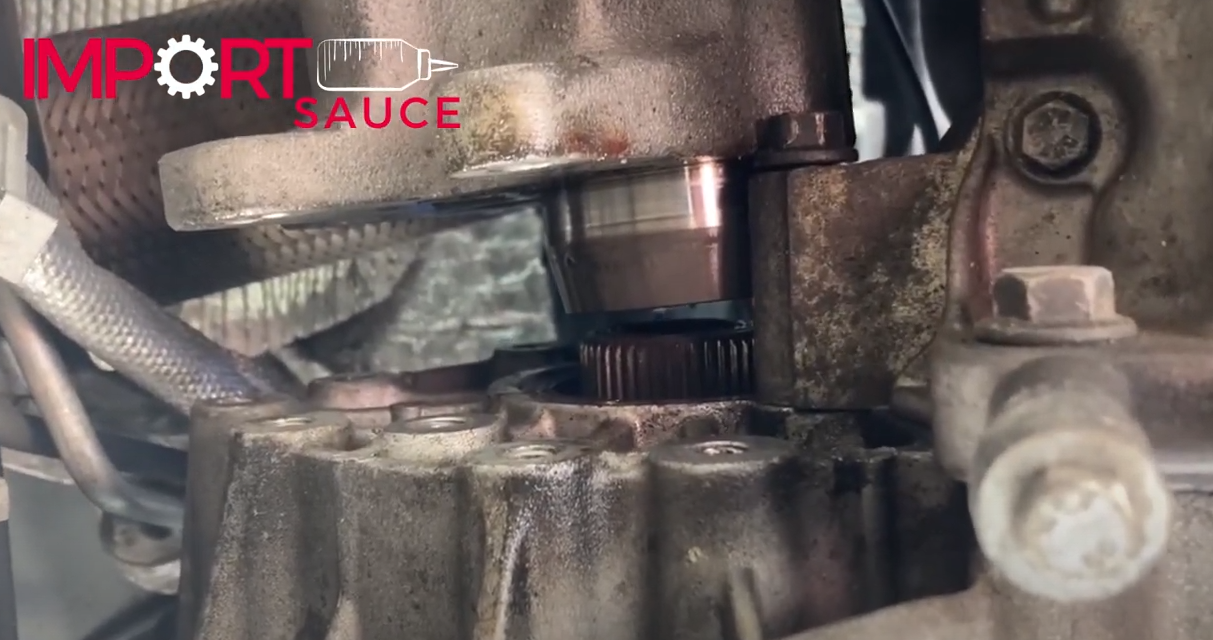
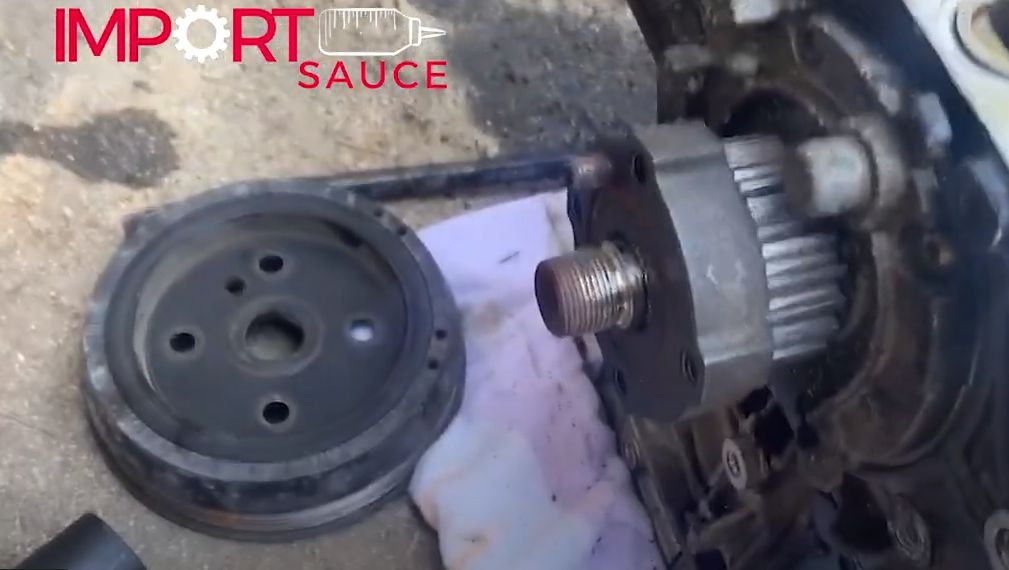
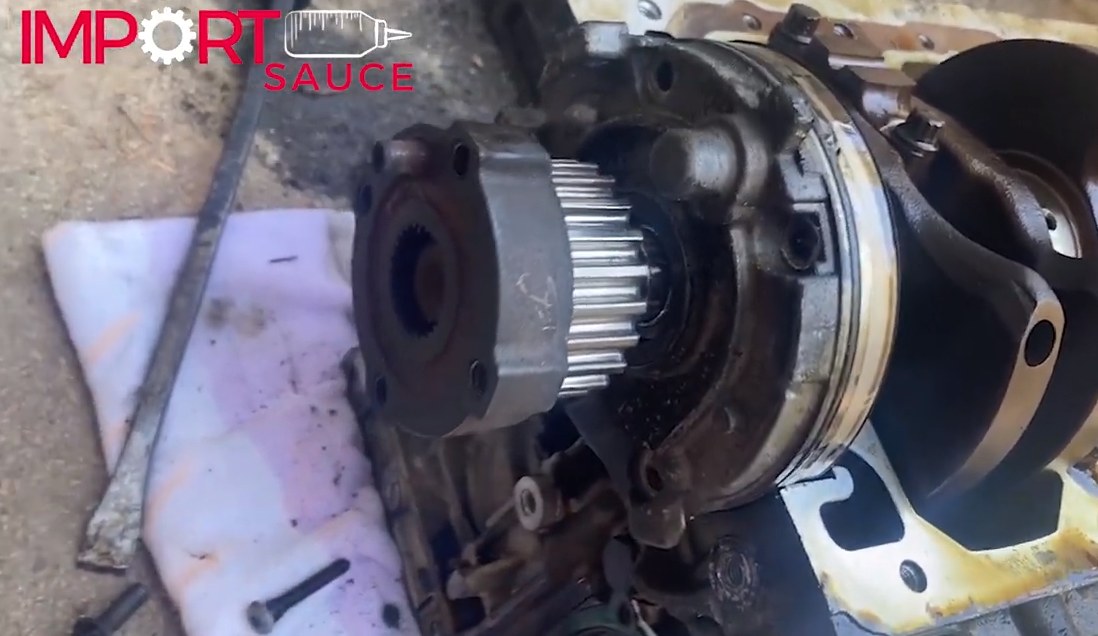
Water Pump and Water Pump Tensioner: water pump tensioner is a single 12mm down the middle. The water pump has 7 10mm bolts holding it on. With it off, you can see where the long coolant hard pipe we removed above feeds into, or is fed from.
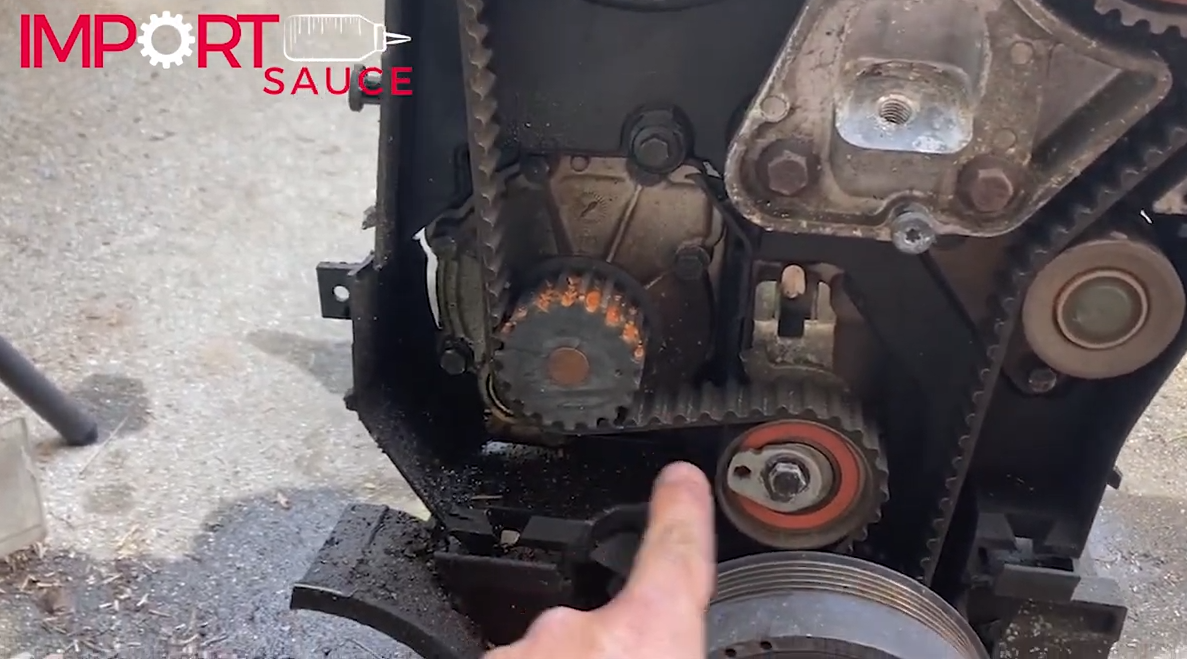
Belt drive pulley: 2 10mm bolts.
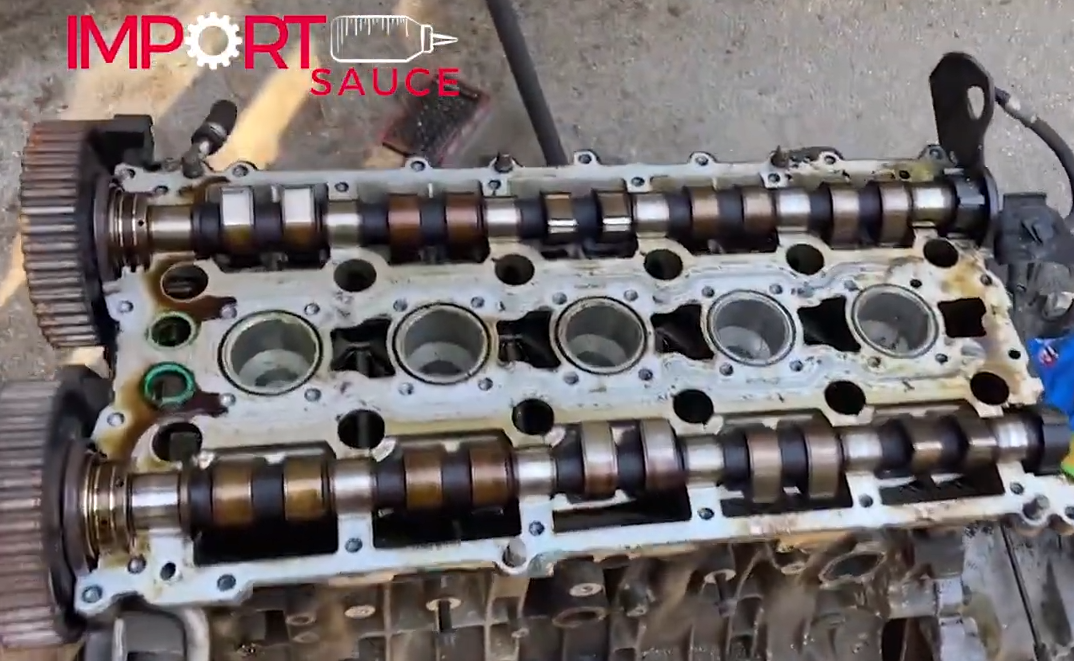
Cam Cover (CKA Valve Cover): Be careful if your cam position sensors are still installed. We broke ours, and could have avoided this $50+ error by simply removing them before we got started. 40+ 10mm bolts, all down the sides and 4 around where each coil pack goes. Break these bolts with the ratchet and then save some time by zipping them all off with a drill with socket attachment.
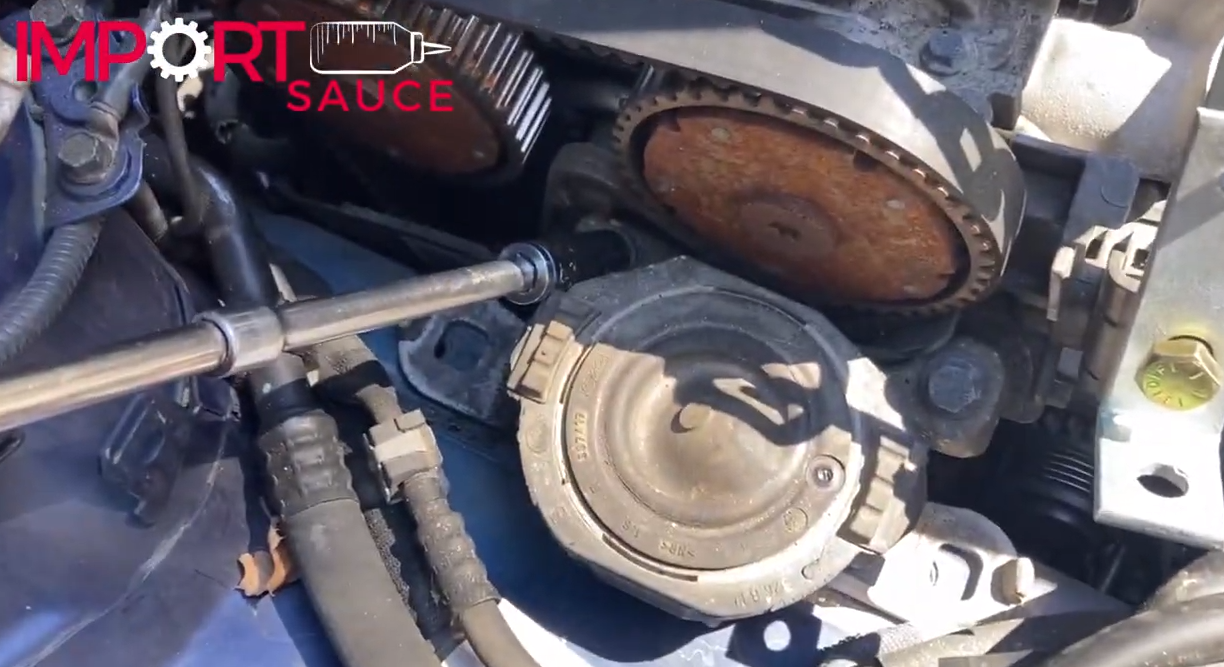
Cam Gears: Slide right up. The part numbers are different, so no need to mark them as we did in the video, on the opposite end of the gear, you will see a part number, and they vary by one digit.
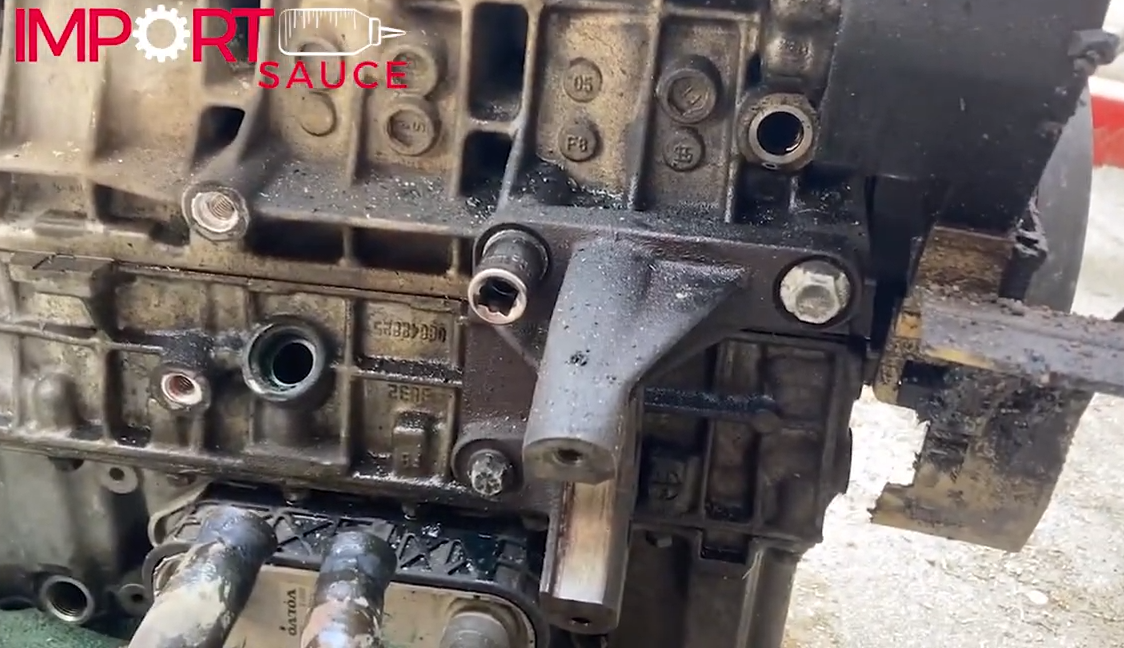
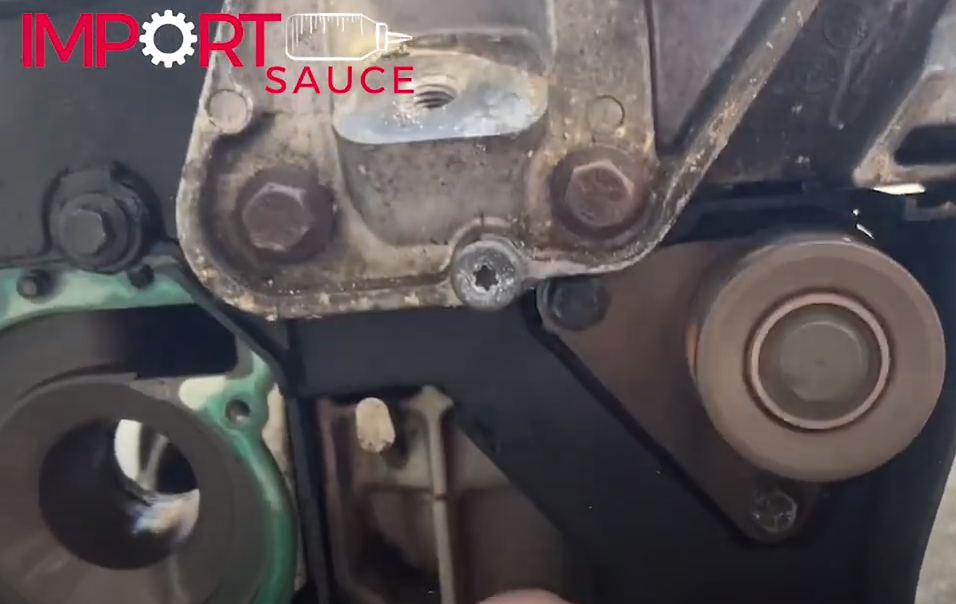
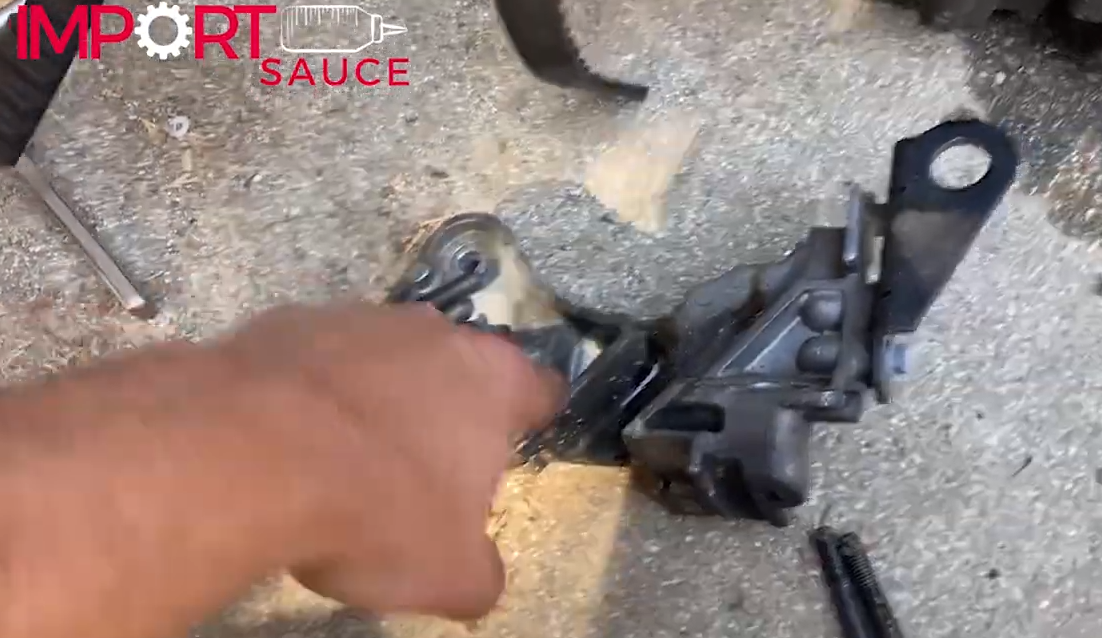
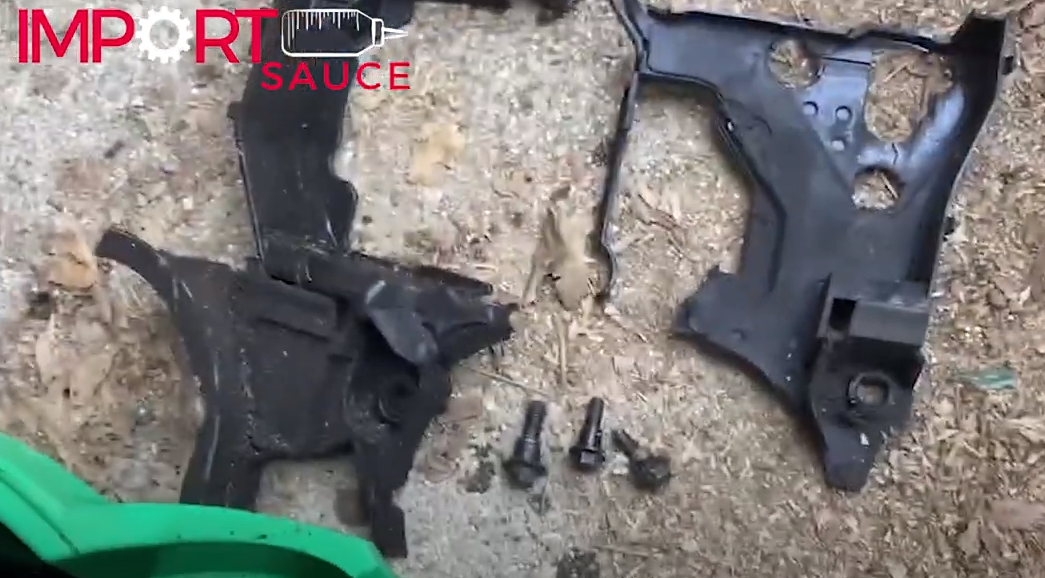
Motor Mount Bracket: 3 13mm bolts on the side. The bracket surface where it attaches to the front of the block was 2 bolts, the top being a 13mm and a 10mm on the lower portion – 5 bolts total.
Timing Covers (Plastic): 3 10mm bolts. One of which had a bit of a larger spacer diameter, and this one goes into the lowest bolt hole. This plastic is multiple parts, but all referenced by Volvo as “Inner”, meaning they bolt to the block. The outer covers snap into these inner covers forming the complete housing around the belt drive system. All parts listed and linked in the master parts sheet above. You can also now remove the hard coolant pipe that just rests in the block groves behind those covers.
The Head: 12 bolts, 14mm all very tight!!! Breaker bar and someone holding the engine will help. A little pry to separate the old liquid gasket required. Not too hard on the pry as to not gouge the mating surfaces.

Transmission: 10 Bolts, that vary between 13 and 14mm. We start at TDC or 12 o’clock and work counter clockwise, laying the removed bolts in the order they came off, with attention to the orientation they came out in. Then take a picture so you know exactly how they go back in.

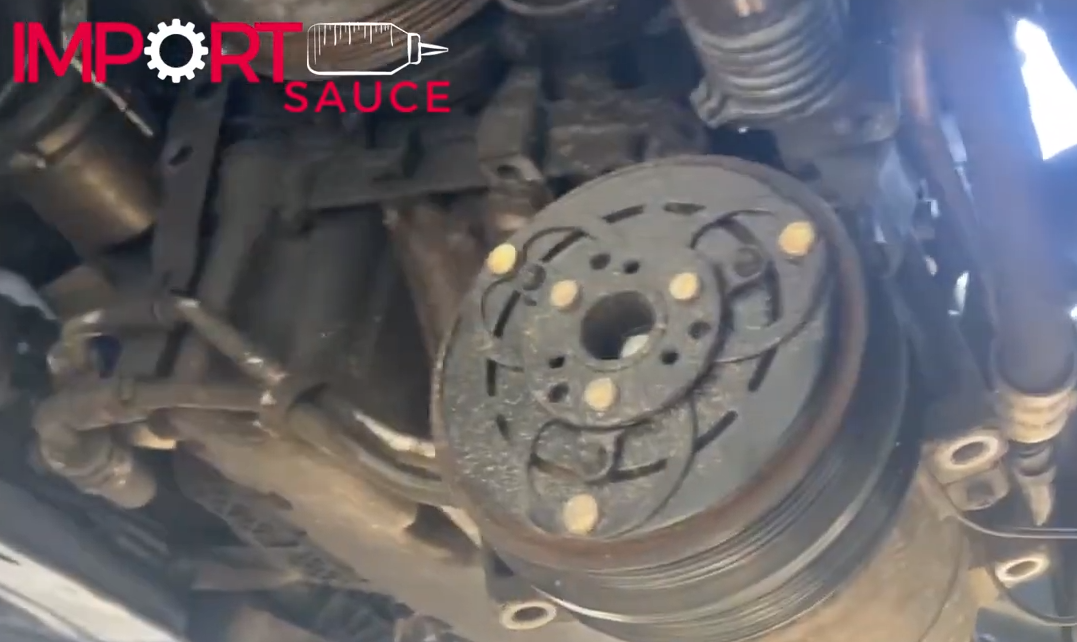
Pressure Plate and Clutch: 6 Allen bolts, 6mm head. We had to brace the crank with the ratchet to break the bolts.
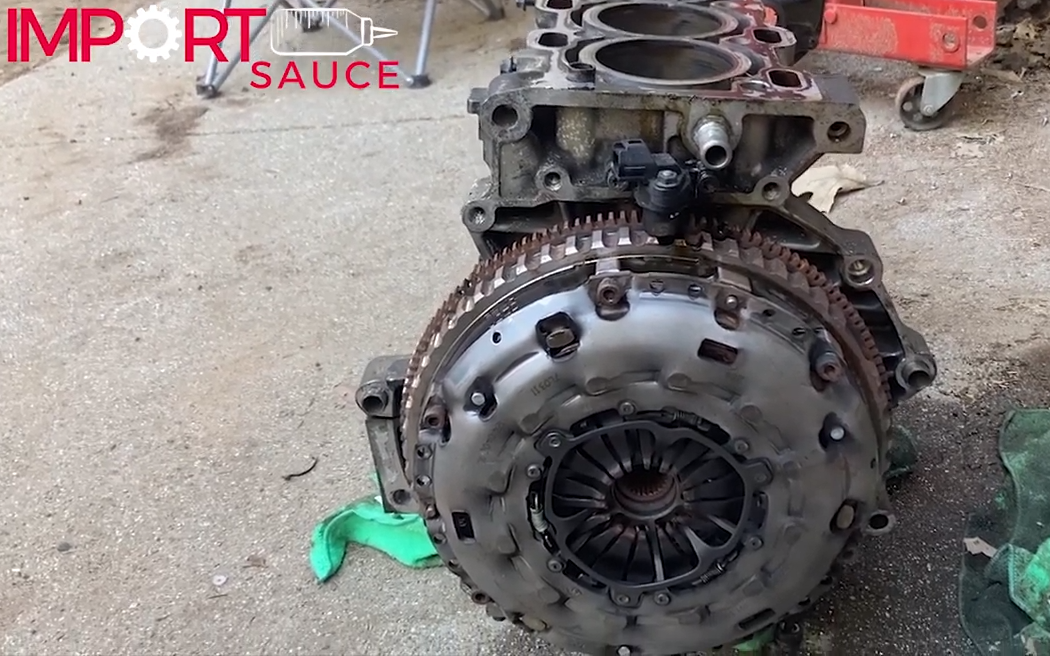
Flywheel: 10 T55 torque head bolts. We had to brace the crank with the ratchet to break the bolts. New flywheel bolts are required every time. They are only a few bucks, so do not skimp.

Vehicle Speed Sensor: 2 T35 torque heads bolts.
Oil Pan: After flipping the block over, the oil pan is facing the sky, and you have access to all the pan bolts. This is a total of 29 10mm bolts, 2 are M7X1 – 105, 2 are M7X1 – 45 and the remaining are M7X1 – 25. The very long are on the extended pan on the flywheel side. The medium bolts on the crank balancer side.
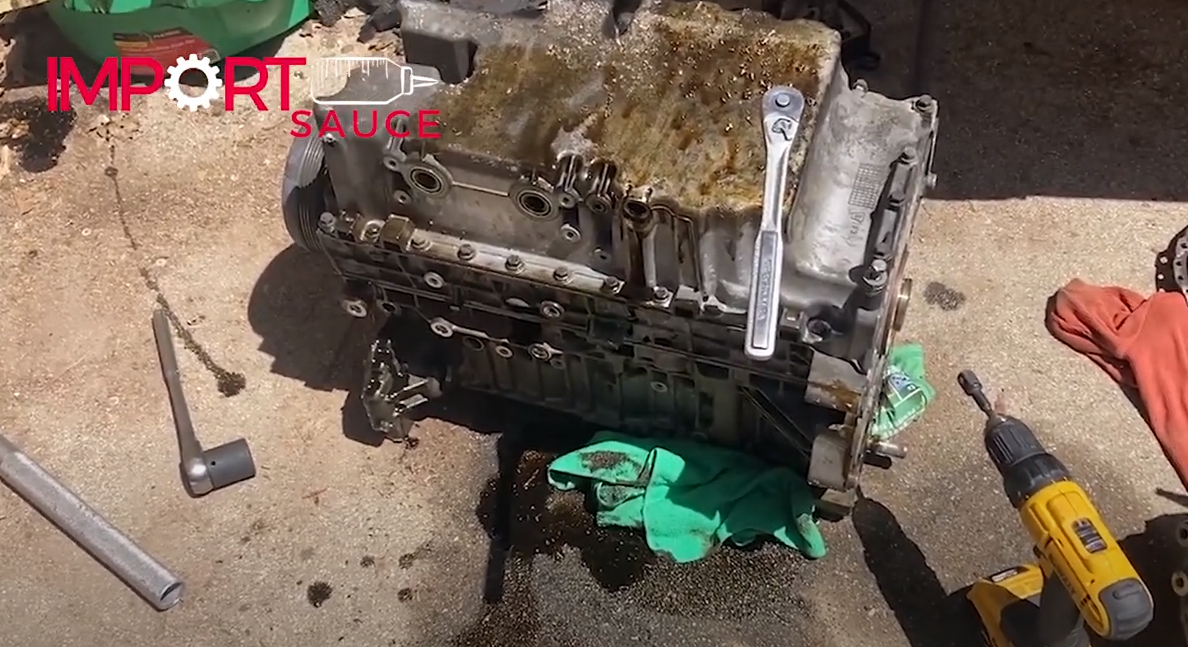
Oil Pan Pick Up: 2 10mm bolts, and note and find the four rubber gaskets/o-rings.
Belt Cover Protection Lower (bottom side of harmonic balancer): 2 10mm bolts.
Learn from our mistake... on the video process we then moved onto the lower block housing, but then after realizing it would not separate from the block, we had to change gears and go take more stuff off. So here, we provide the correct order, and in the video, we did it a little backwards.
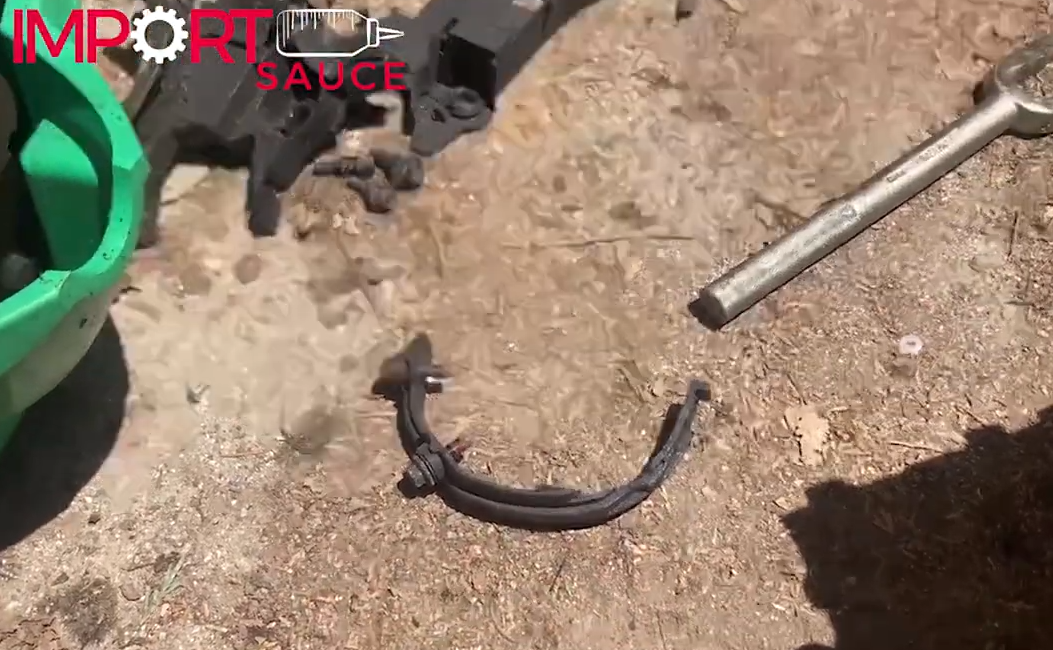
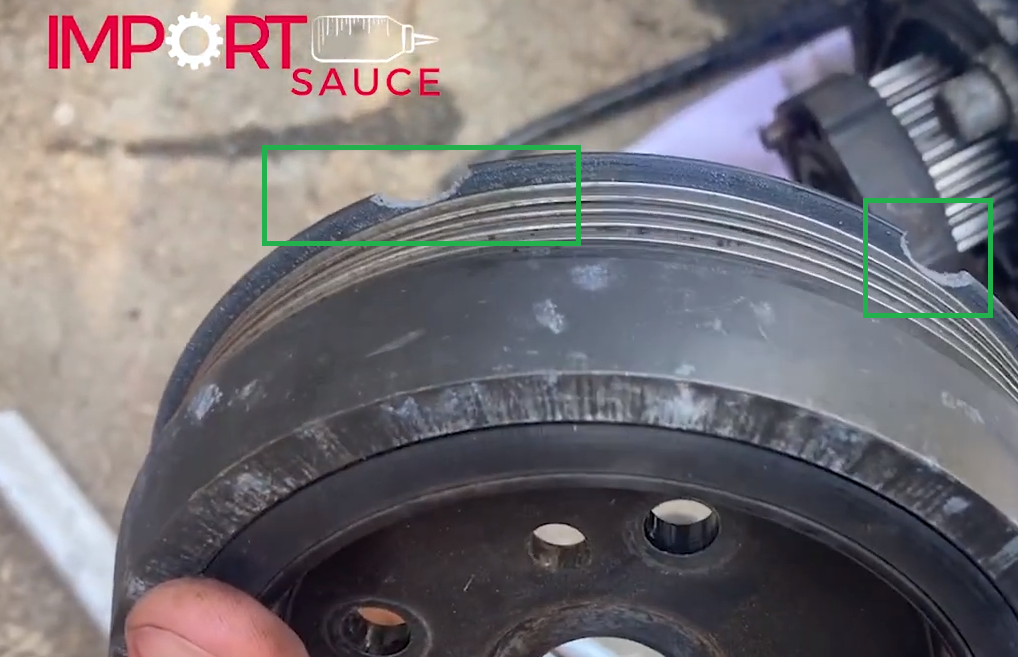
Harmonic Balancer/Dampener: 30mm nut, which must be secured or it will spin, breaker bar on the but and opposite side, we put two flywheel bolts back in, and used a pry bar to secure the crank from spinning. There are then 4 10mm bolts left to come off, Be sure to ease the pully off with care, we used a hammer and chipped the lip, meaning we are buying a new setup to put back on.
Oil Pump: 4 T30 torque head screws hold the pump to the block, but note two screws thread into the upper block, and 2 thread into lower, meaning this pump holds those two housings together.
Lower Block Housing Outer: 17 10mm bolts around the outside of the housing rim. The longer bolts here were for the outside, and the shorter bolts were recessed a bit inside the housing.
Lower Block Housing Inner: 12 14mm bolts in the center of the lower block assembly will release the two portions of the block.
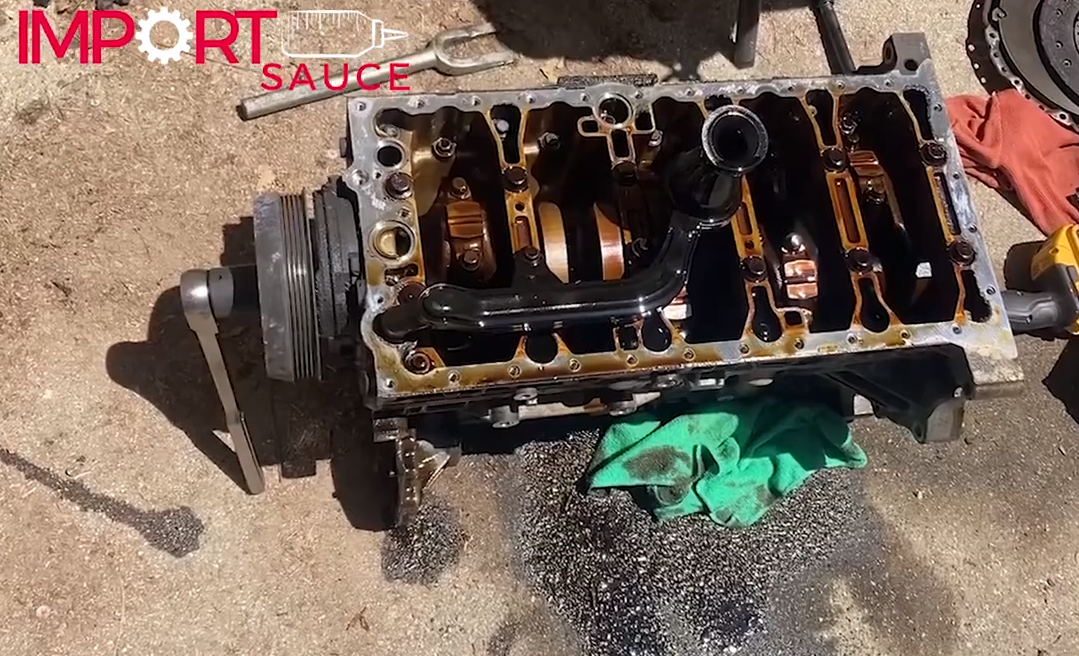
Connecting Rod Caps: 2 10mm triple star socket bolts, two for each rod.
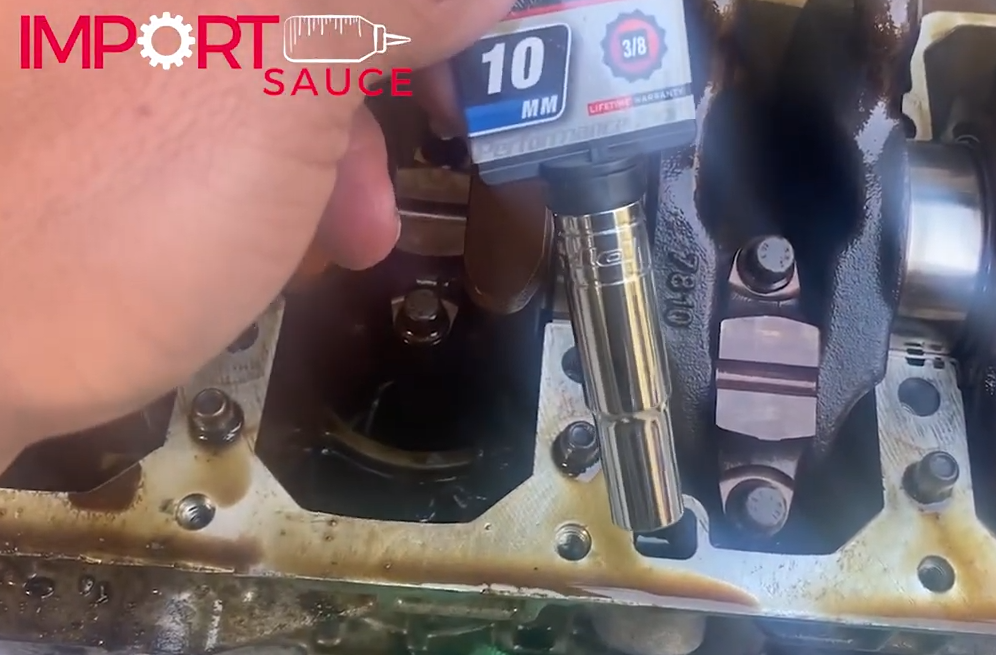
Piston Rods and Pistons: after removing the caps, simply push them out the top of the block, some may snag a little on the piston rings, but simply give it a good push, and they should slide right out.
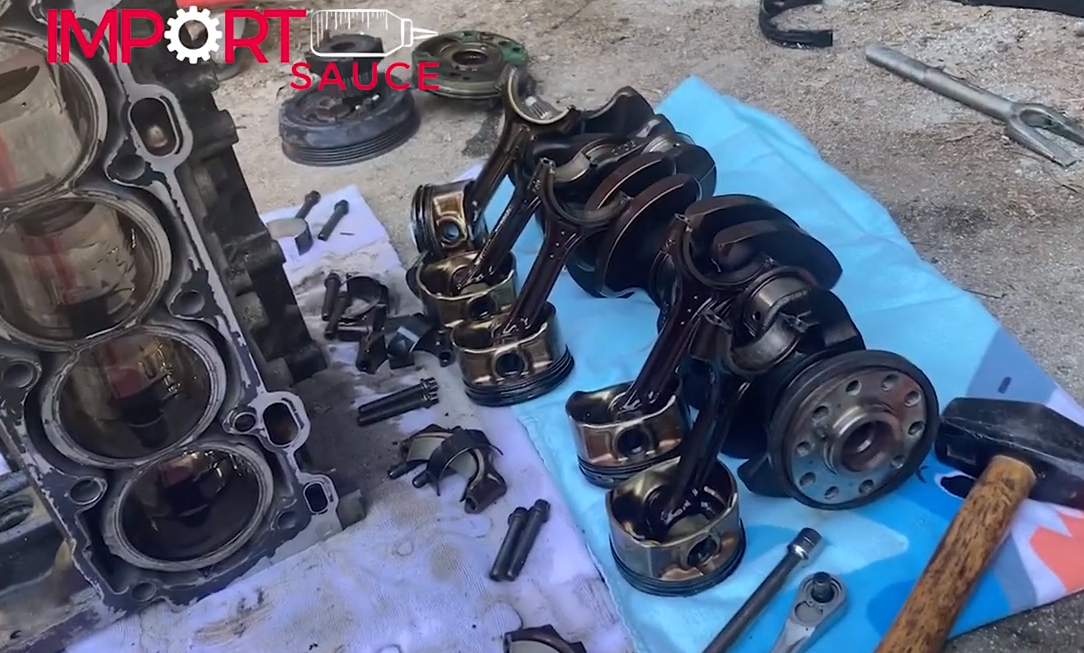
Crank Removal: At this point, nothing is holding the crank in, just pick that heavy son of a gun up and out.
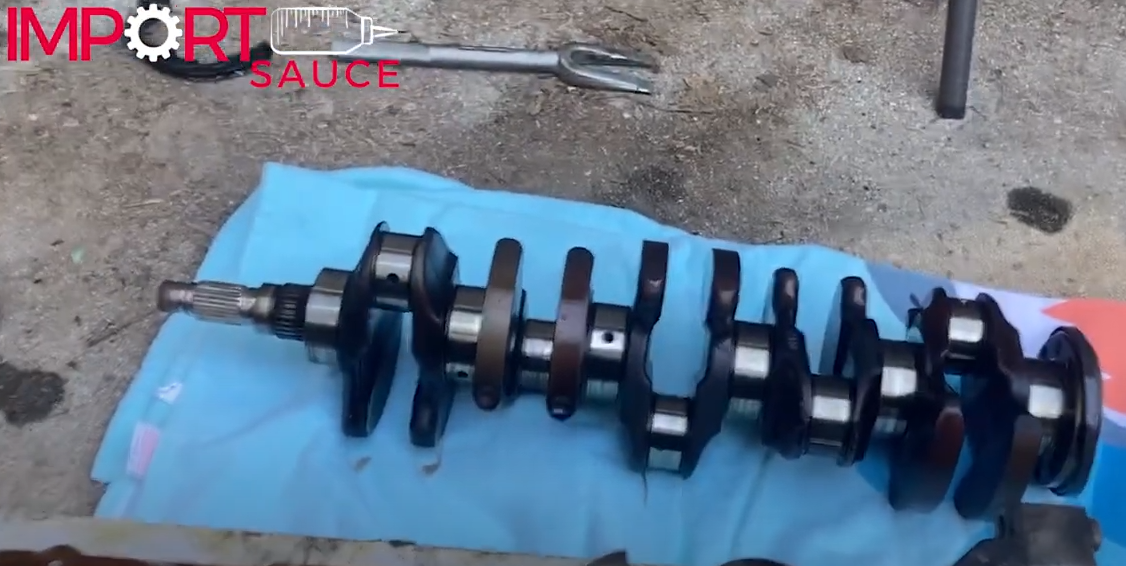
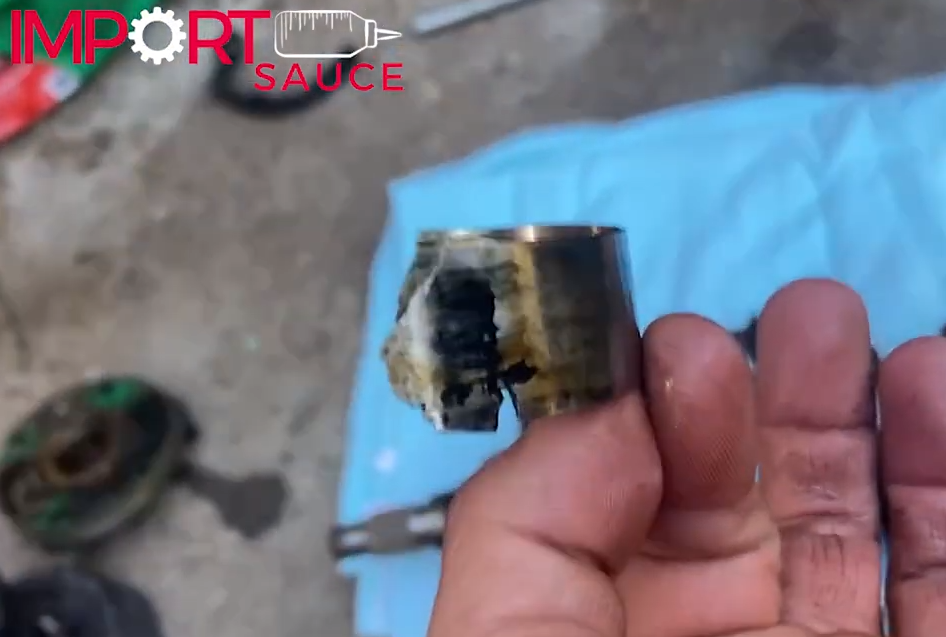
The Culprit: Here we see cylinder 2 bearing….
The Machine Shops…5 Months Later
This stage of the process was for sure the longest. The biggest set back was tracking down a shop who thought they were qualified, and who we felt comfortable using, for the block sleeving. While LA Sleeves, the manufacturer of the sleeves were local, they were backed up about 3-4 months. So we did find a shop, that said about 4 weeks. This was Q&E Engine Machine Shop in Anahiem, CA.
Aside from the block, the crank needed work, and many machine shops did not have the proper set up to work on the Volvo crank. From our initial shop Waynes, we were referred to Marine Crackshaft in Santa Ana, CA. They also said about 4 weeks.
We were able to drop block and crackshaft at the same time, and figured a month later we would go back to pick it all up.
Wrong…. Almost 3 months later we got a call from both shops, a day apart, that parts were ready. So we did only have to take one trip to Orange County, CA to get it, we were 2+ months behind schedule.
Long story long, we got everything, it was completed perfectly, and worth the wait. We explain more in the video below.
Not Required: Cleaning and Painting EVERYTHING!!!
Now that everything is out, and the core components are off to the machine shop, we have plenty of time to start our cleaning process. This includes cleaning every thread of every bolt, as well as a deep clean on any brackets and others parts that will not be sourced as a new replacement. From there we will prep all brackets and related for paint. We are using VHT high temp wrinkle paint in black. This gives a solid durable coating as well as looks great with a clean finish and some texture. Rather than break these optional steps down, we just made a video compilation to show you start to finish what to do in your free time while you wait. After all, you have the time, and why would you want to put dirty greasy parts back on a fresh new engine…. you wouldn’t.
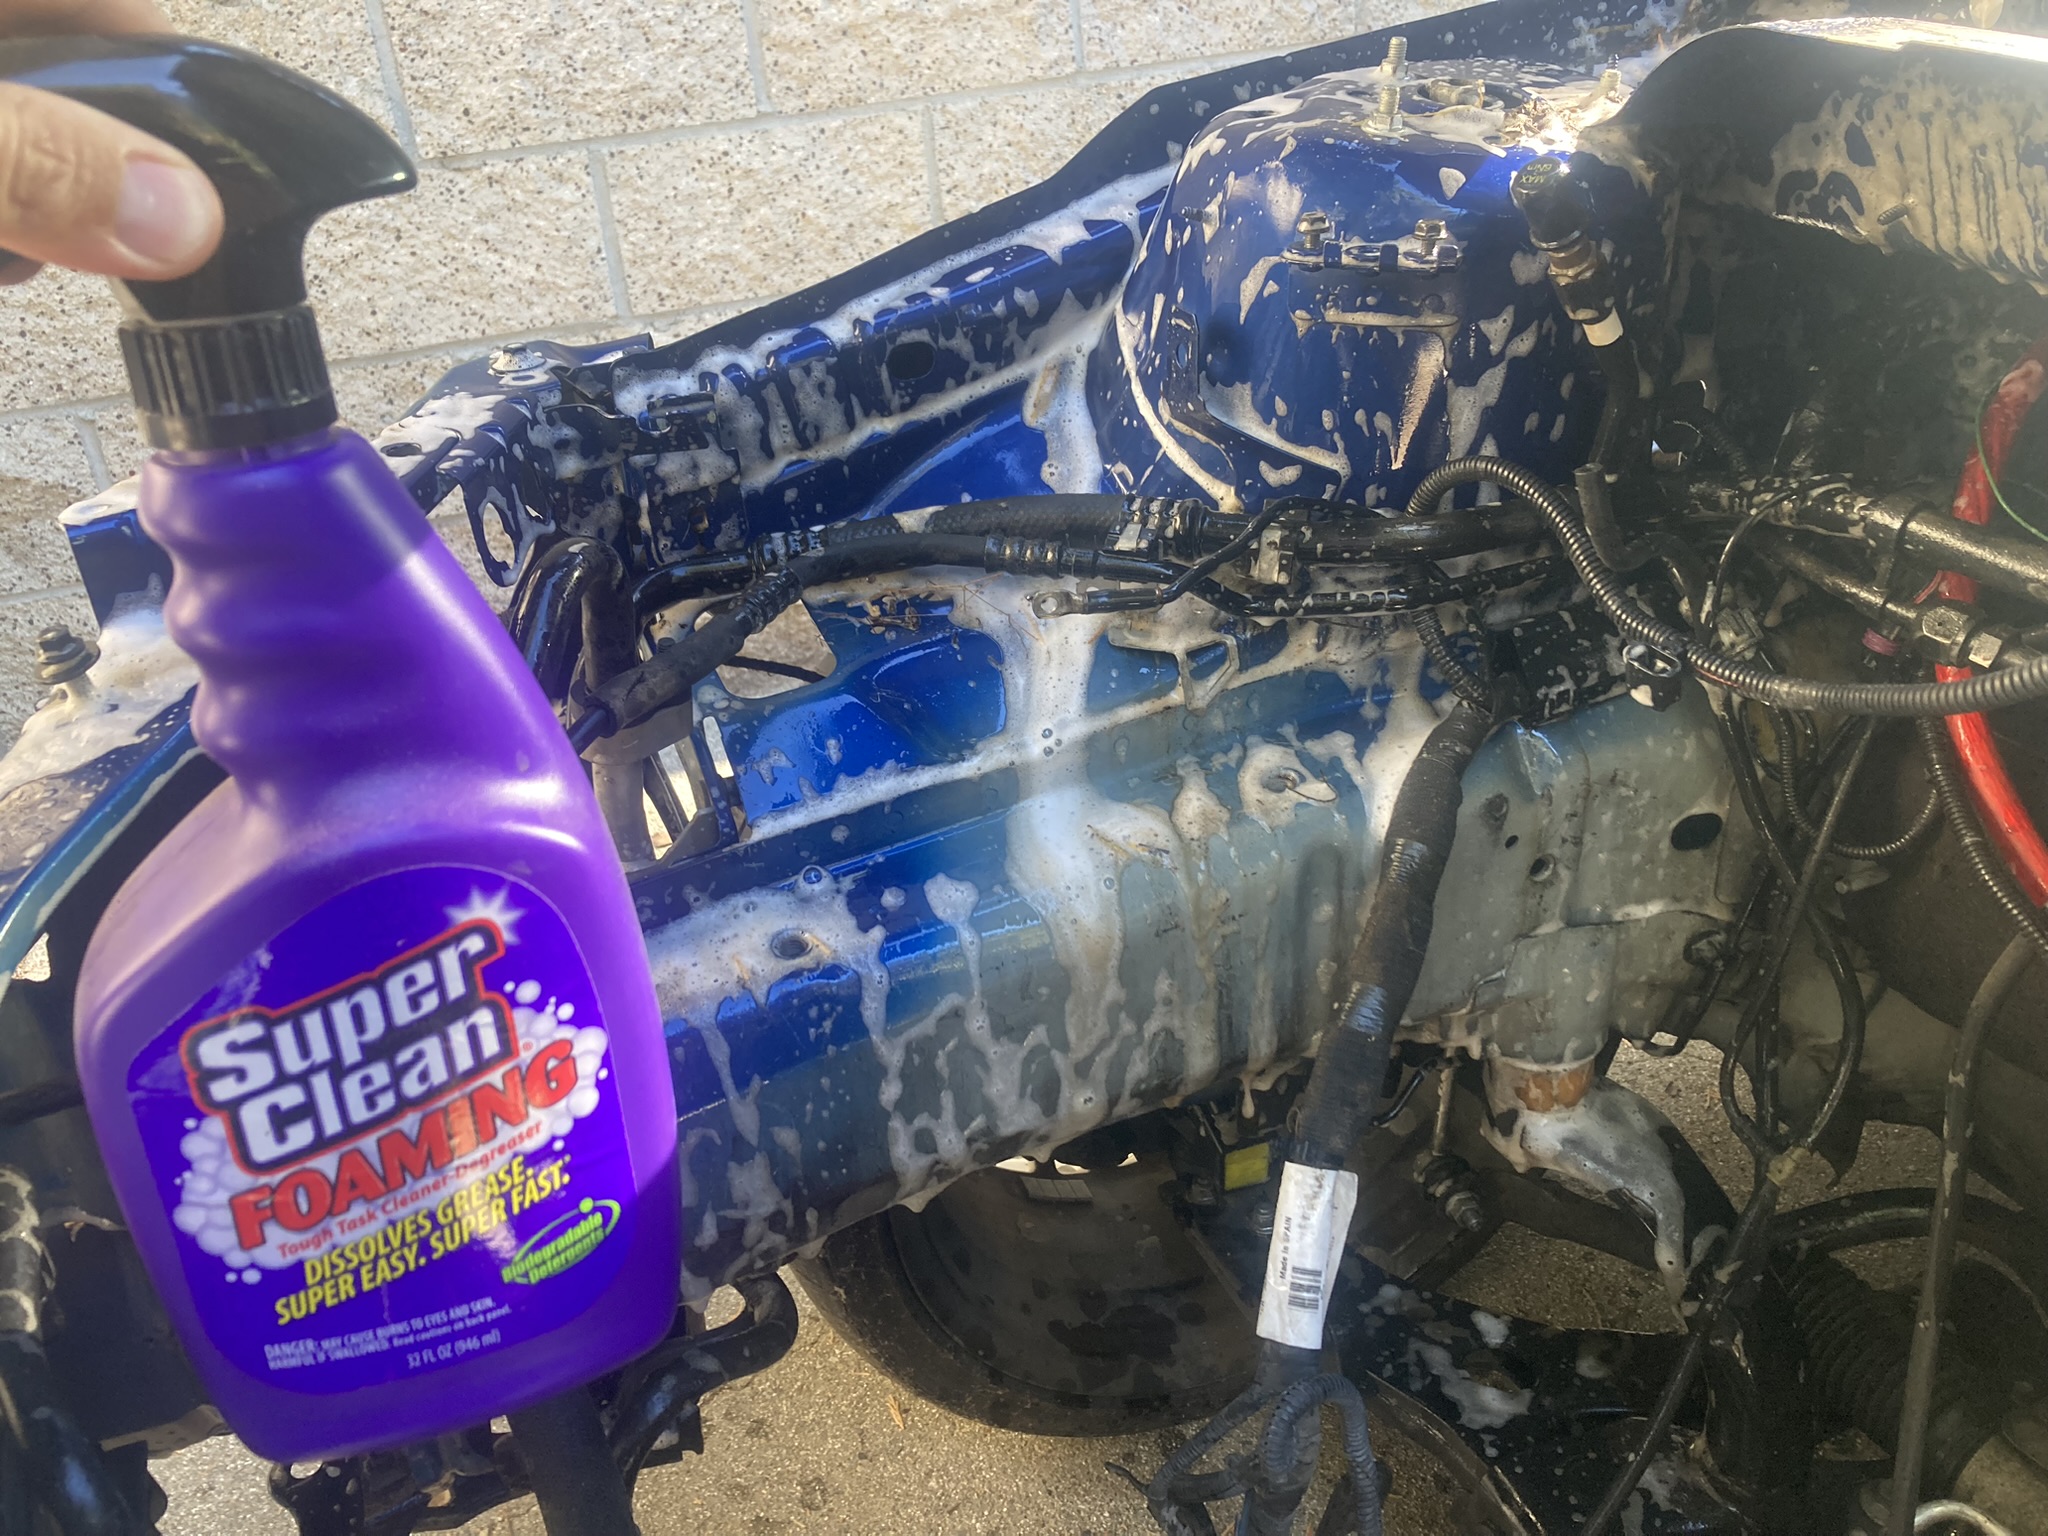
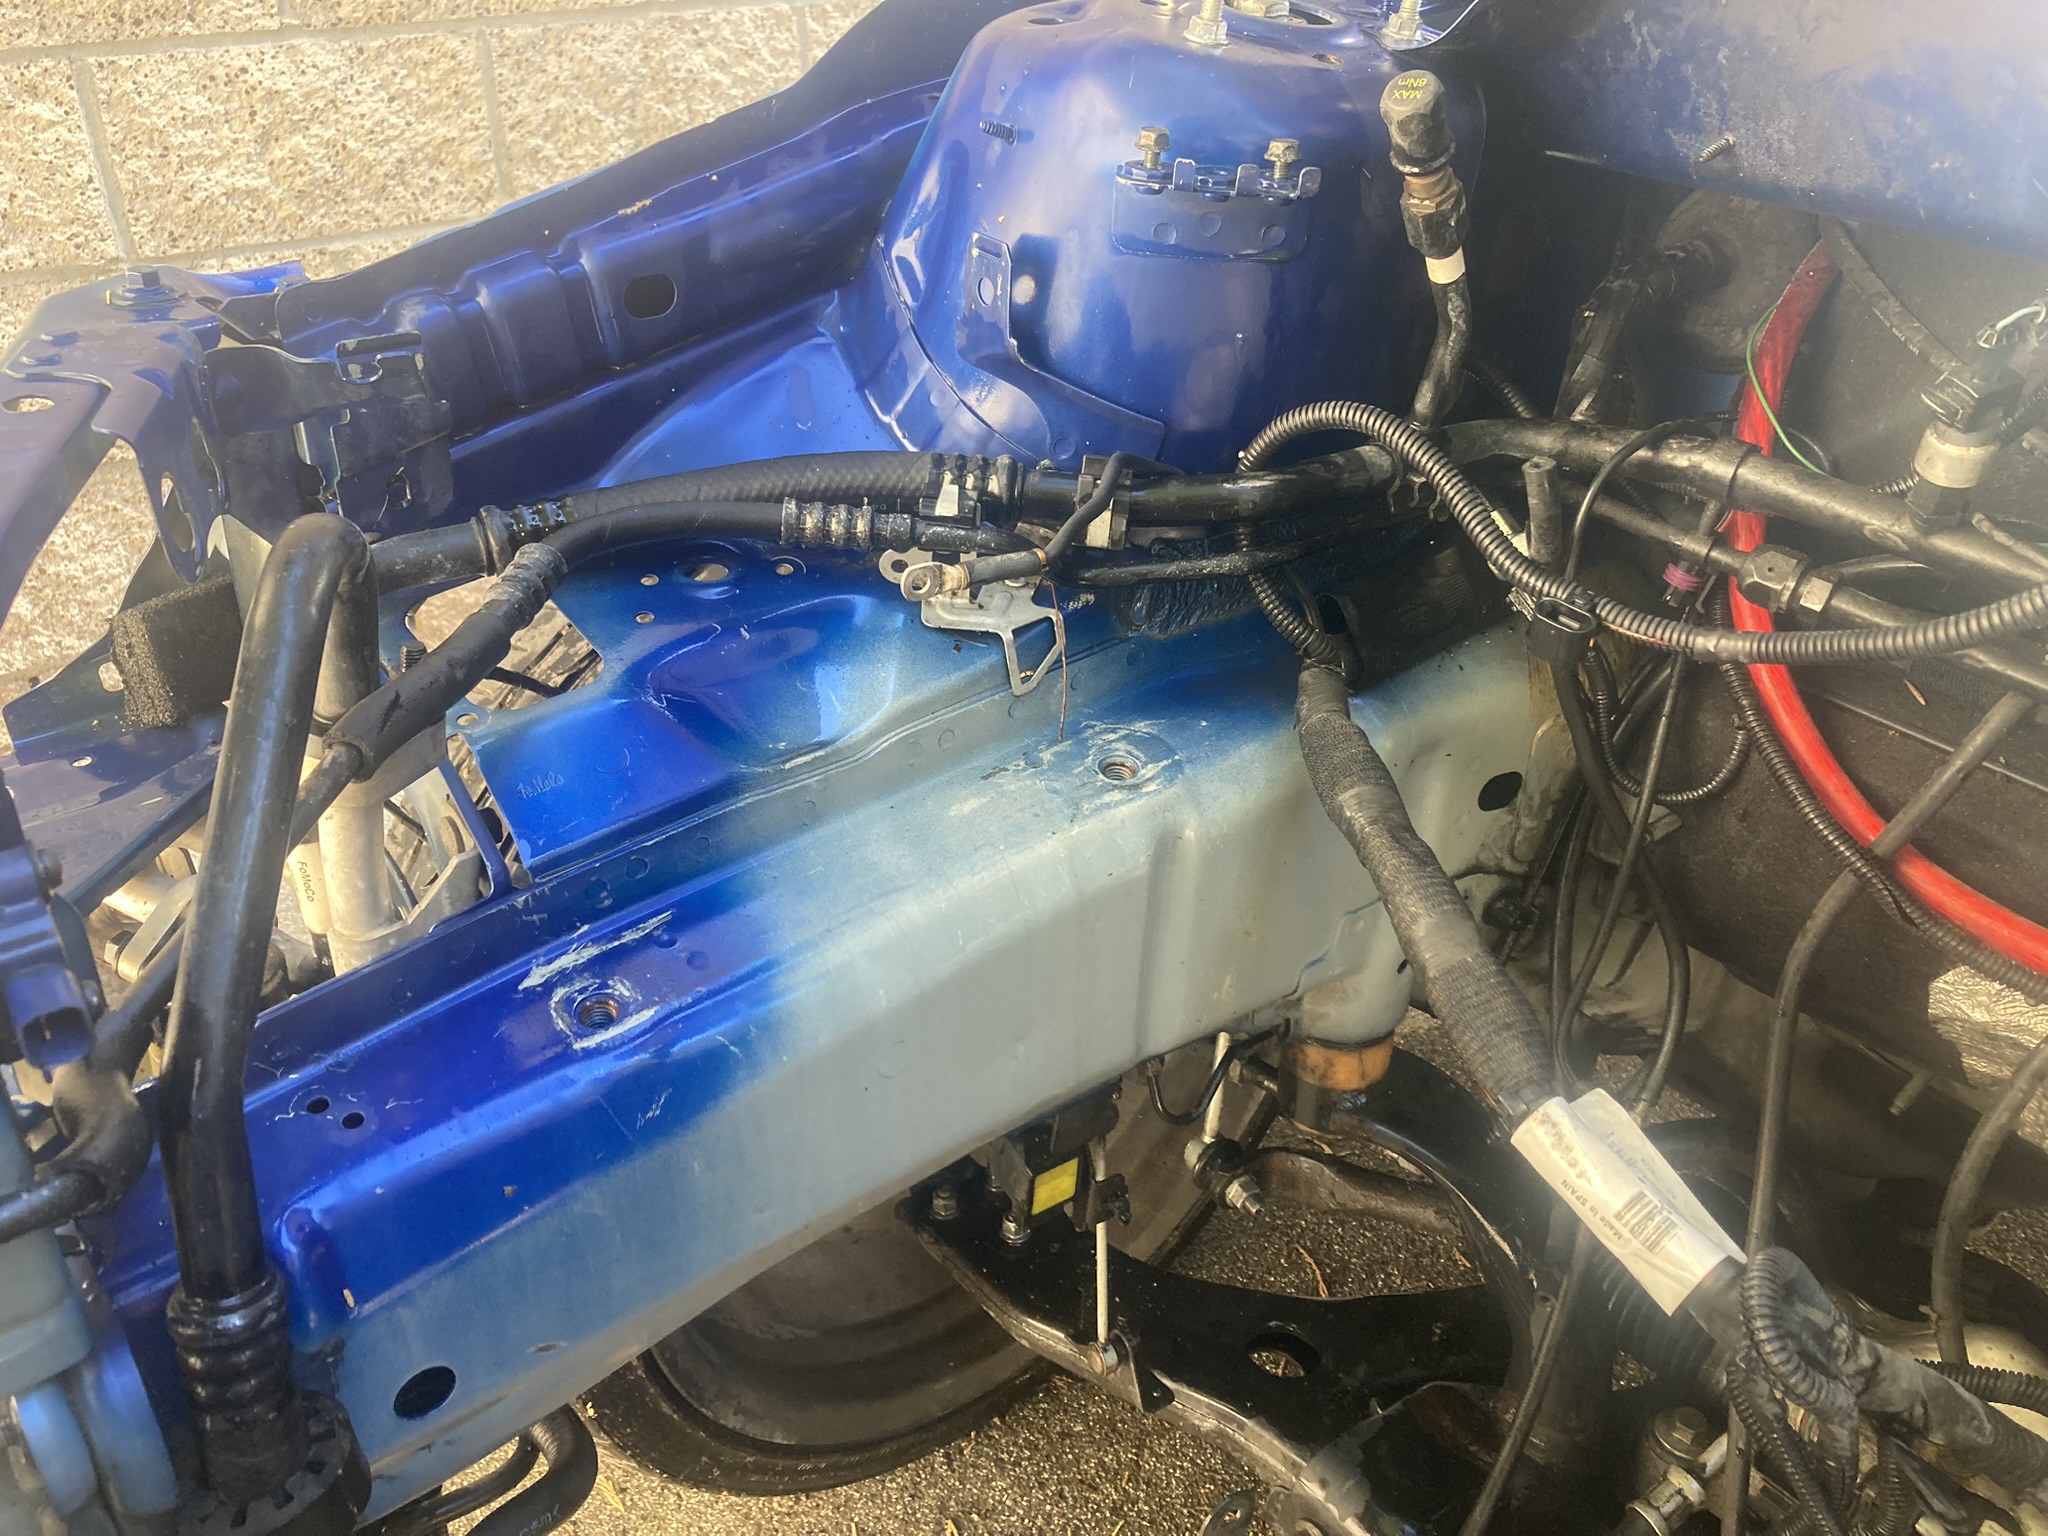
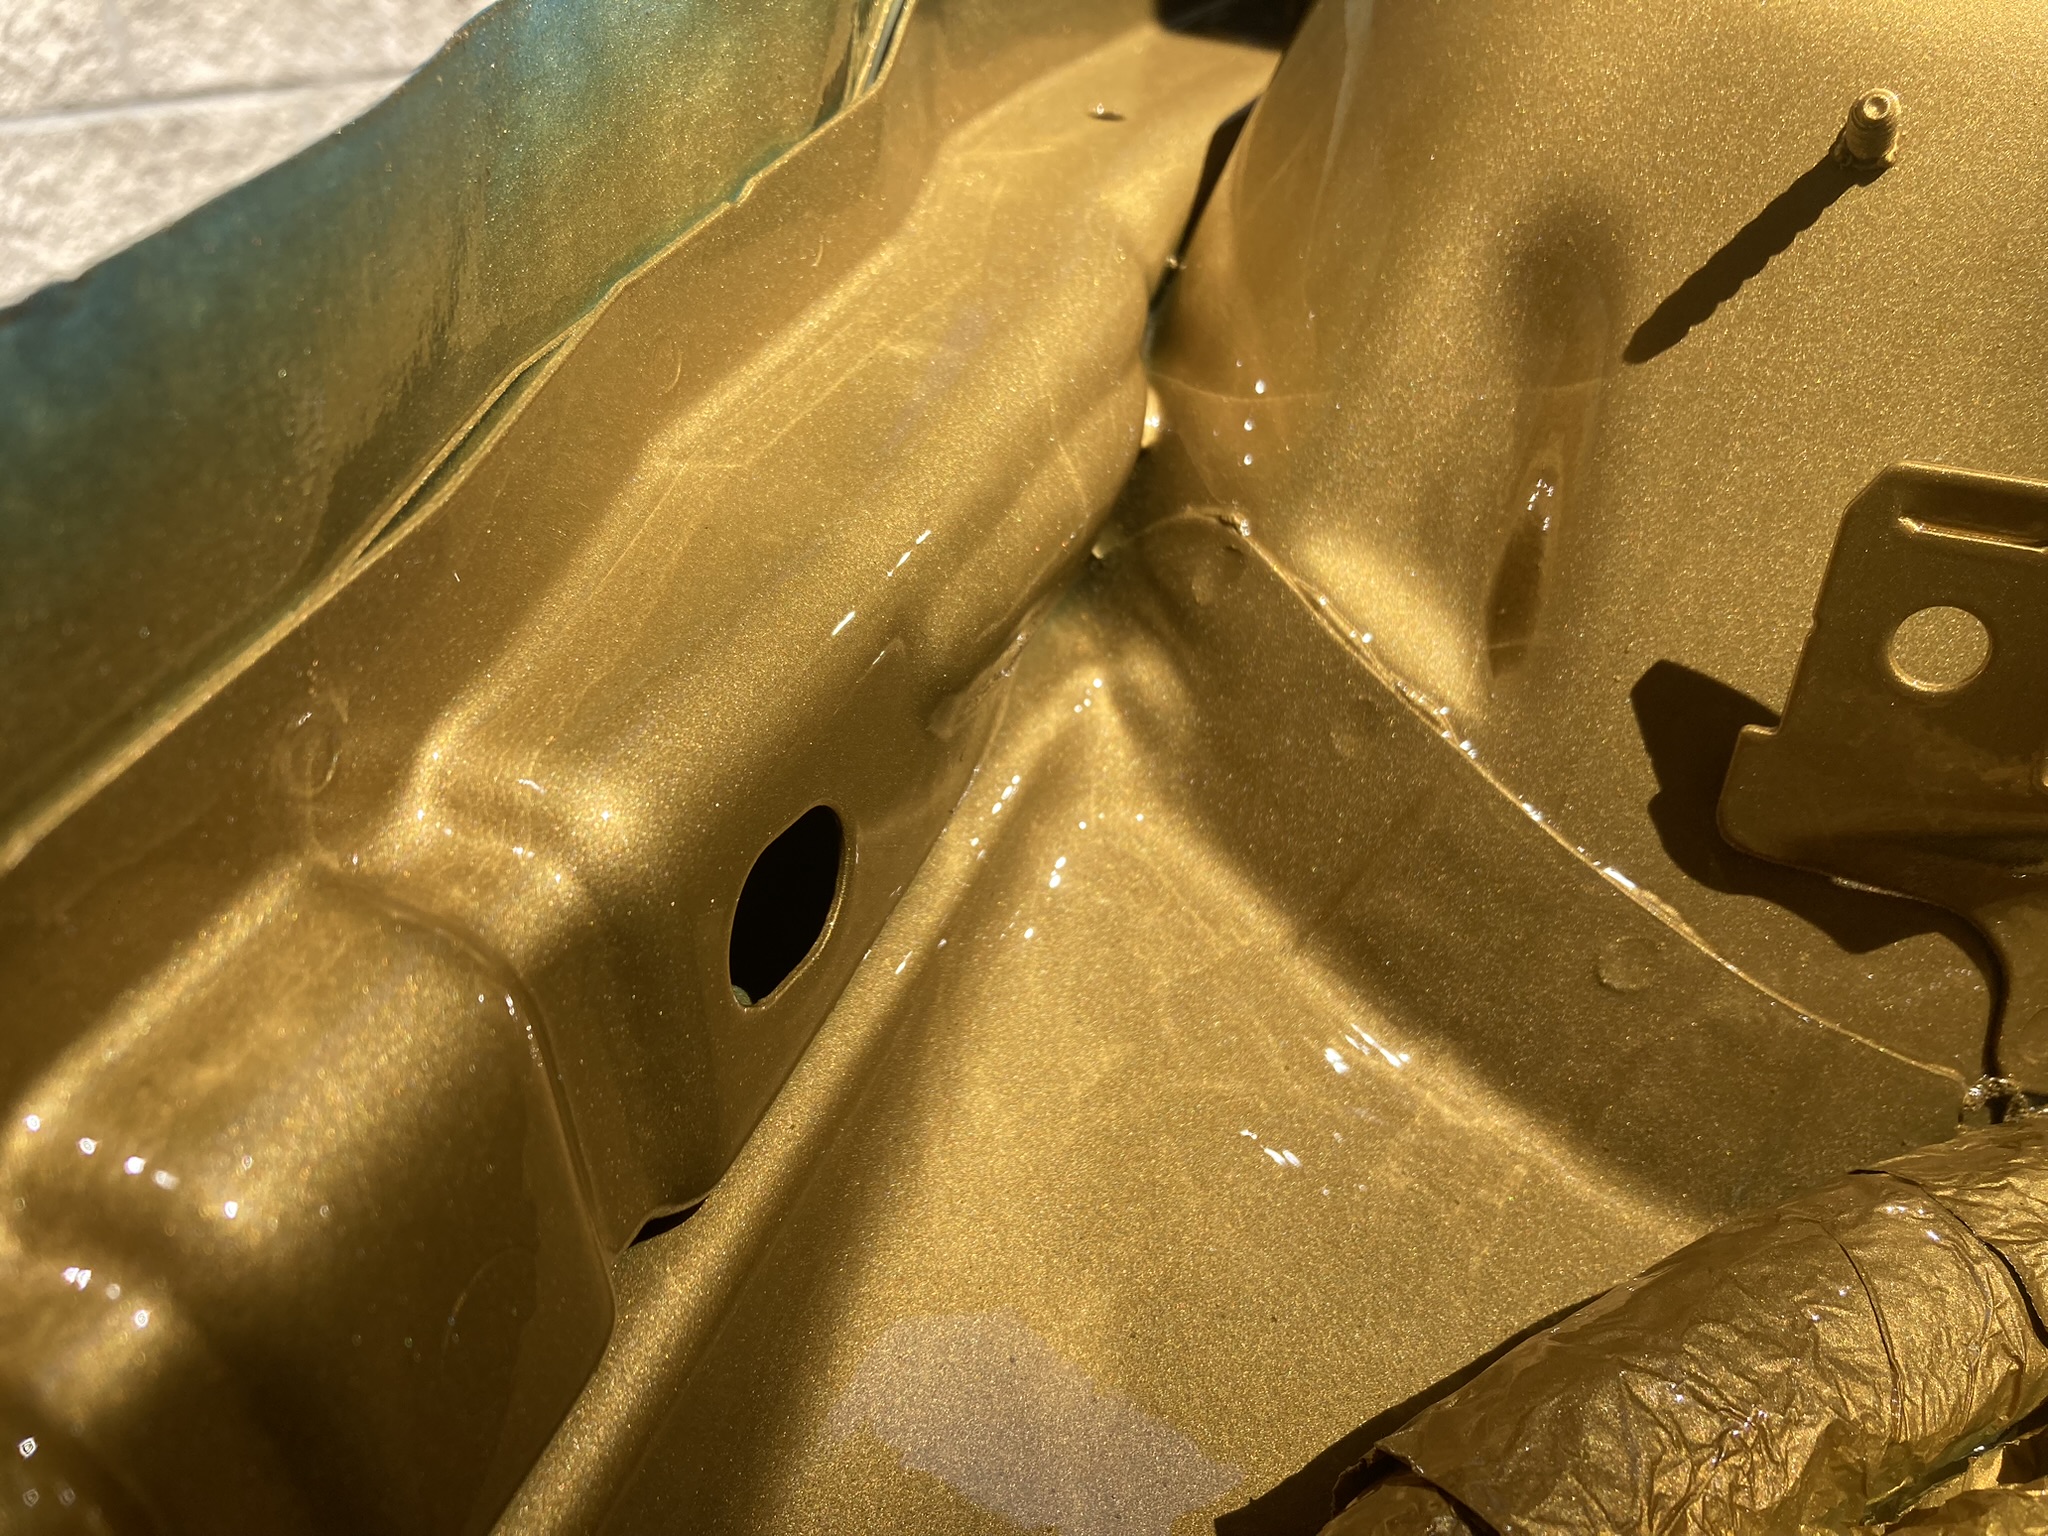
The second phase of of this step of the process is attacking the engine bay. Here we will be doing a very deep clean on the entire engine bay. From there we will prep the engine bay for paint. Our paint process will be full service including prepping, painting, clearing. If time permits, we may do a final color sand and buff to make the engine bay show quality.
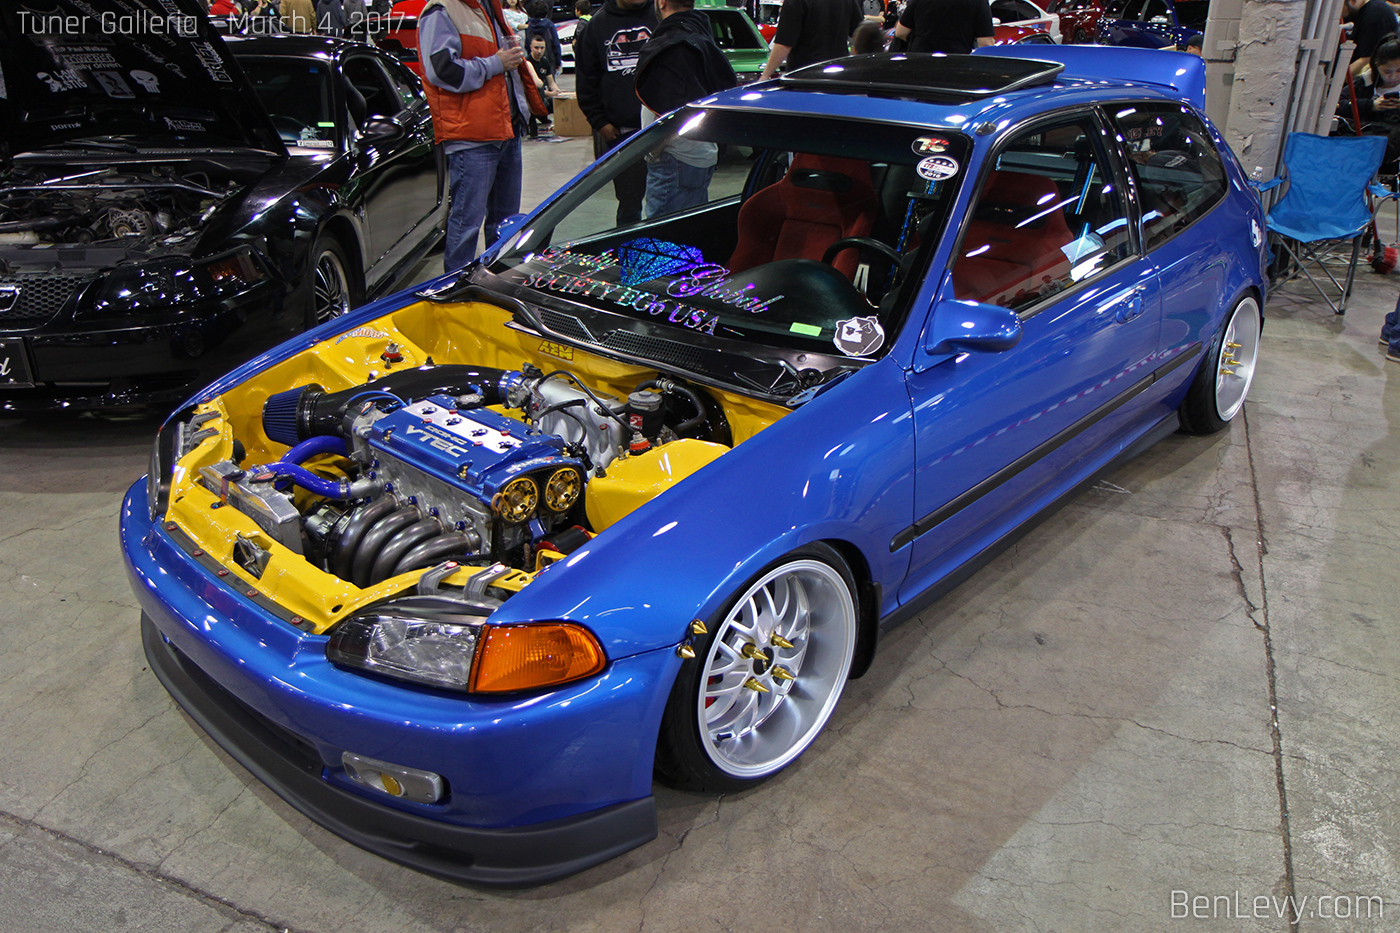
We have tossed around a dozen different paint schemes for the engine bay and engine, but the problem is, you don’t know if it looks good until it’s done and installed. Initially we were thinking a Volvo Rebel Blue (619) on the entire engine bay, but after talking to the paint shop, they said they could no confirm that custom color mixed automotive paint would in fact hold up to engine temps. Rather than have it look good and then start to fade or crack or chip or flake, we decided to keep the entire engine block and head in a VHT high temp paint, which limits us to off the shelf colors. So rather than the initial black engine bay, blue with paint splatter engine, we are now thinking yellow engine bay, color matched blue (476 brilliant blue metallic) timing cover, and for the block and head, possibly the same VHT wrinkle used on the brackets and mounts. Here is the image we found that we are modeling the engine bay after, it since our car is blue, we can really see how these colors play so well together.
The image is by Ben Levy (@ben_levy_pics), and his website is here. We have no association with Ben, but wanted to shout out credit to him for getting this image on the inter webs for us to find as inspiration, and he has some great import coverage on his Instagram.
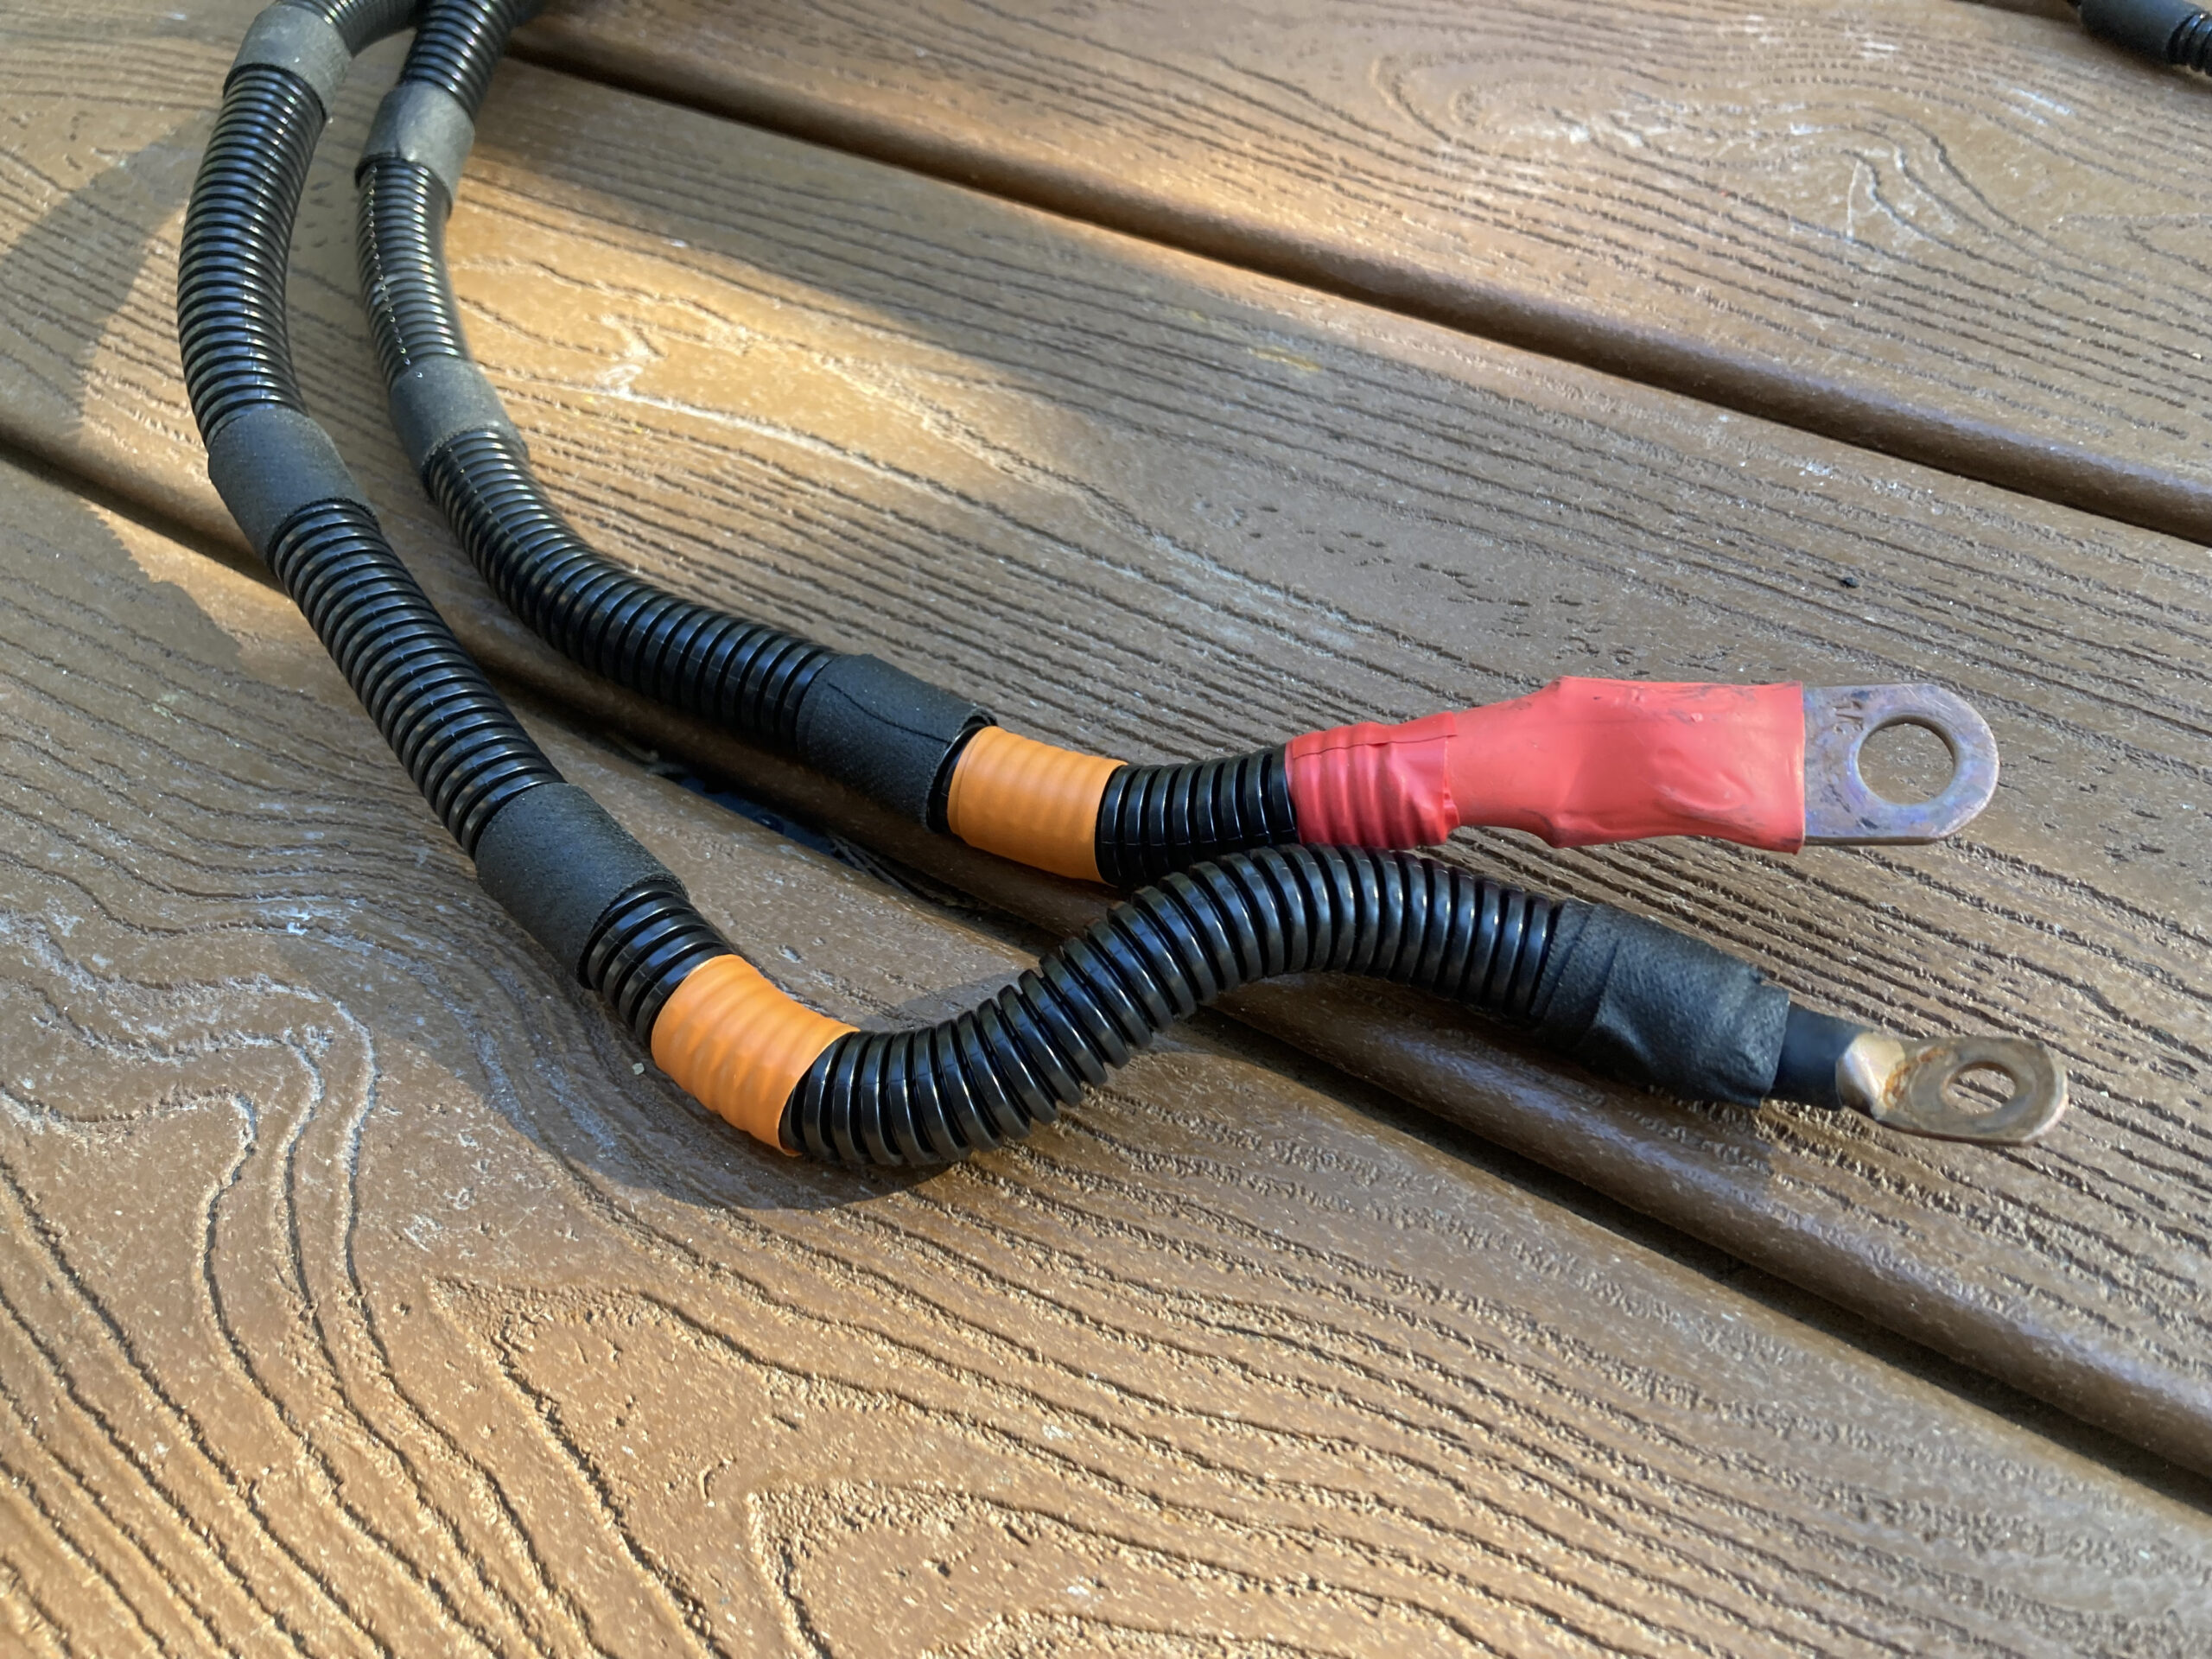
After much work, the engine bay overhaul has been completed. This included removing anything not permanently attached in the engine bay, degreasing and cleaning the entire engine bay, then sanding scuffing and painting. Followed up by a clear with hardener and and complete re-looking of EVERY wire in the engine bay. A few pictures below show an overview, but the video covers it step by step in depth.

Painting Block and Head and Gears: Coming Soon
Rebuilding The Engine: Coming Soon
Dropping the T5 Engine Back in: Coming Soon
Firing It Up: Coming Soon


