


An Easy and Affordable Mod to Bring Touch Screen to Your P1 Volvo
The evolution of sound in a P1 Volvo has been slow, and even with new advances and options, there is still little documentation on how to execute some easy upgrades. A few years ago it was documented on how to bring even the most basic of AUX connection into your early model S40/C30/V50. The documentation was few and far between, so the ImportSauce team went in head first, and got this done with the first fully documented write-up to help the Volvo community. You can see the entire write up here. While the upgrade is straight forward, it is still under utilized. We are probably the only supplier of the 2007 Volvo Factory AUX Upgrade Bundle (for sale here), and have sold just a handful.
Over the years since our AUX addition, we have always had it in our mind to take it one step further. This would be bringing a full touch screen media system into the waterfall. We had seen other options available as we describe below, but none ever really seemed complete or polished. We did have a few ideas mapped out in our head on how to complete this, all super simple, but never got around to doing it.
A few weeks ago though, with some extra time on our hands, we decided to attack the upgrade. First lets recap available options:
- Stereo shop: It has been done a few times we can find on the web, and probably more not documented. Your local stereo shop can install a standard double-din radio screen. This would be the popular Pioneer and such, that come with smartphone connectivity. The problem here is the wiring. We all know the factory CD deck and infotainment screen are really hard wired in for the car functionality. Those two pieces of hardware almost always must be retained. They are either stuffed behind the dash, and then the stereo shop must start splicing into the factory wiring to get the stereo to work. This is more a job if you are equipped with Premium sound as there are amps and more wiring integrations to address. Further, modifications must be done to the waterfall to get the stereo to fit and secure into the dash. We have seen these options $600-$1500 easily. The head units alone would $500+ and then the amount of work and customization to be done will not come cheap. Also risky if you are working with a less experienced installer. Volvo wiring can easily become an issue if the wrong wire is cut or crossed, sending you to the dealer for an expensive fix.
- Piggyback the double-din. This was our option of choice. This is where you will purchase your own double din media system and then simply use the 3.5mm output from the stereo and plug that into your 2007+ factory aux port. The rest of the wiring is simple. Tap a constant power, and alt power and a ground. The stereo will feed the factory system, which will do the rest. The problem here is there are few stereos that have a 3.5mm output. We did find a Kenwood we liked that did though. From here you must still re-route the cd deck and infotainment screen, and further make a custom mounting bracket to hold the unit. This would be something that you could probably attack at home. We were going to experiment with this option, but the stereo alone would be $500+, and so we held off.
- The good old tape your screen over the current factory system. We’ve seen this done a few times. This is where someone buys a tablet of their choice, and puts some Velcro or double-sided tape on the back and sticks it over the factory screen. They just use the headphone jack to output to the factory aux input jack. No real customization, price is not bad, and it doesn’t look too bad, if you don’t mind wires hanging around in your cabin.
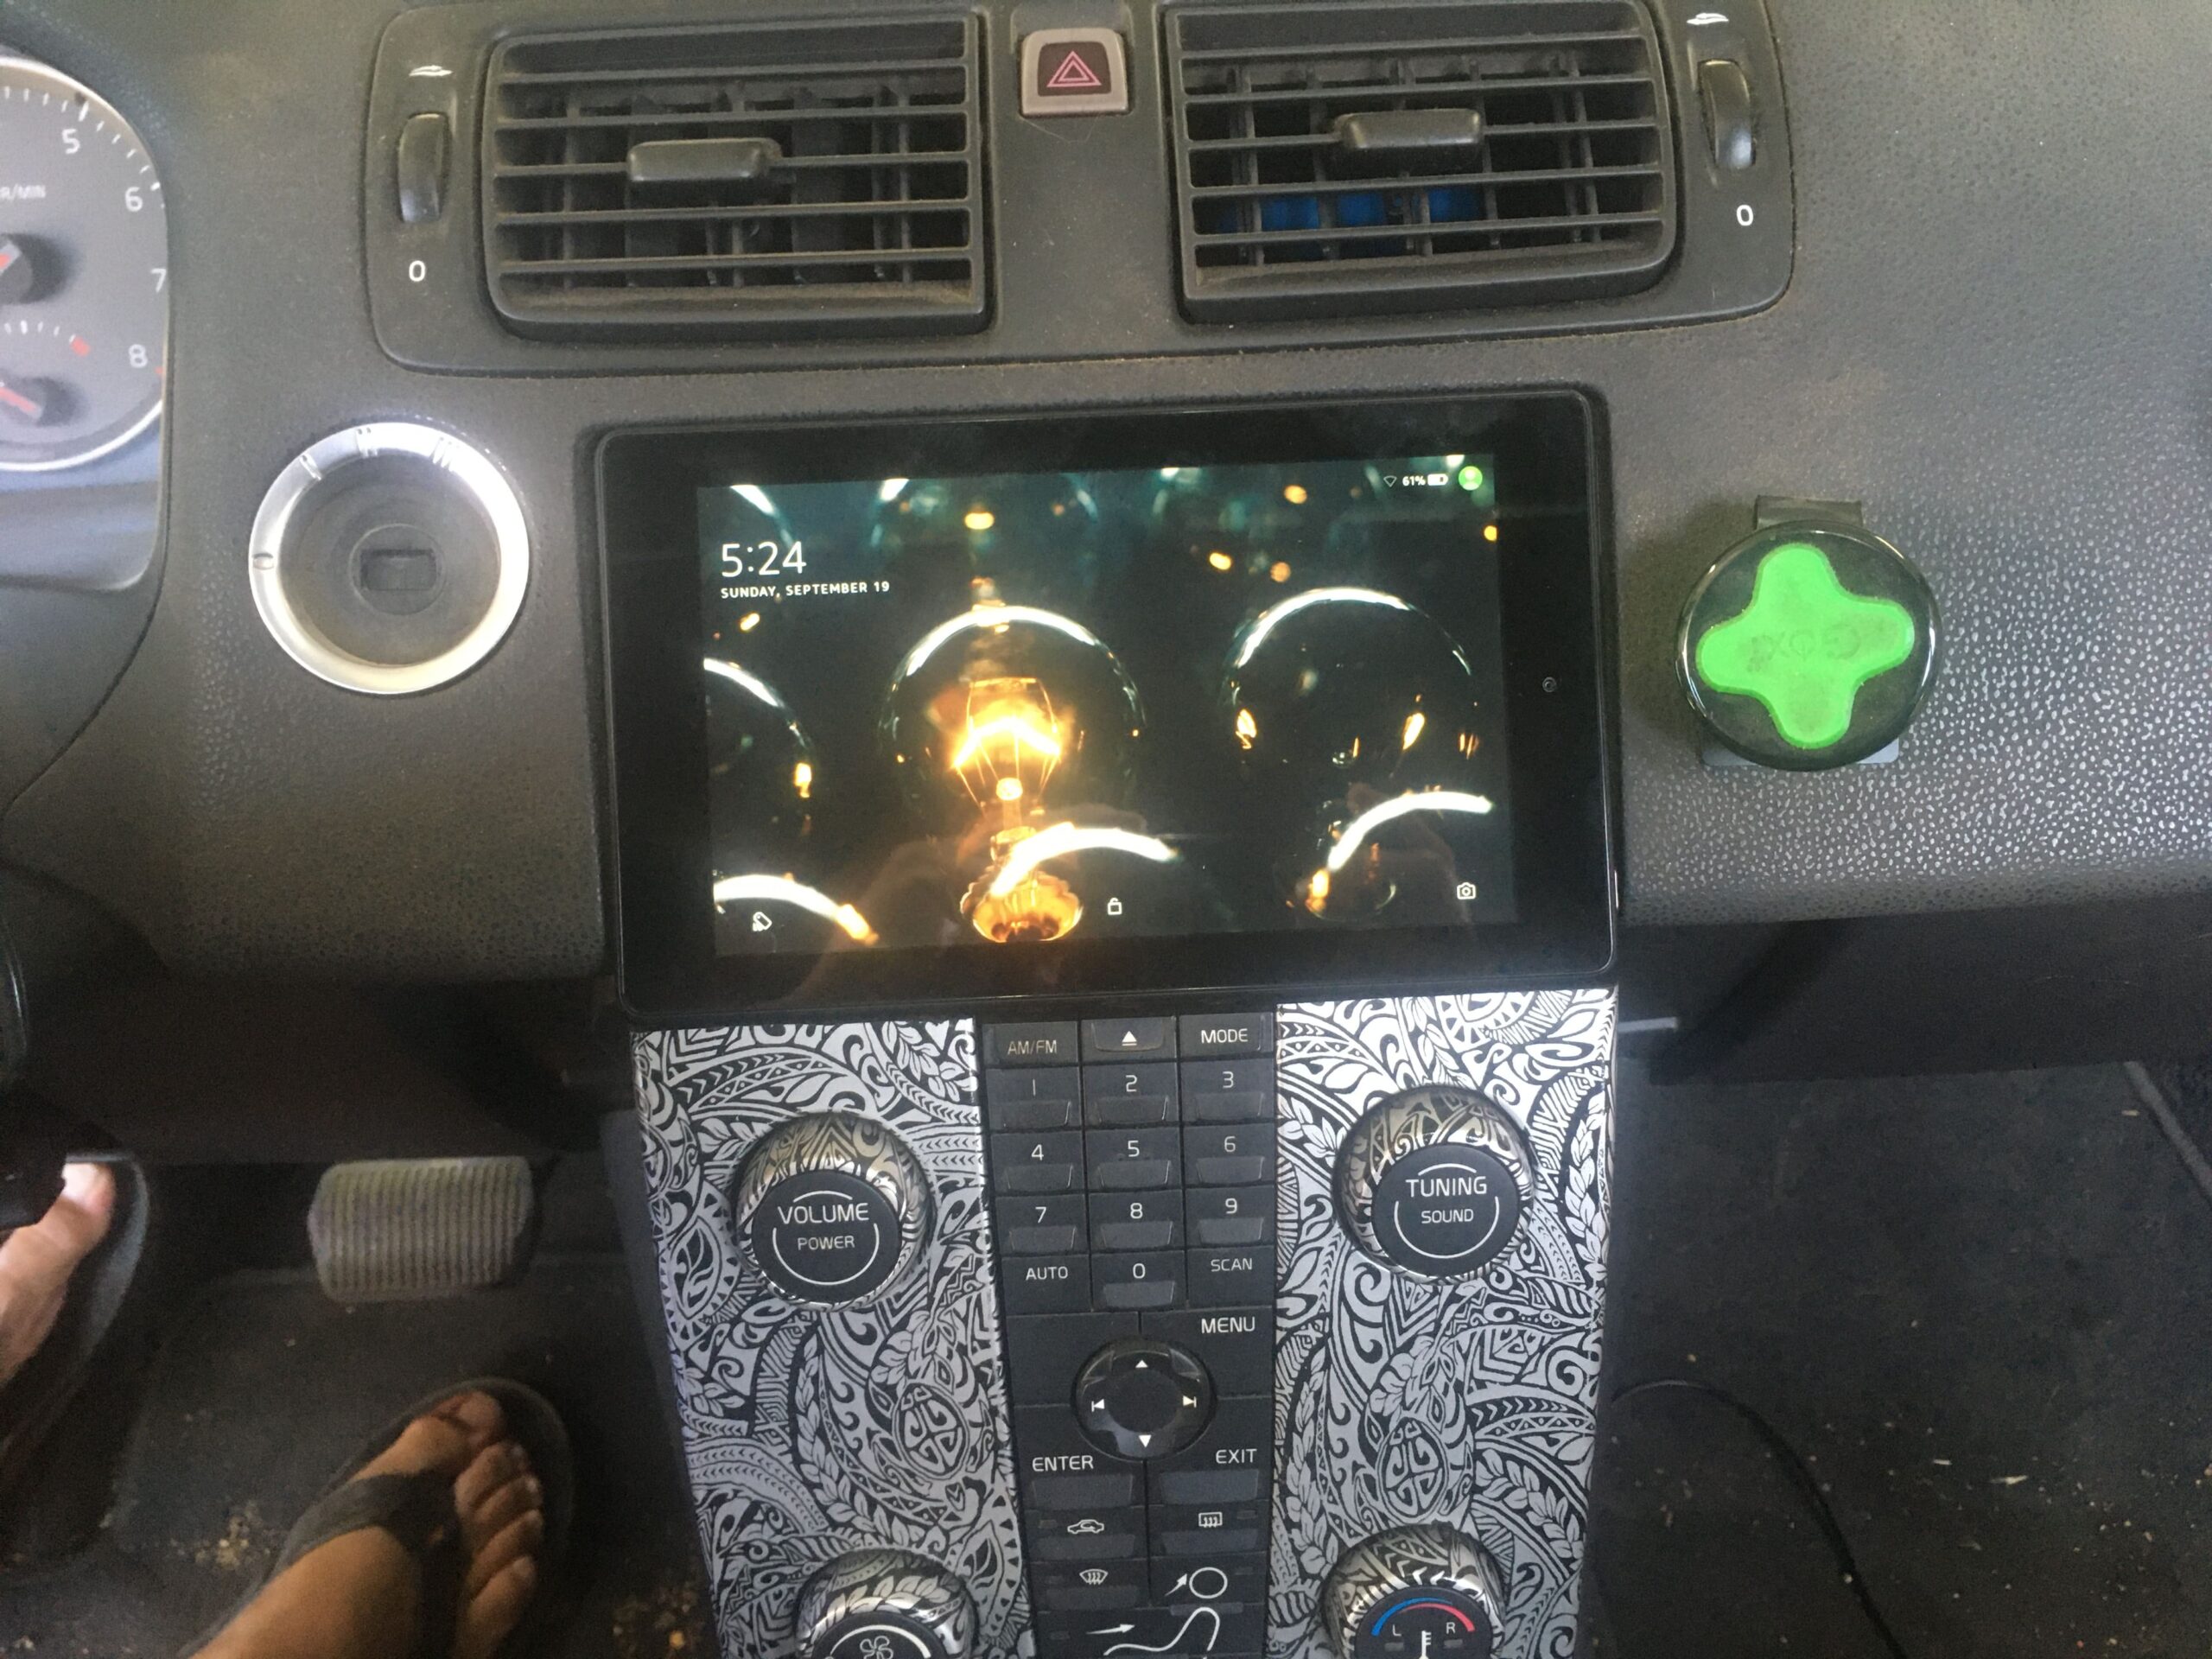
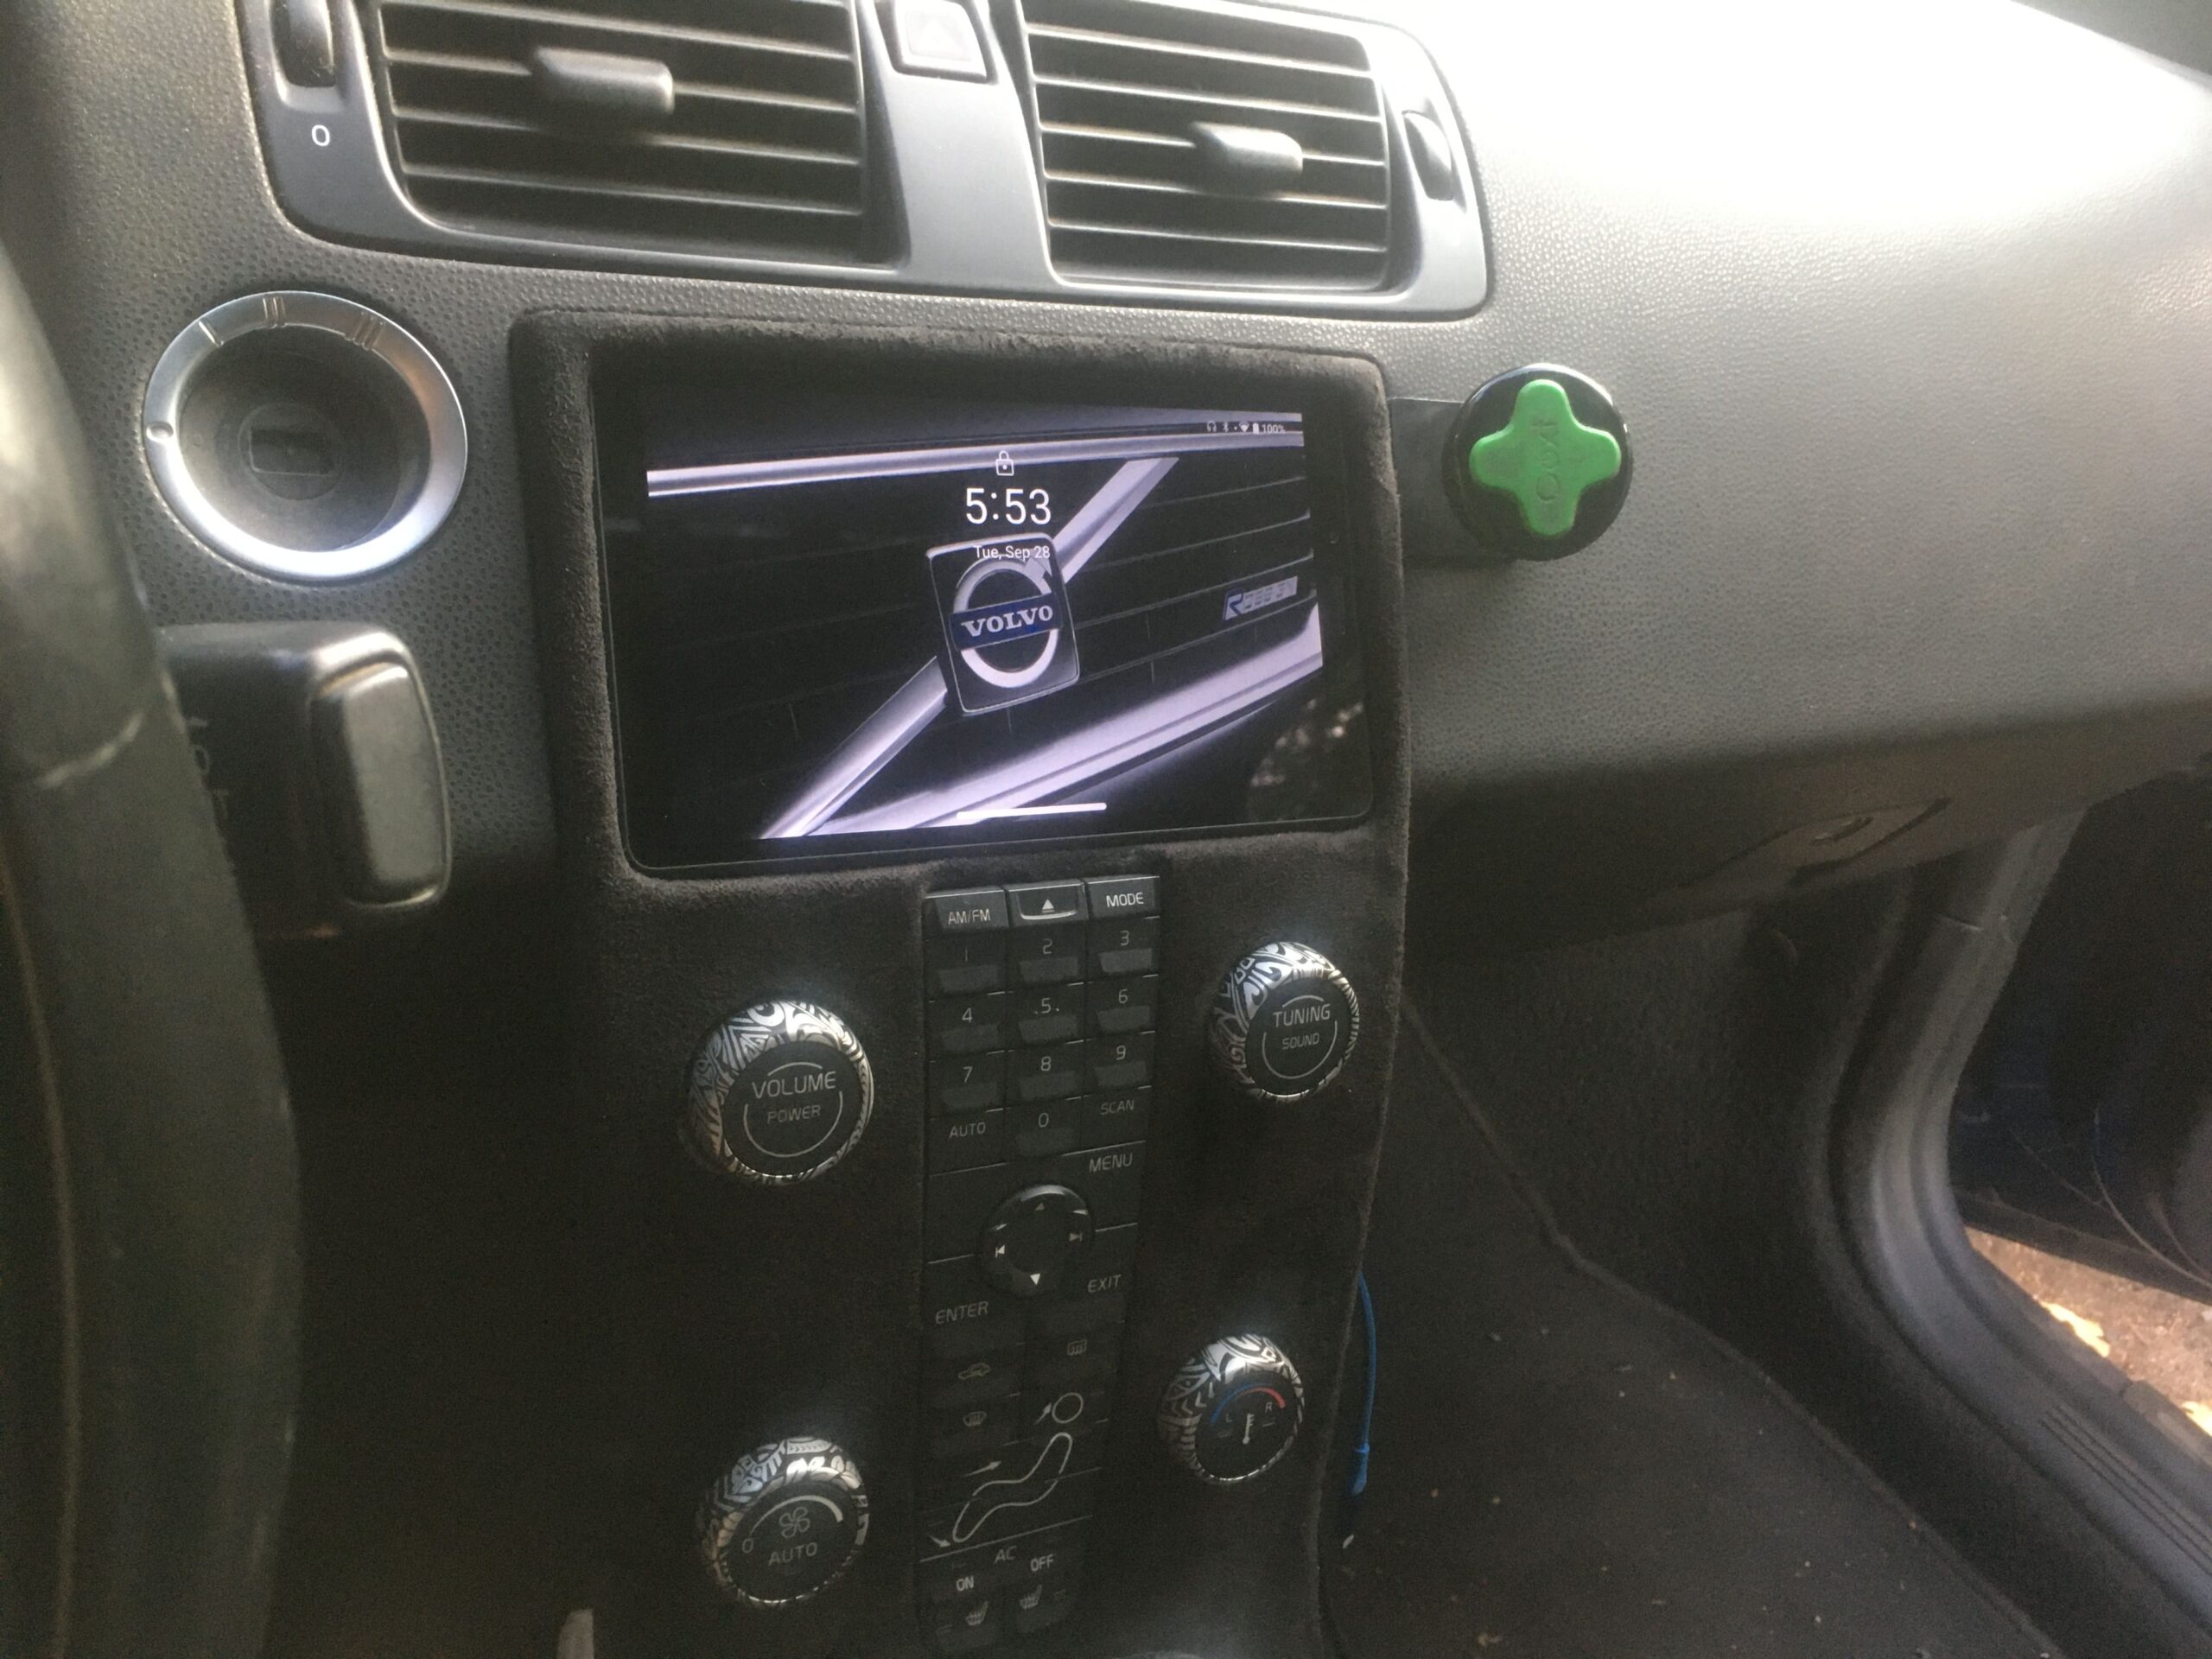
- The recessed and hard-wired tablet. This is the option we wanted to hit more recently, since the price point was less than $100, and if we botched it, we can revert to factory with a new junkyard waterfall for $20, and send the tablet back on return. This is also a piggy-back upgrade, meaning we are outputting sound from the tablet, to the factory aux input. Here we will also shave down the waterfall opening to custom fit the screen. Further we will run all 3.5mm cables behind the dash, and even tap power to have a power source, not a power cable running to your 12V plug behind the shifter. The CD deck stays in place, and the infotainment screen stays in the same location, just flipped backwards.
Shopping List: Here is the hardware we went with:
Lenovo Tab M7 Generation 3: There are very few 7inch tablets on the market, and a name brand is more rare. We found the Amazon Fire 7, which we tried first. We installed Google Play and were able to get our apps, but the device was under powered. It was freezing and closing our apps. Further the screen size was a bit larger, and required we eliminate the top of the waterfall altogether. It didn’t look bad, but the tablet wasn’t up to spec.
We then settled on the Lenovo since it was android out of the box. The screen size was smaller, which means we were going to be able to keep a trim on the waterfall all the way around the screen, a more factory look. Also, the Lenovo has a built in GPS chip so this will come into play with map apps like Google Maps, Waze and such. Lenovo sells on their website here for $87. We however found it when it was $79, and then had BestBuy do a price match so we could have it locally next day.
128GB SanDisk Micro: We live in a dead zone, so cell service is limited. Even our phone running Pandora will stall out and buffer. This card will allow us to download all our Pandora library (stations, playlists, songs, albums…) to the device and run with or without service. Further, since we will use Google Maps, and again are limited in cell service, we have downloaded almost the entire state of California in the device. So even without service, the GPS chip will lay our location over our downloaded Google Maps. $22 on Amazon.
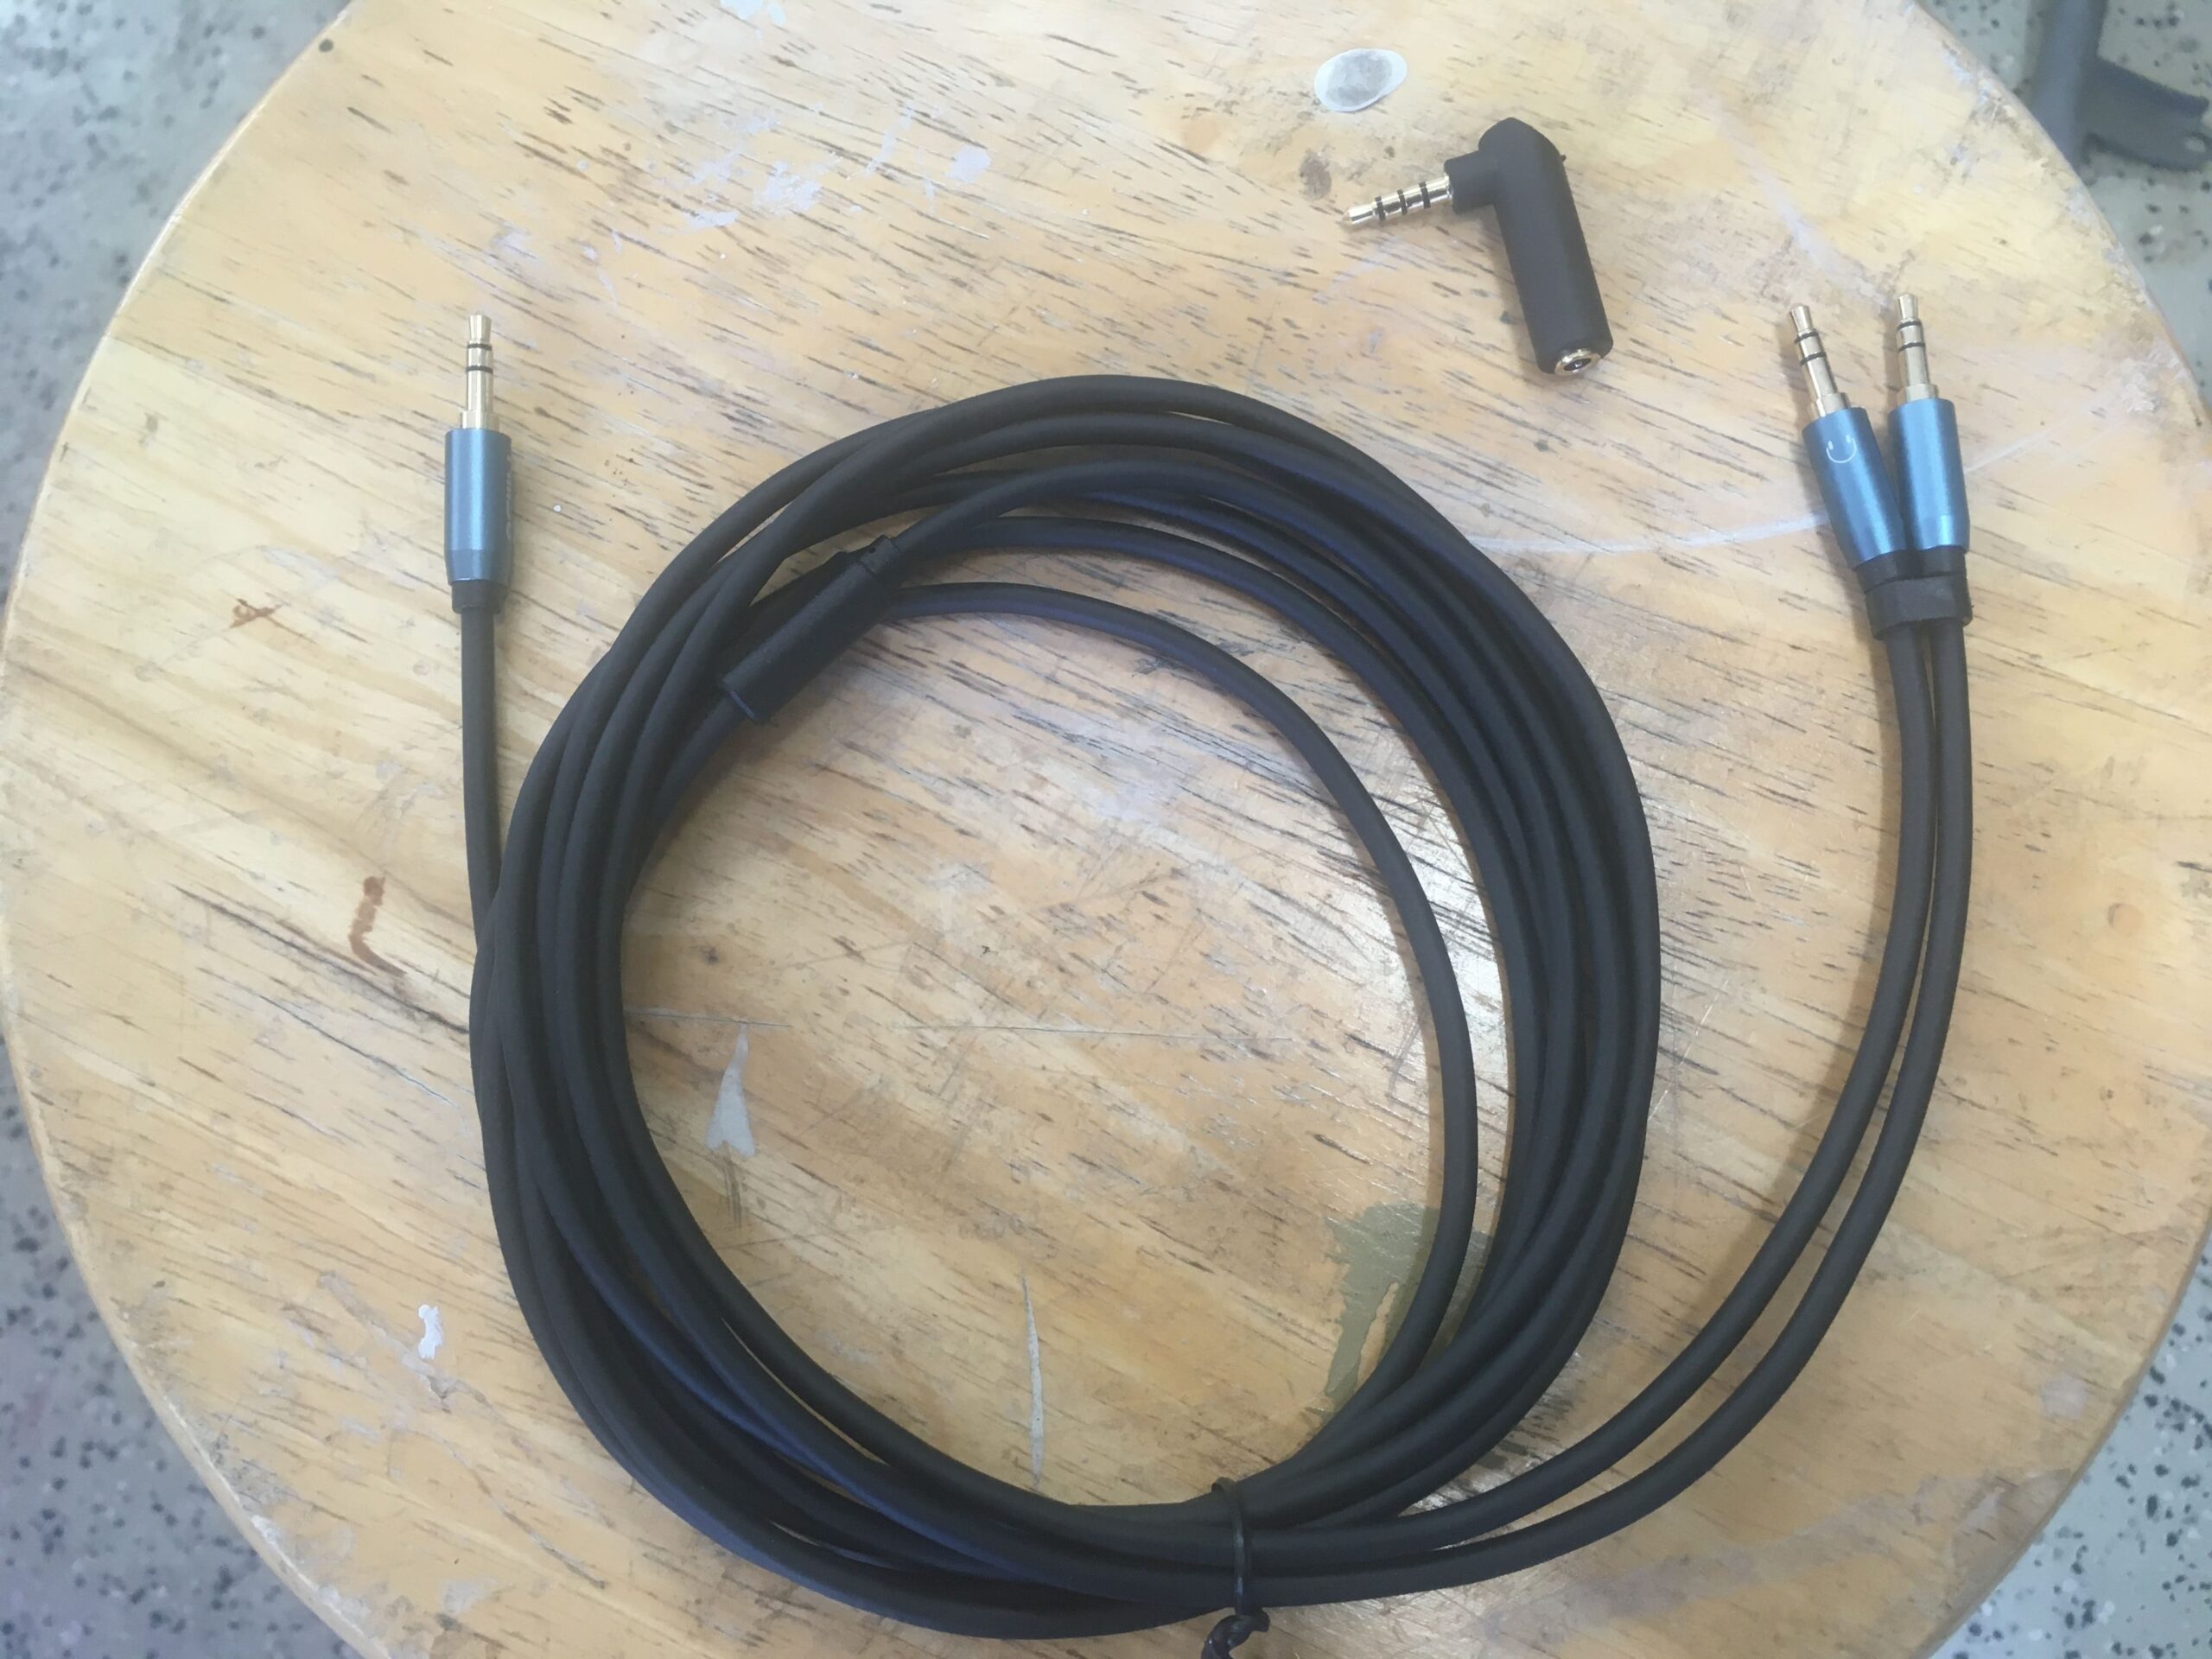
3.5mm Splitter: This is so we can input both the tablet and our iPhone at the same time. If someone calls, we pause the tunes, answer the call and the call then pumps through the car stereo, just as it does with the factory aux port. We got this on Amazon for $14.
The Wiring Explained
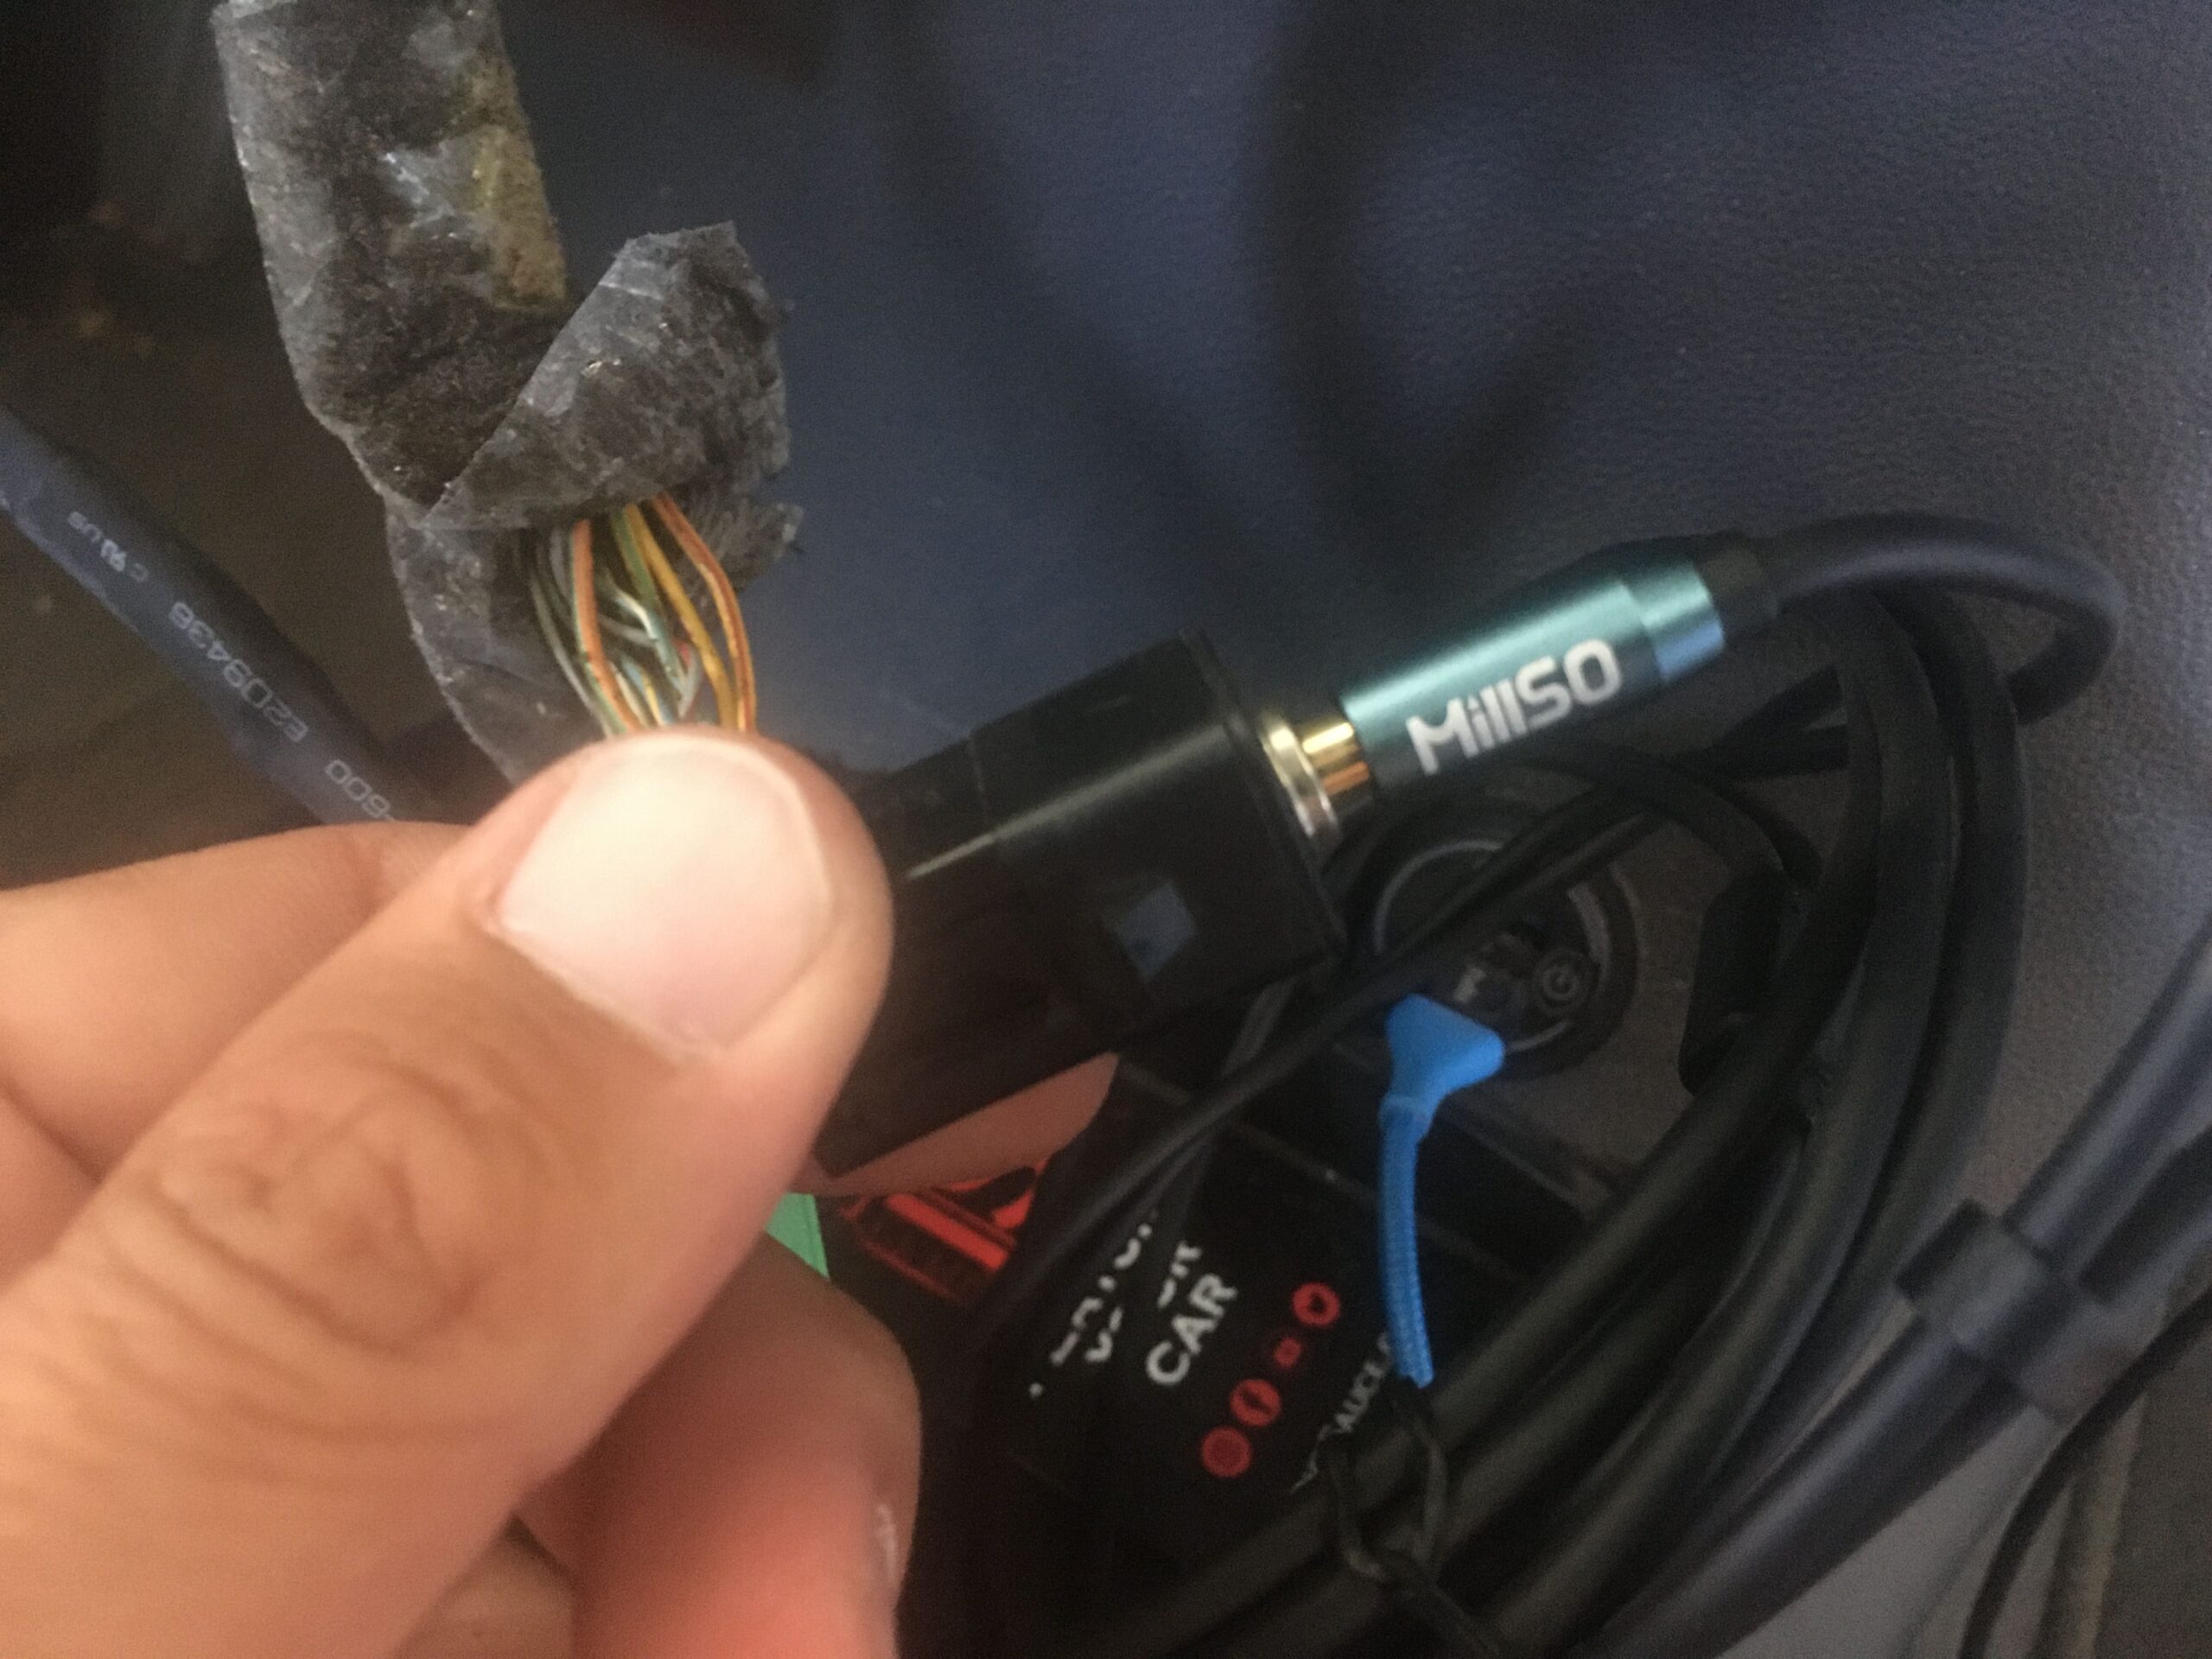
Sound is easy. The tablet outputs from the headphone jack, via a 3.5mm cable, into the factory CD deck aux input. We loaded up 6 discs, and still have that option too.
Power: We tapped the 12V plug behind the shifter with an inline fuse and USB charging port, which will let us have a behind the dash power source for our tablet and our phone…no ugly wires in view.
Making it fit. This is the fun part, and we documented step by step here. Essentially, you are going to be shaving down the waterfall opening, and removing a bit of the side (in the back) to allow for your USB connection and power cable to fish in. Here we go.
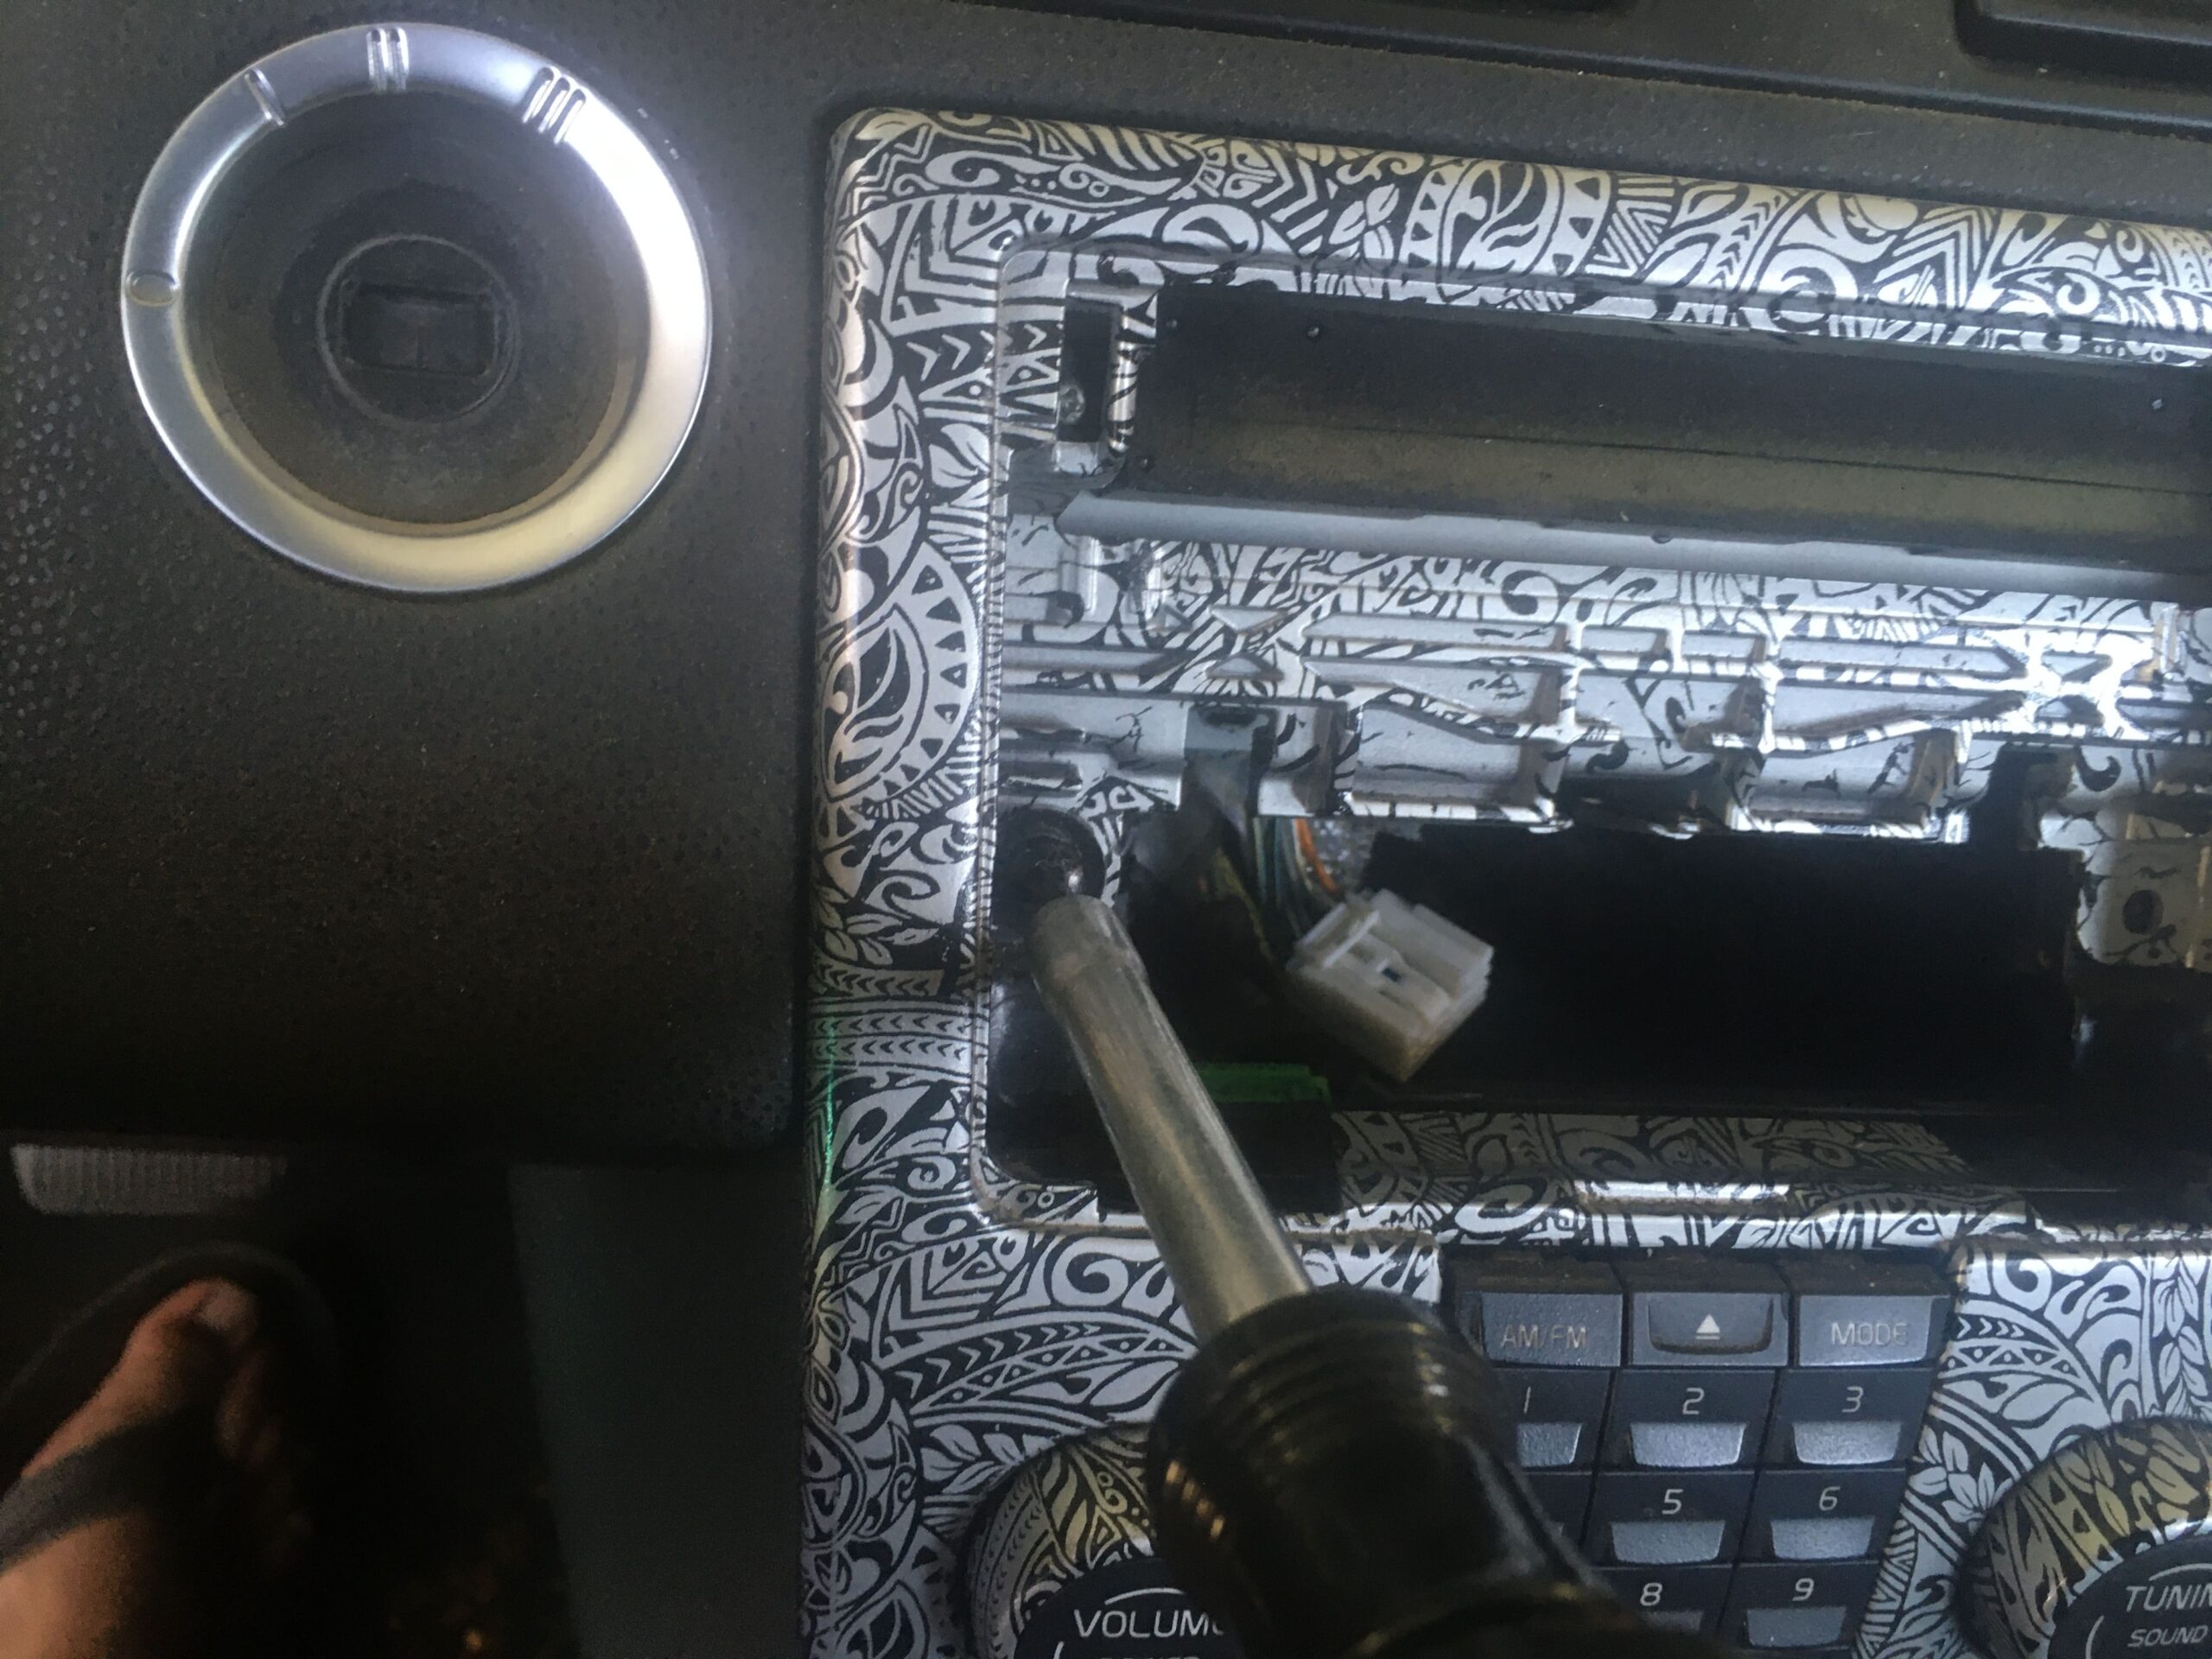
Remove the CD deck and screen trim. Flat head driver from the top and pry out. Pops off no issue.
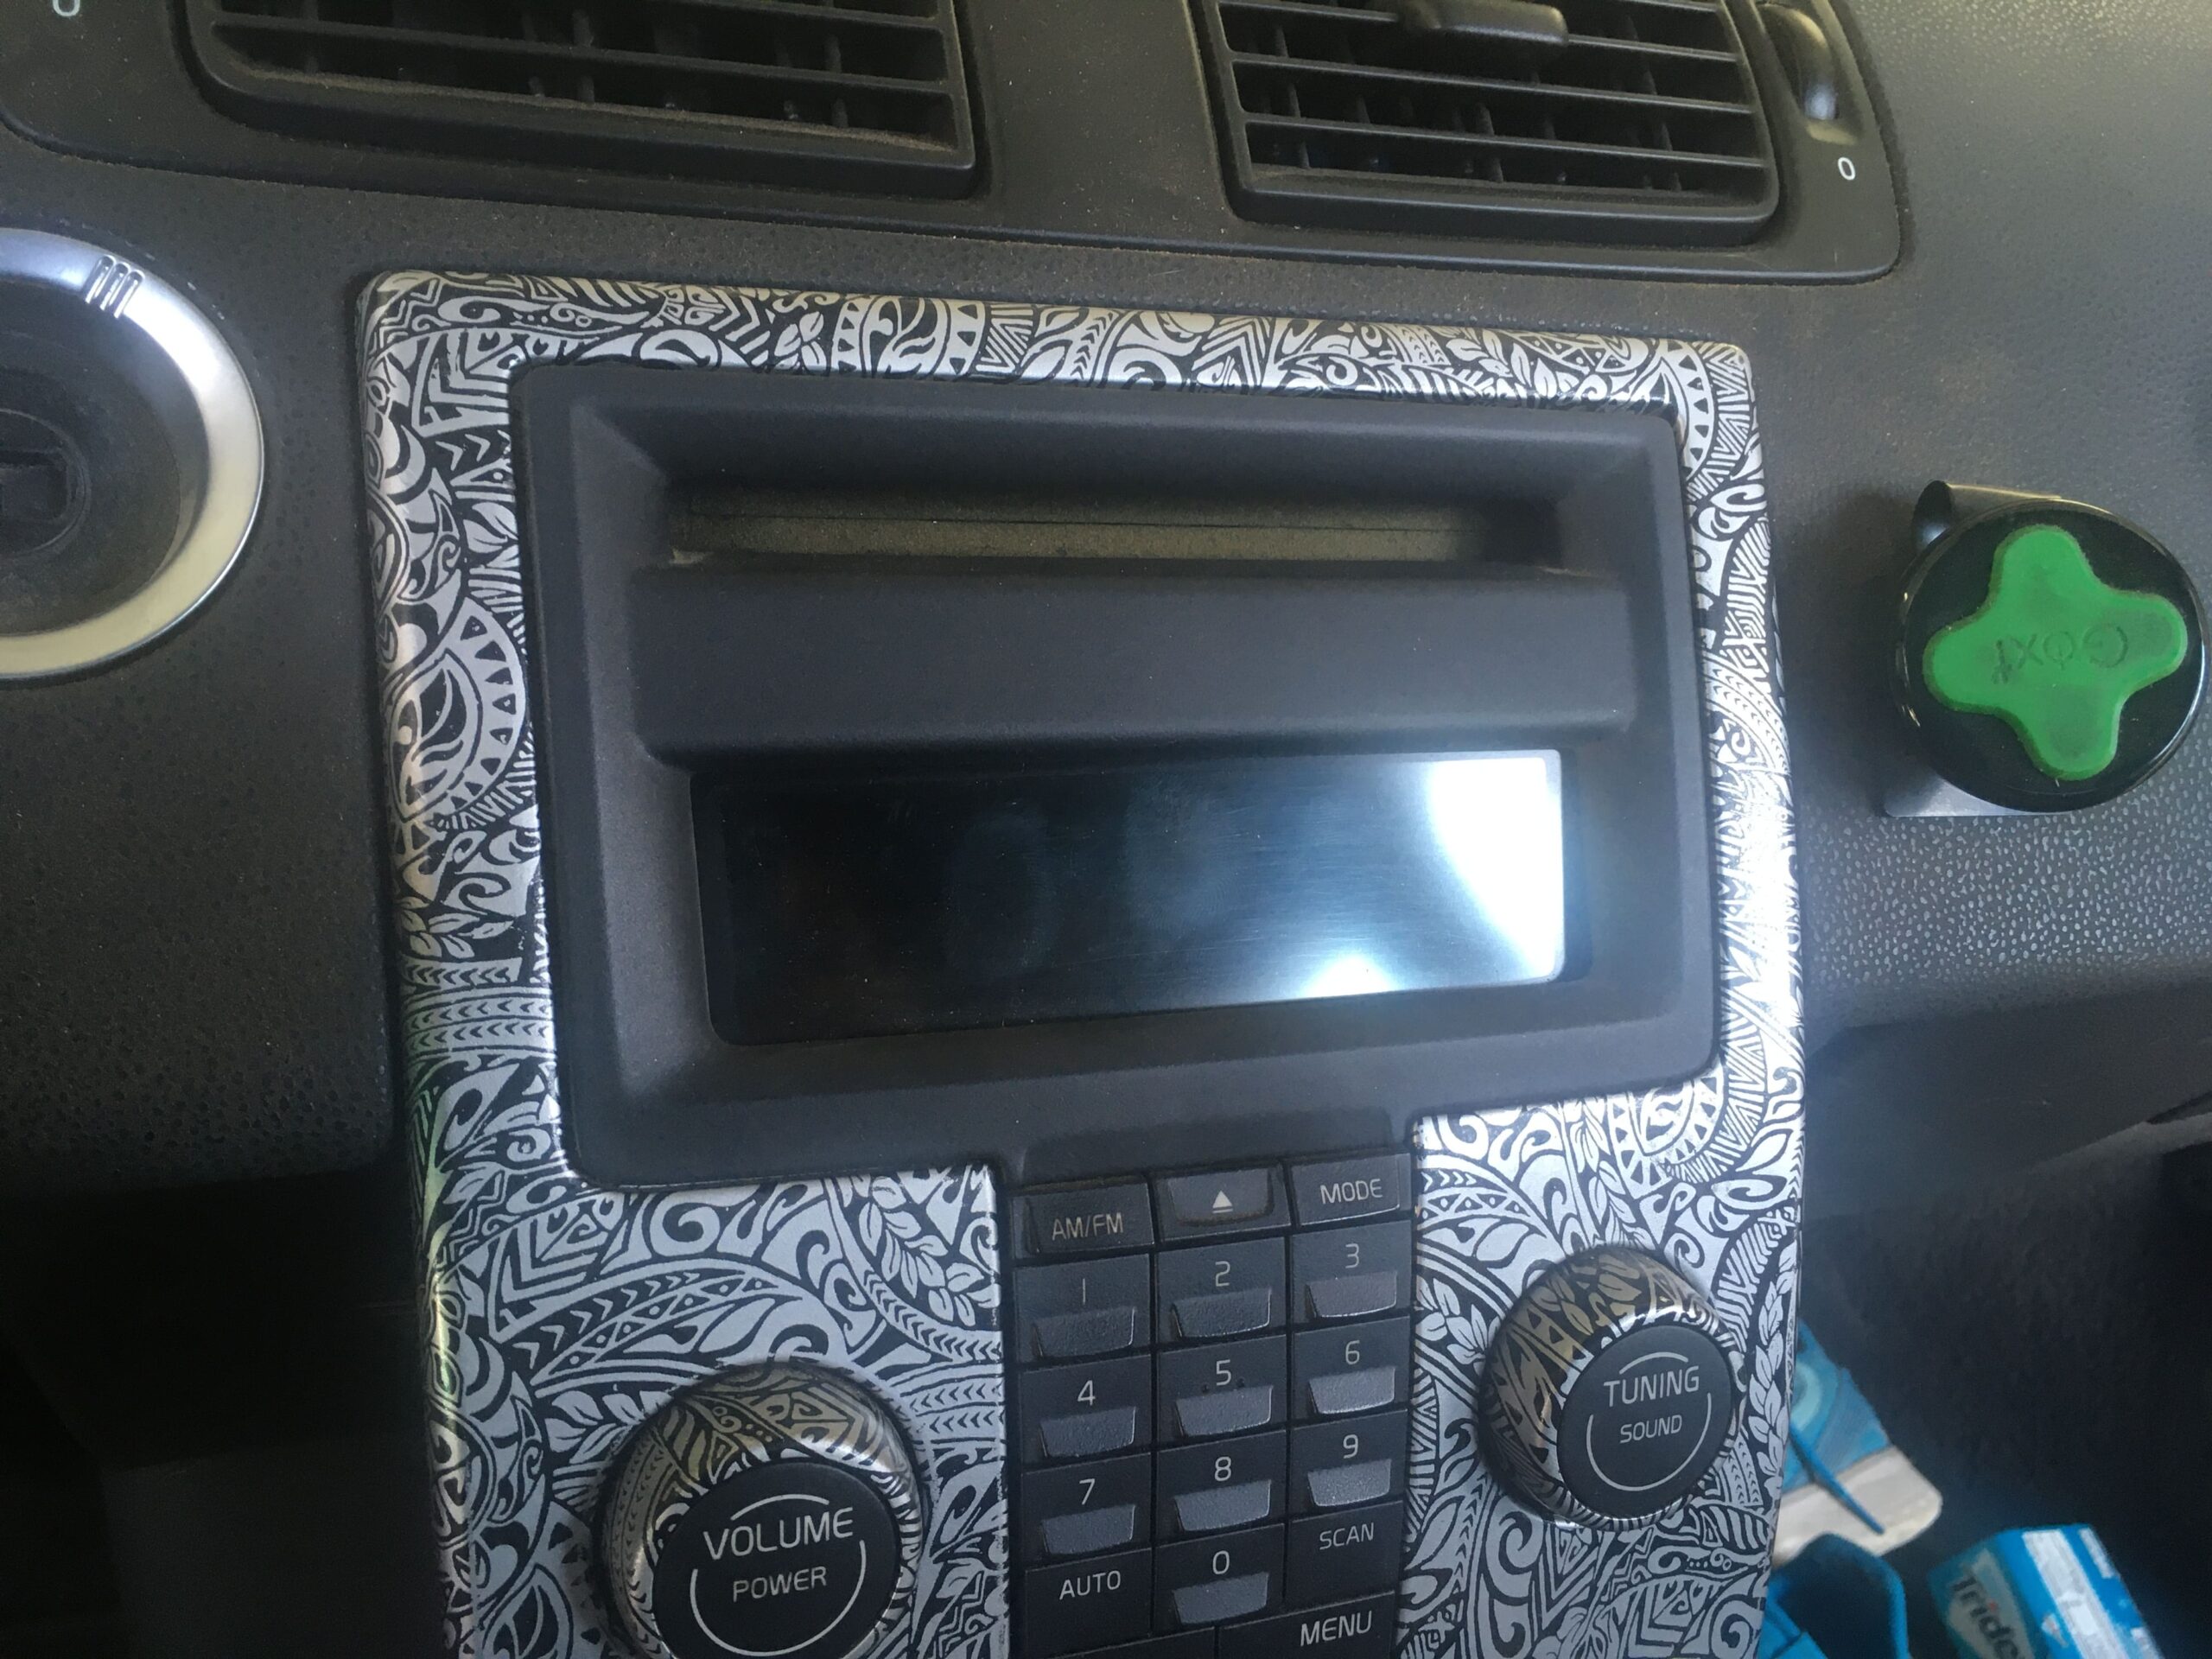
Now your infotainment screen is exposed which is held in by two push clips straight back.
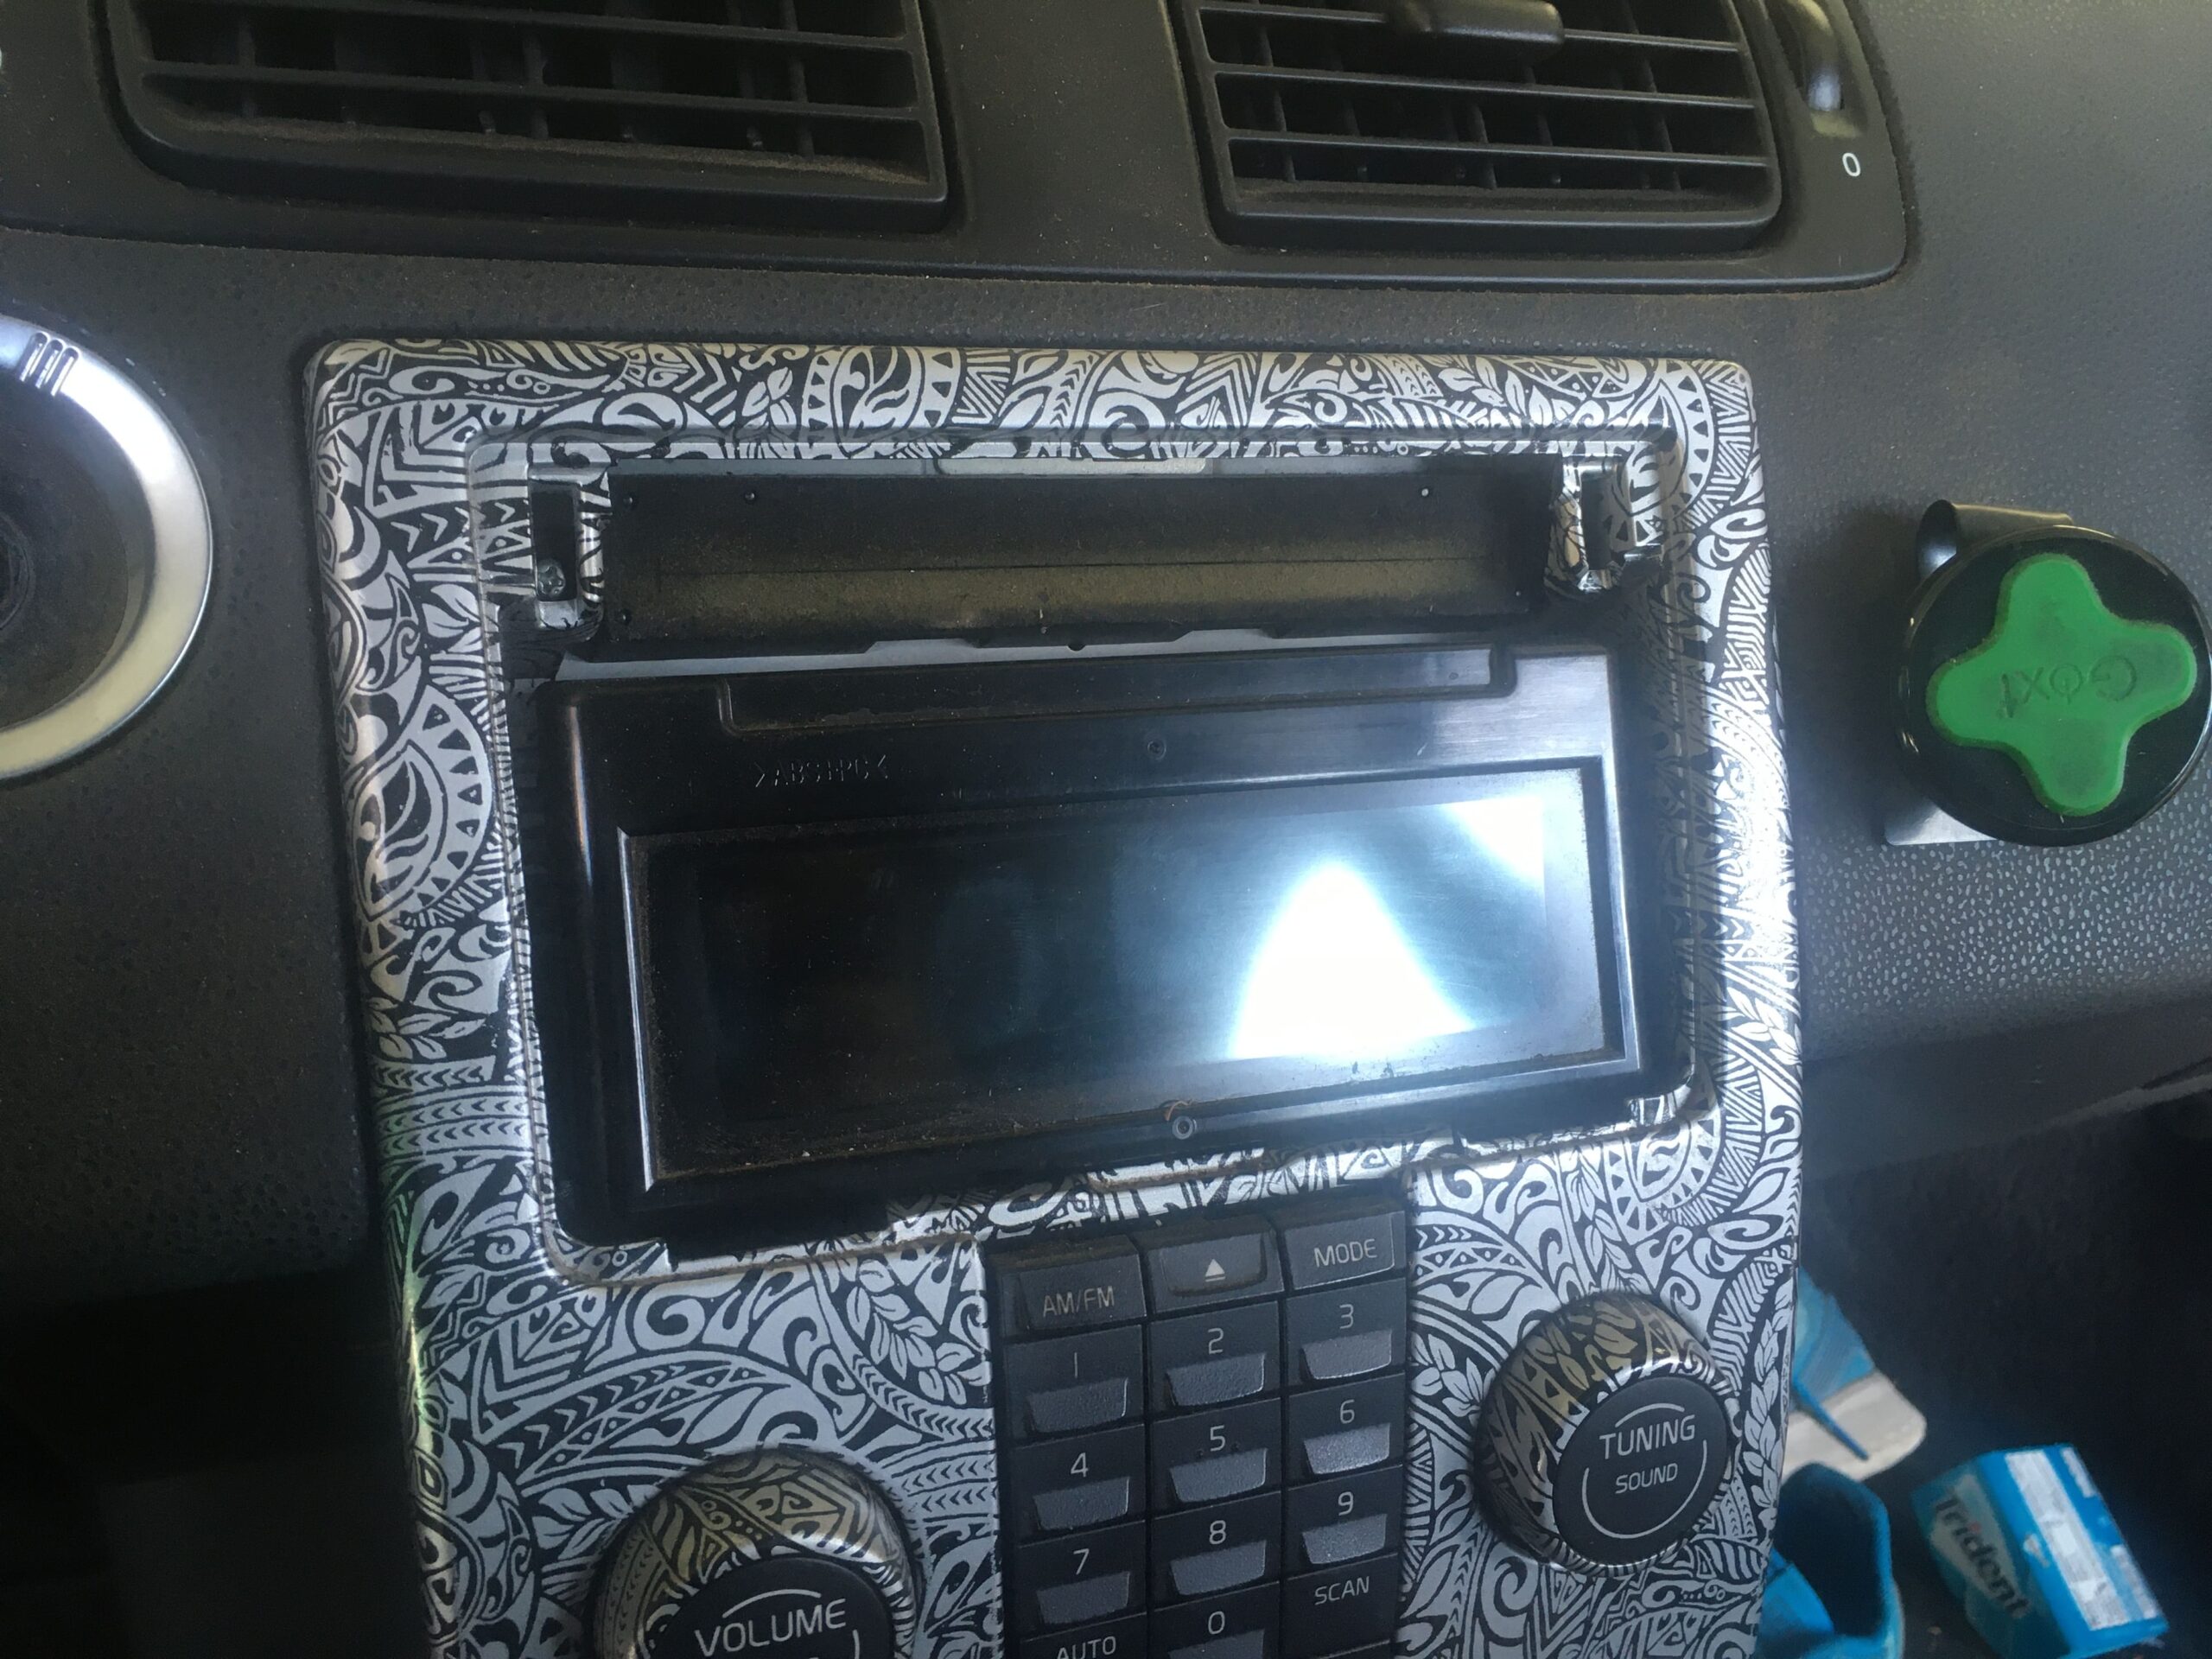
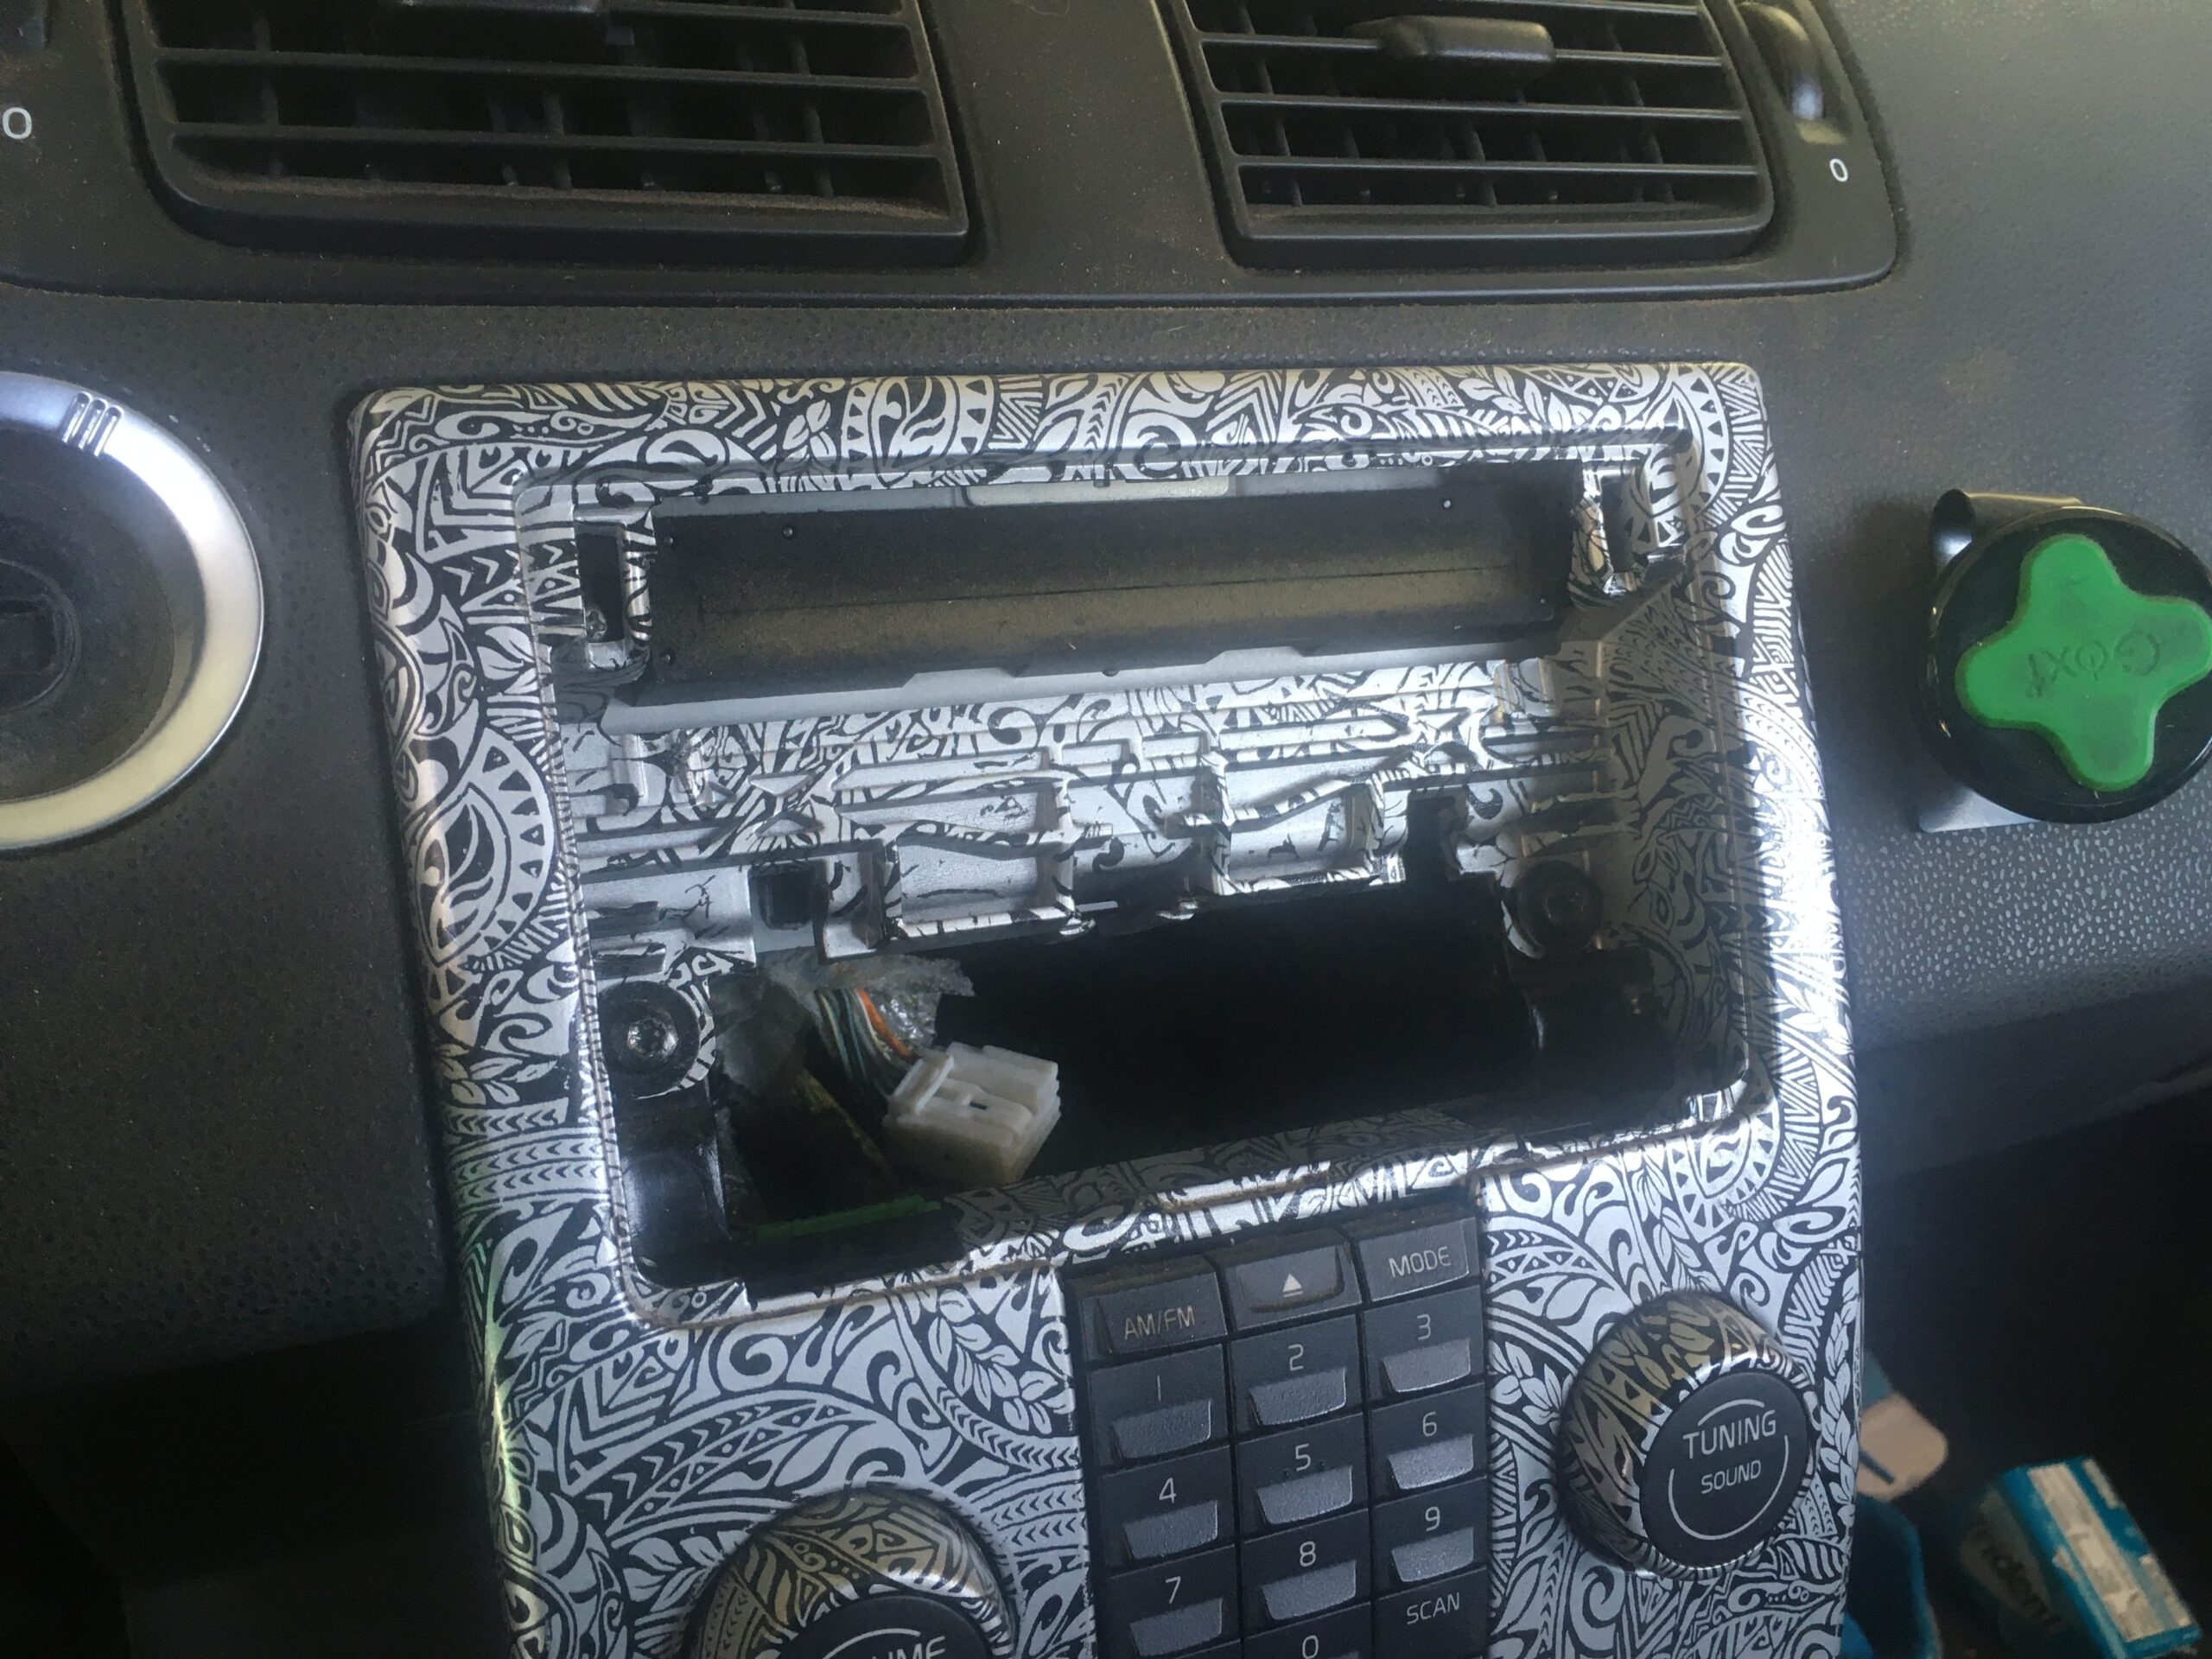
Grab the screen and wiggle and pull straight outwards to pop it out. Unplug the two harnesses, one is the wiring and the other the fiber optic cable harness.
There are 2 T25 torx screws holding the top of the waterfall in. Remove those.
Behind the shift knob, pop off the 12V port cover by pulling straight up. There you find the remaining 2 T25 torx screws holding the bottom of the waterfall in. Remove those.
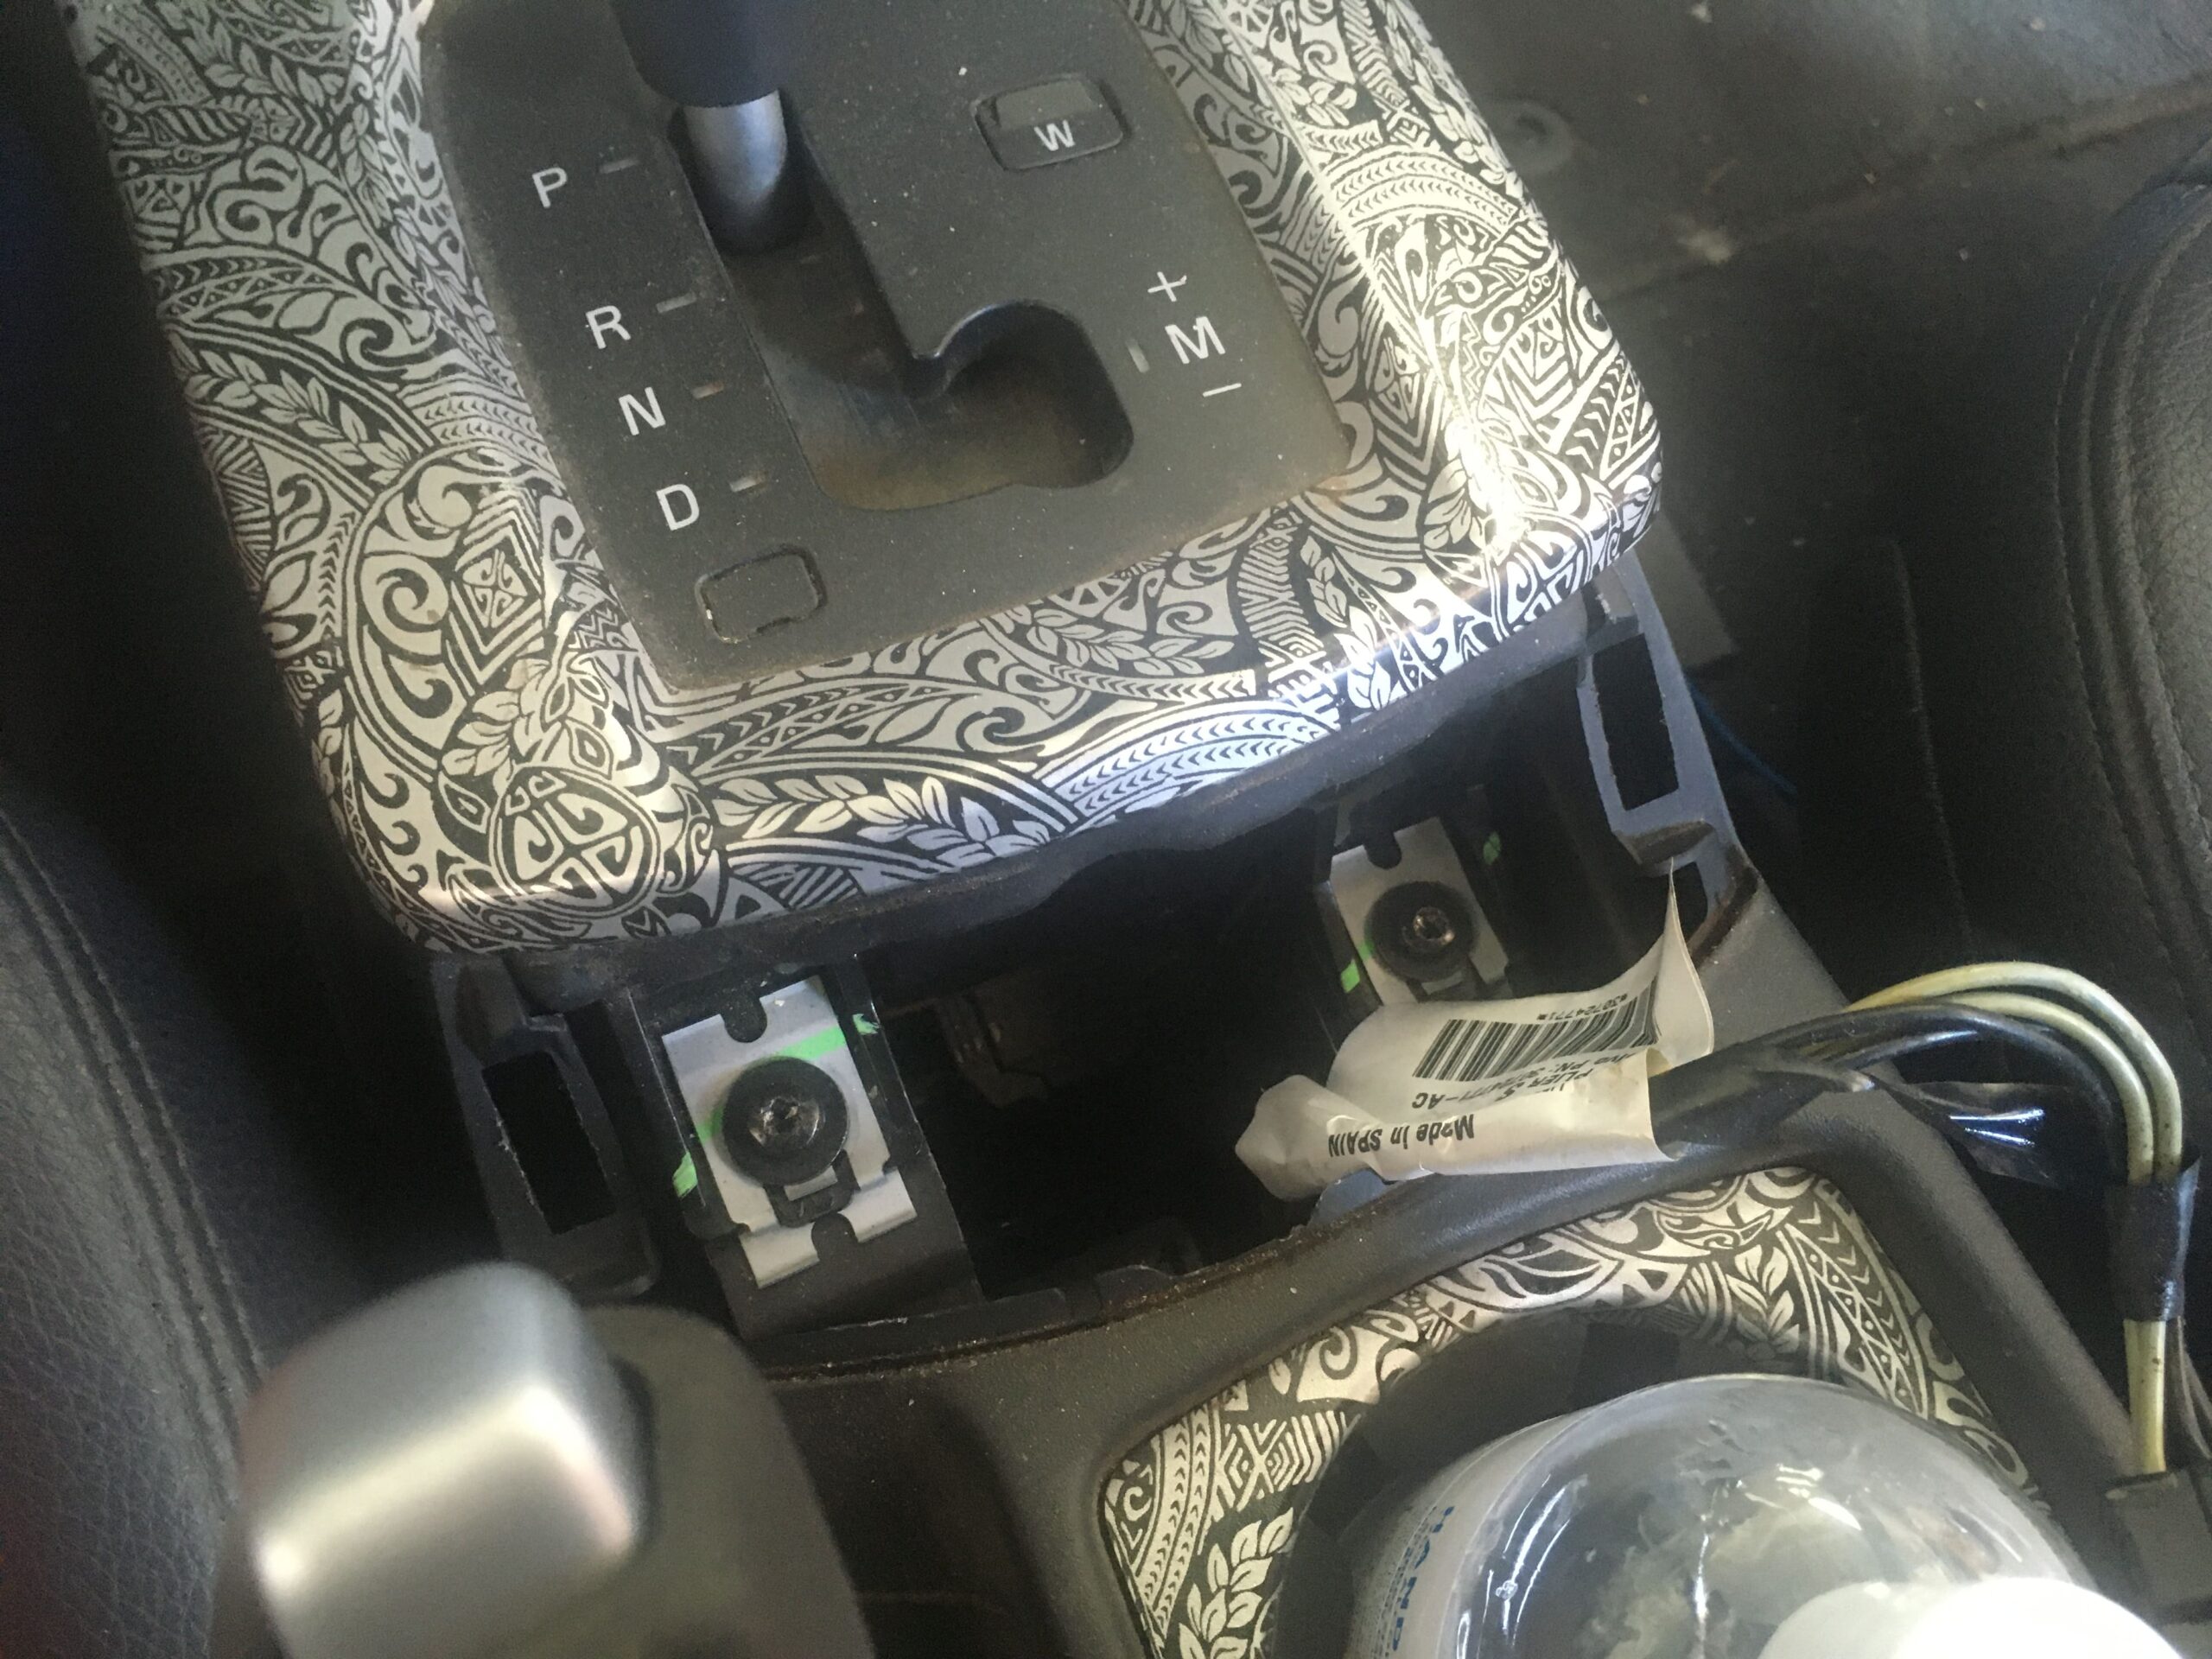
Now you can remove the green wire harness to the waterfall, releasing the entire assembly.
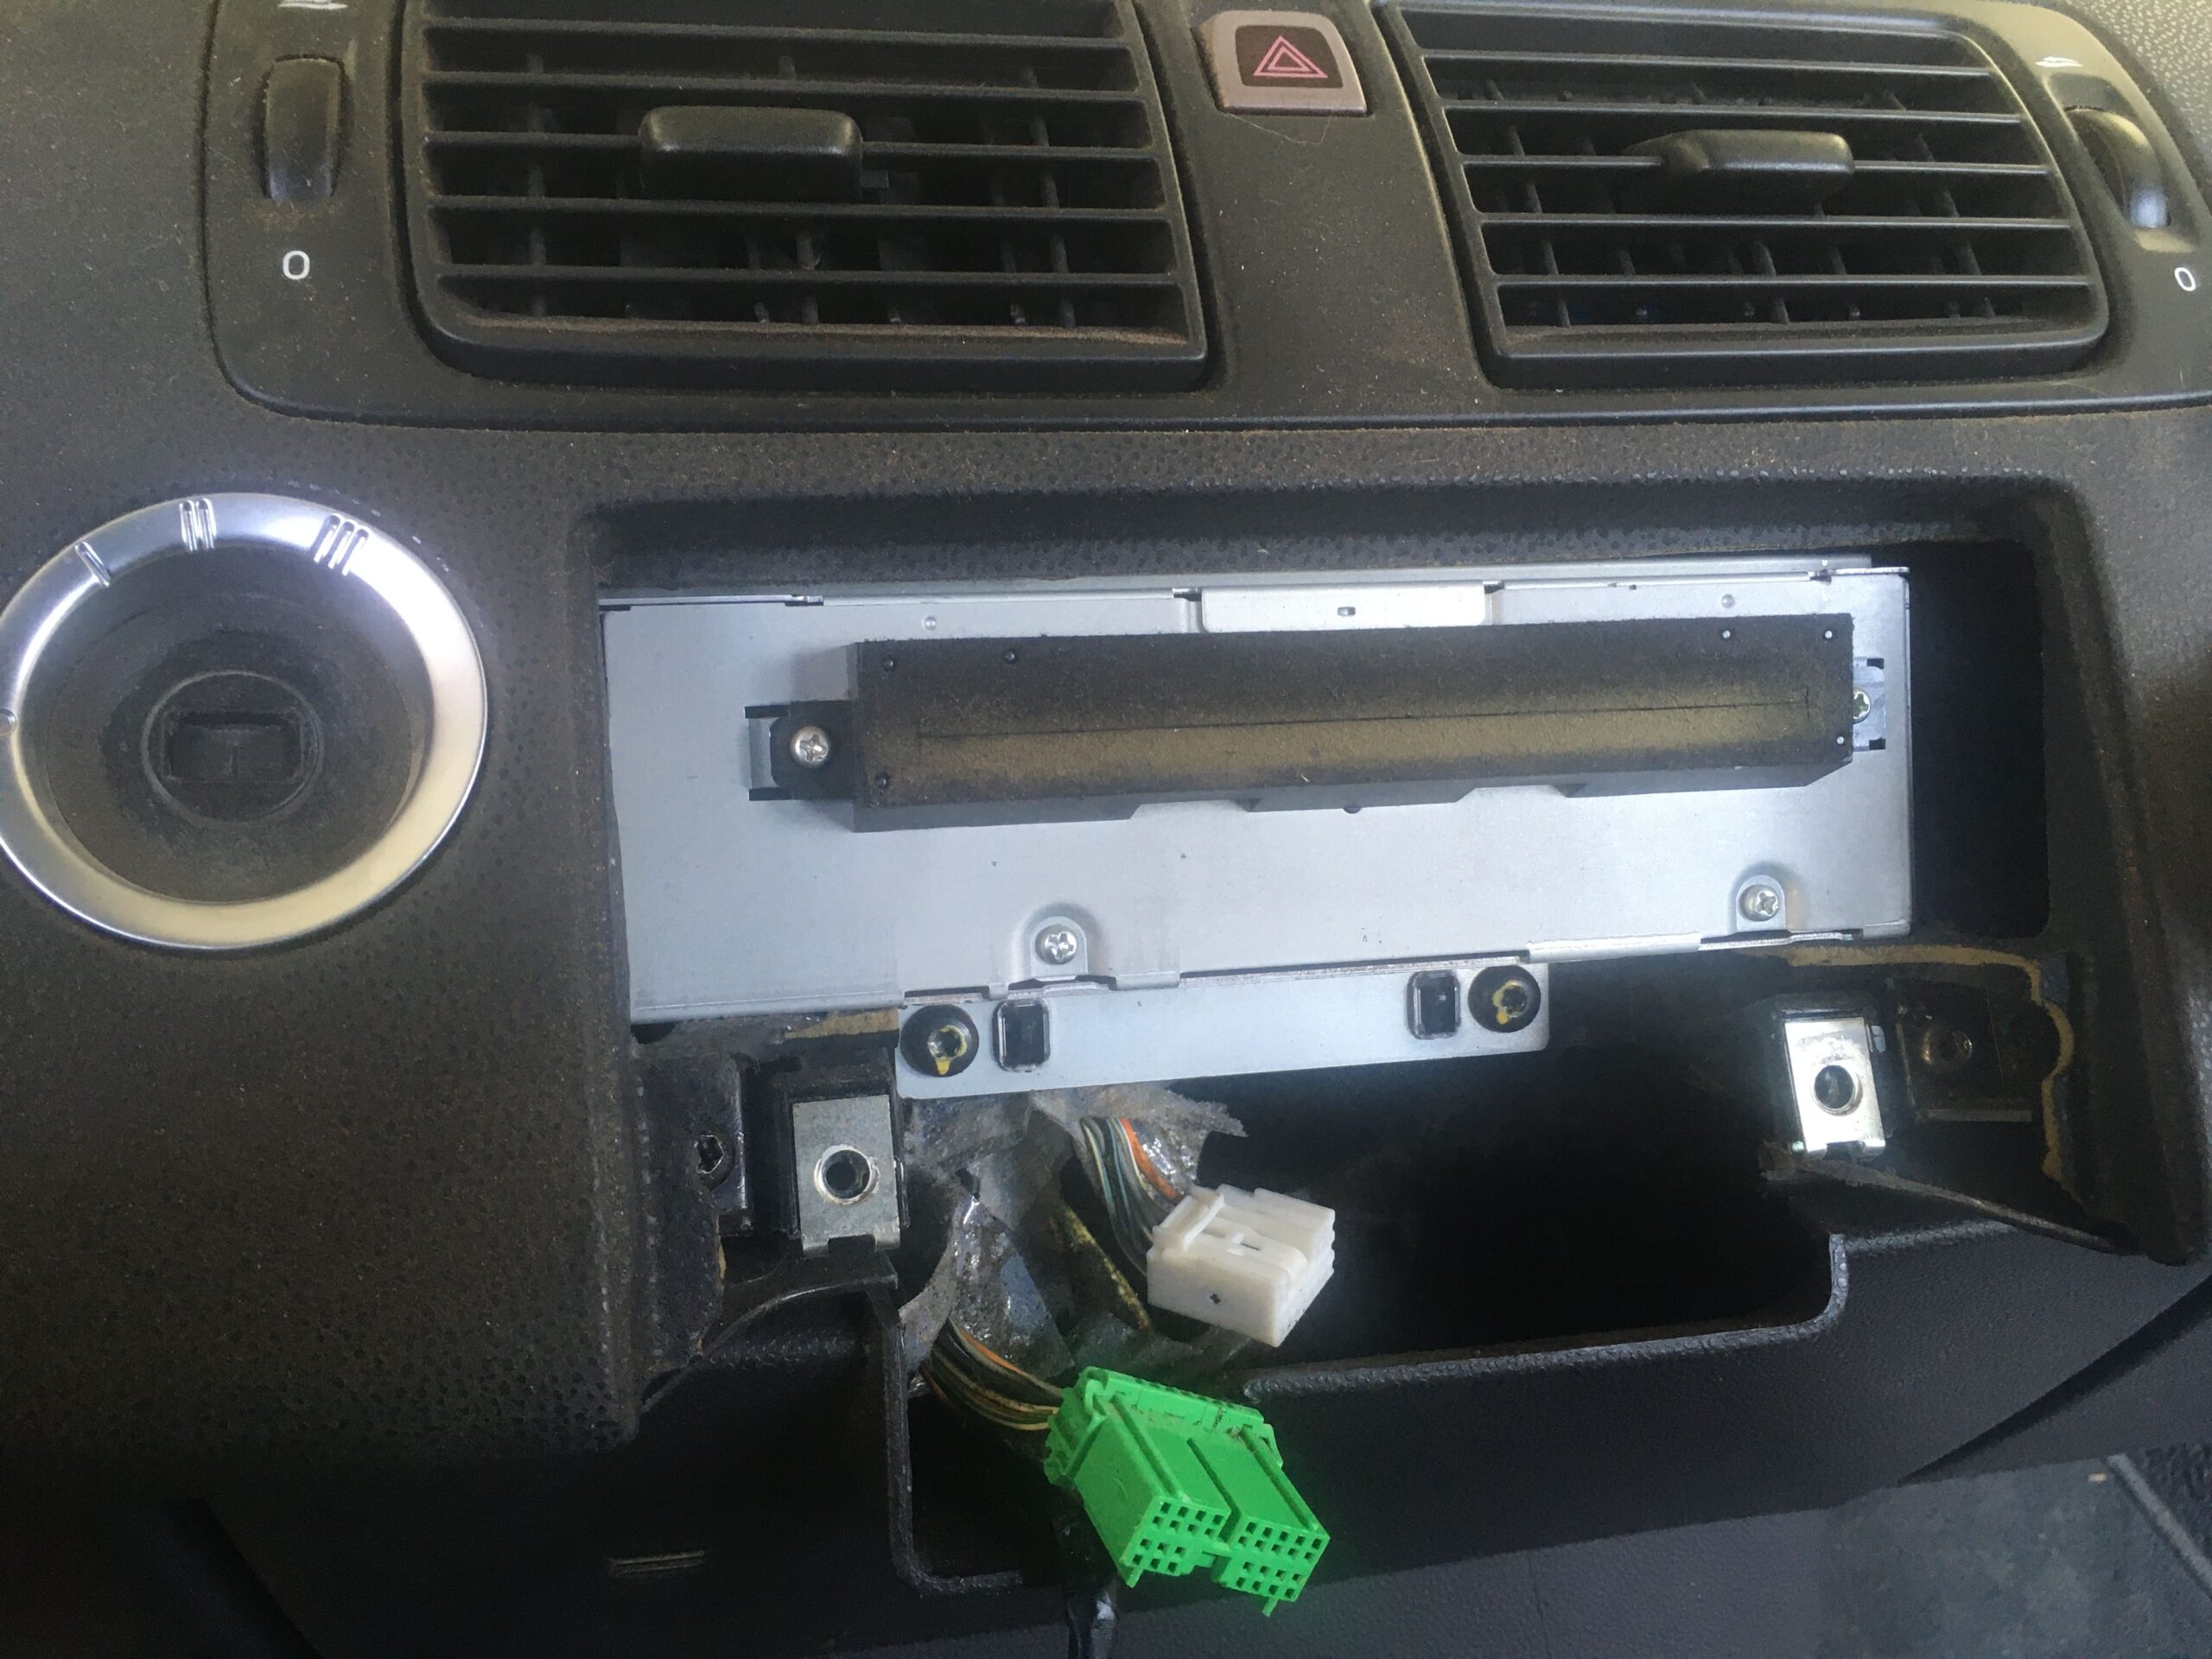
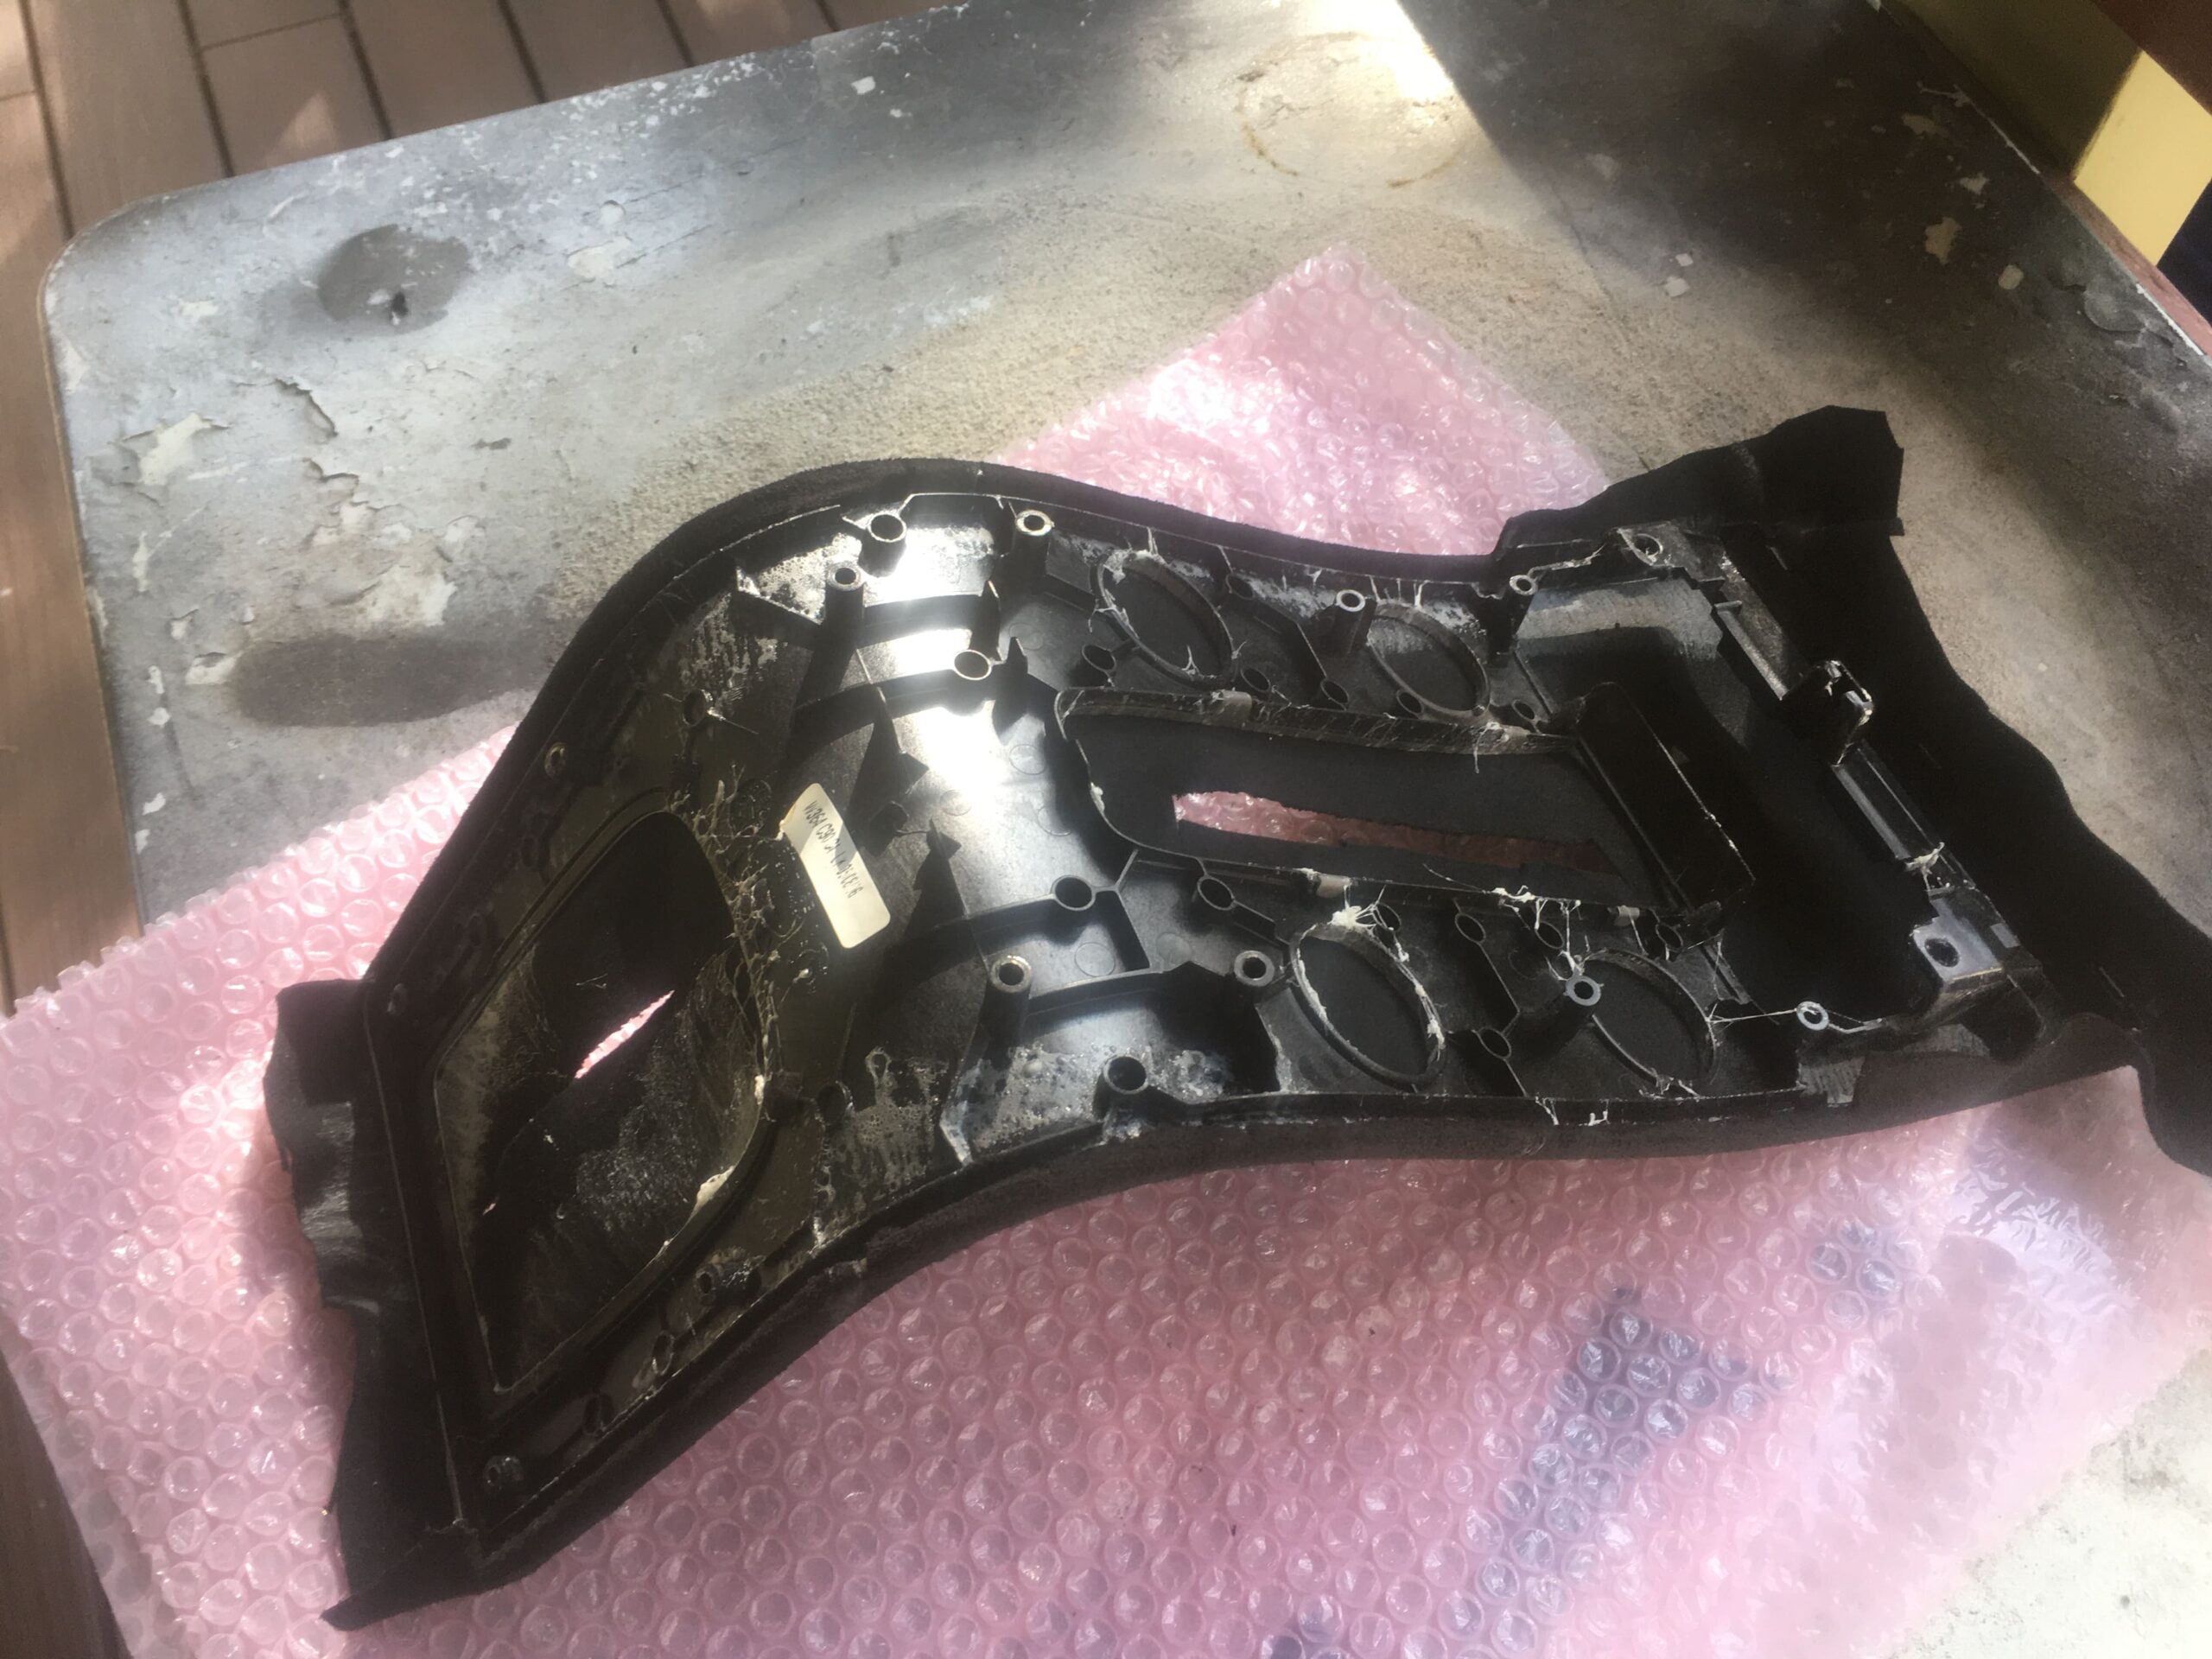
Now you will want to separate the waterfall into its three major pieces. Remove 8 T15 torx screws down the back of the waterfall and around the shifter opening.
Pull the back of the waterfall off and set it aside.
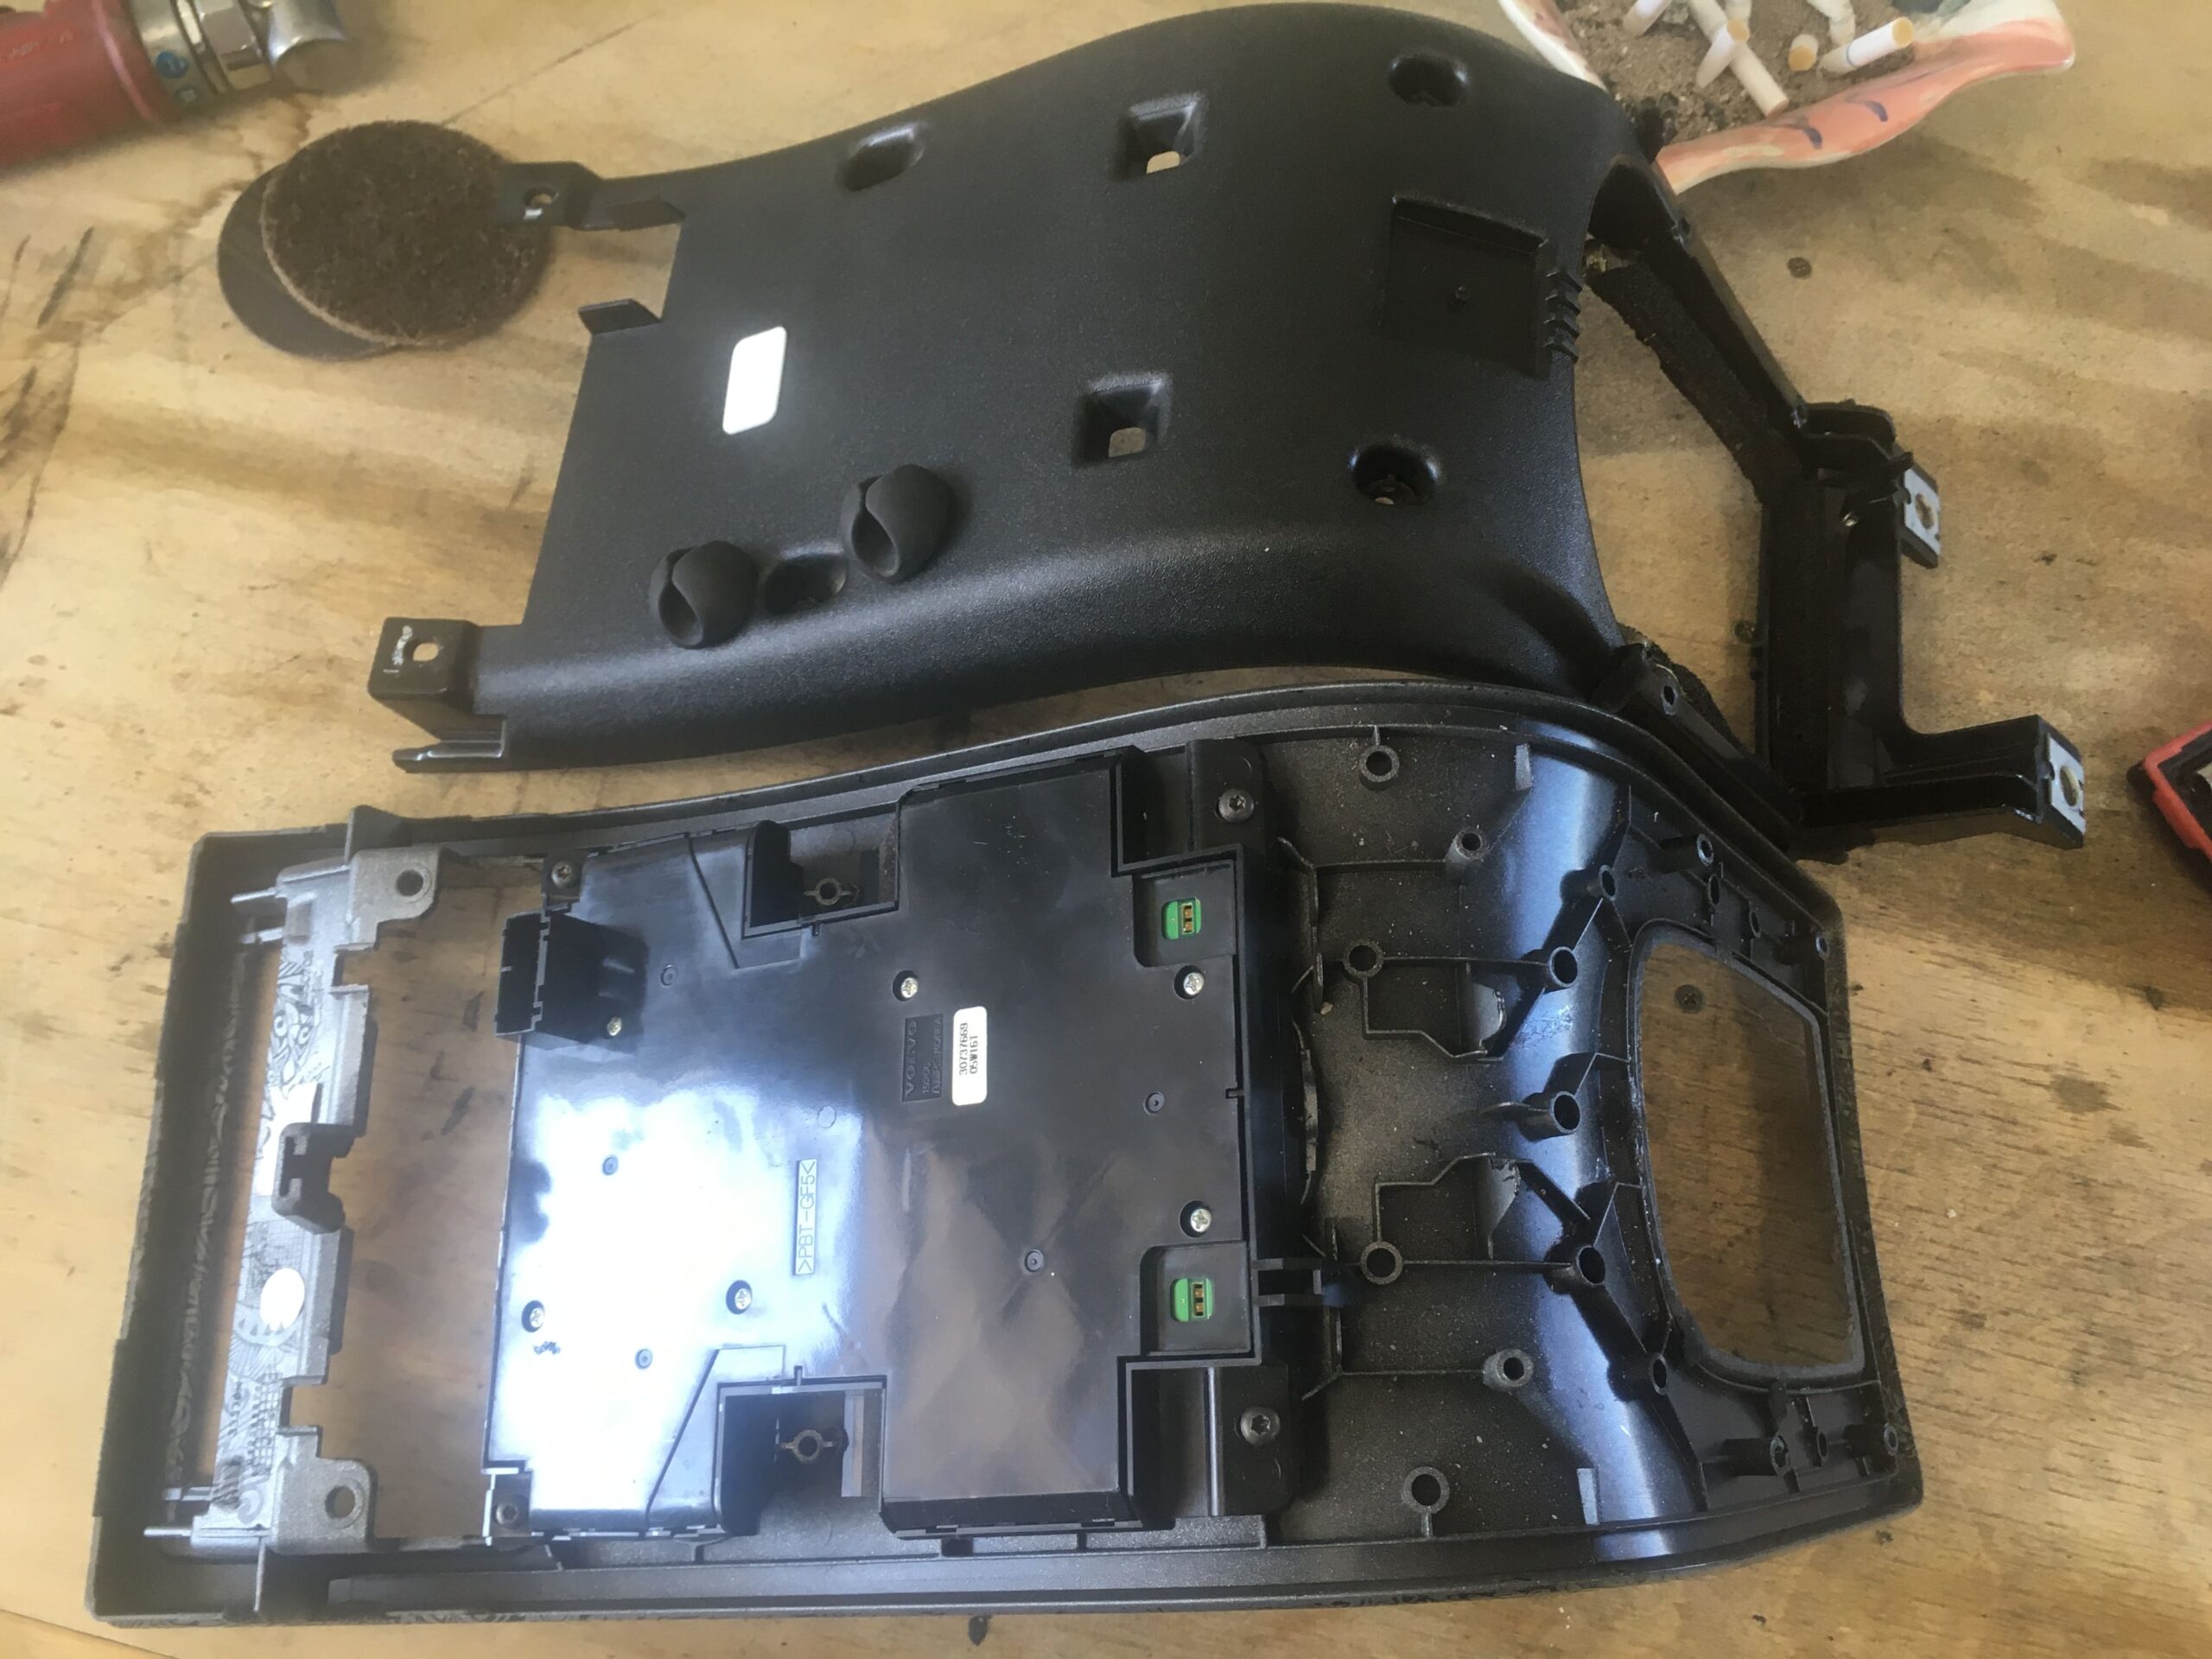
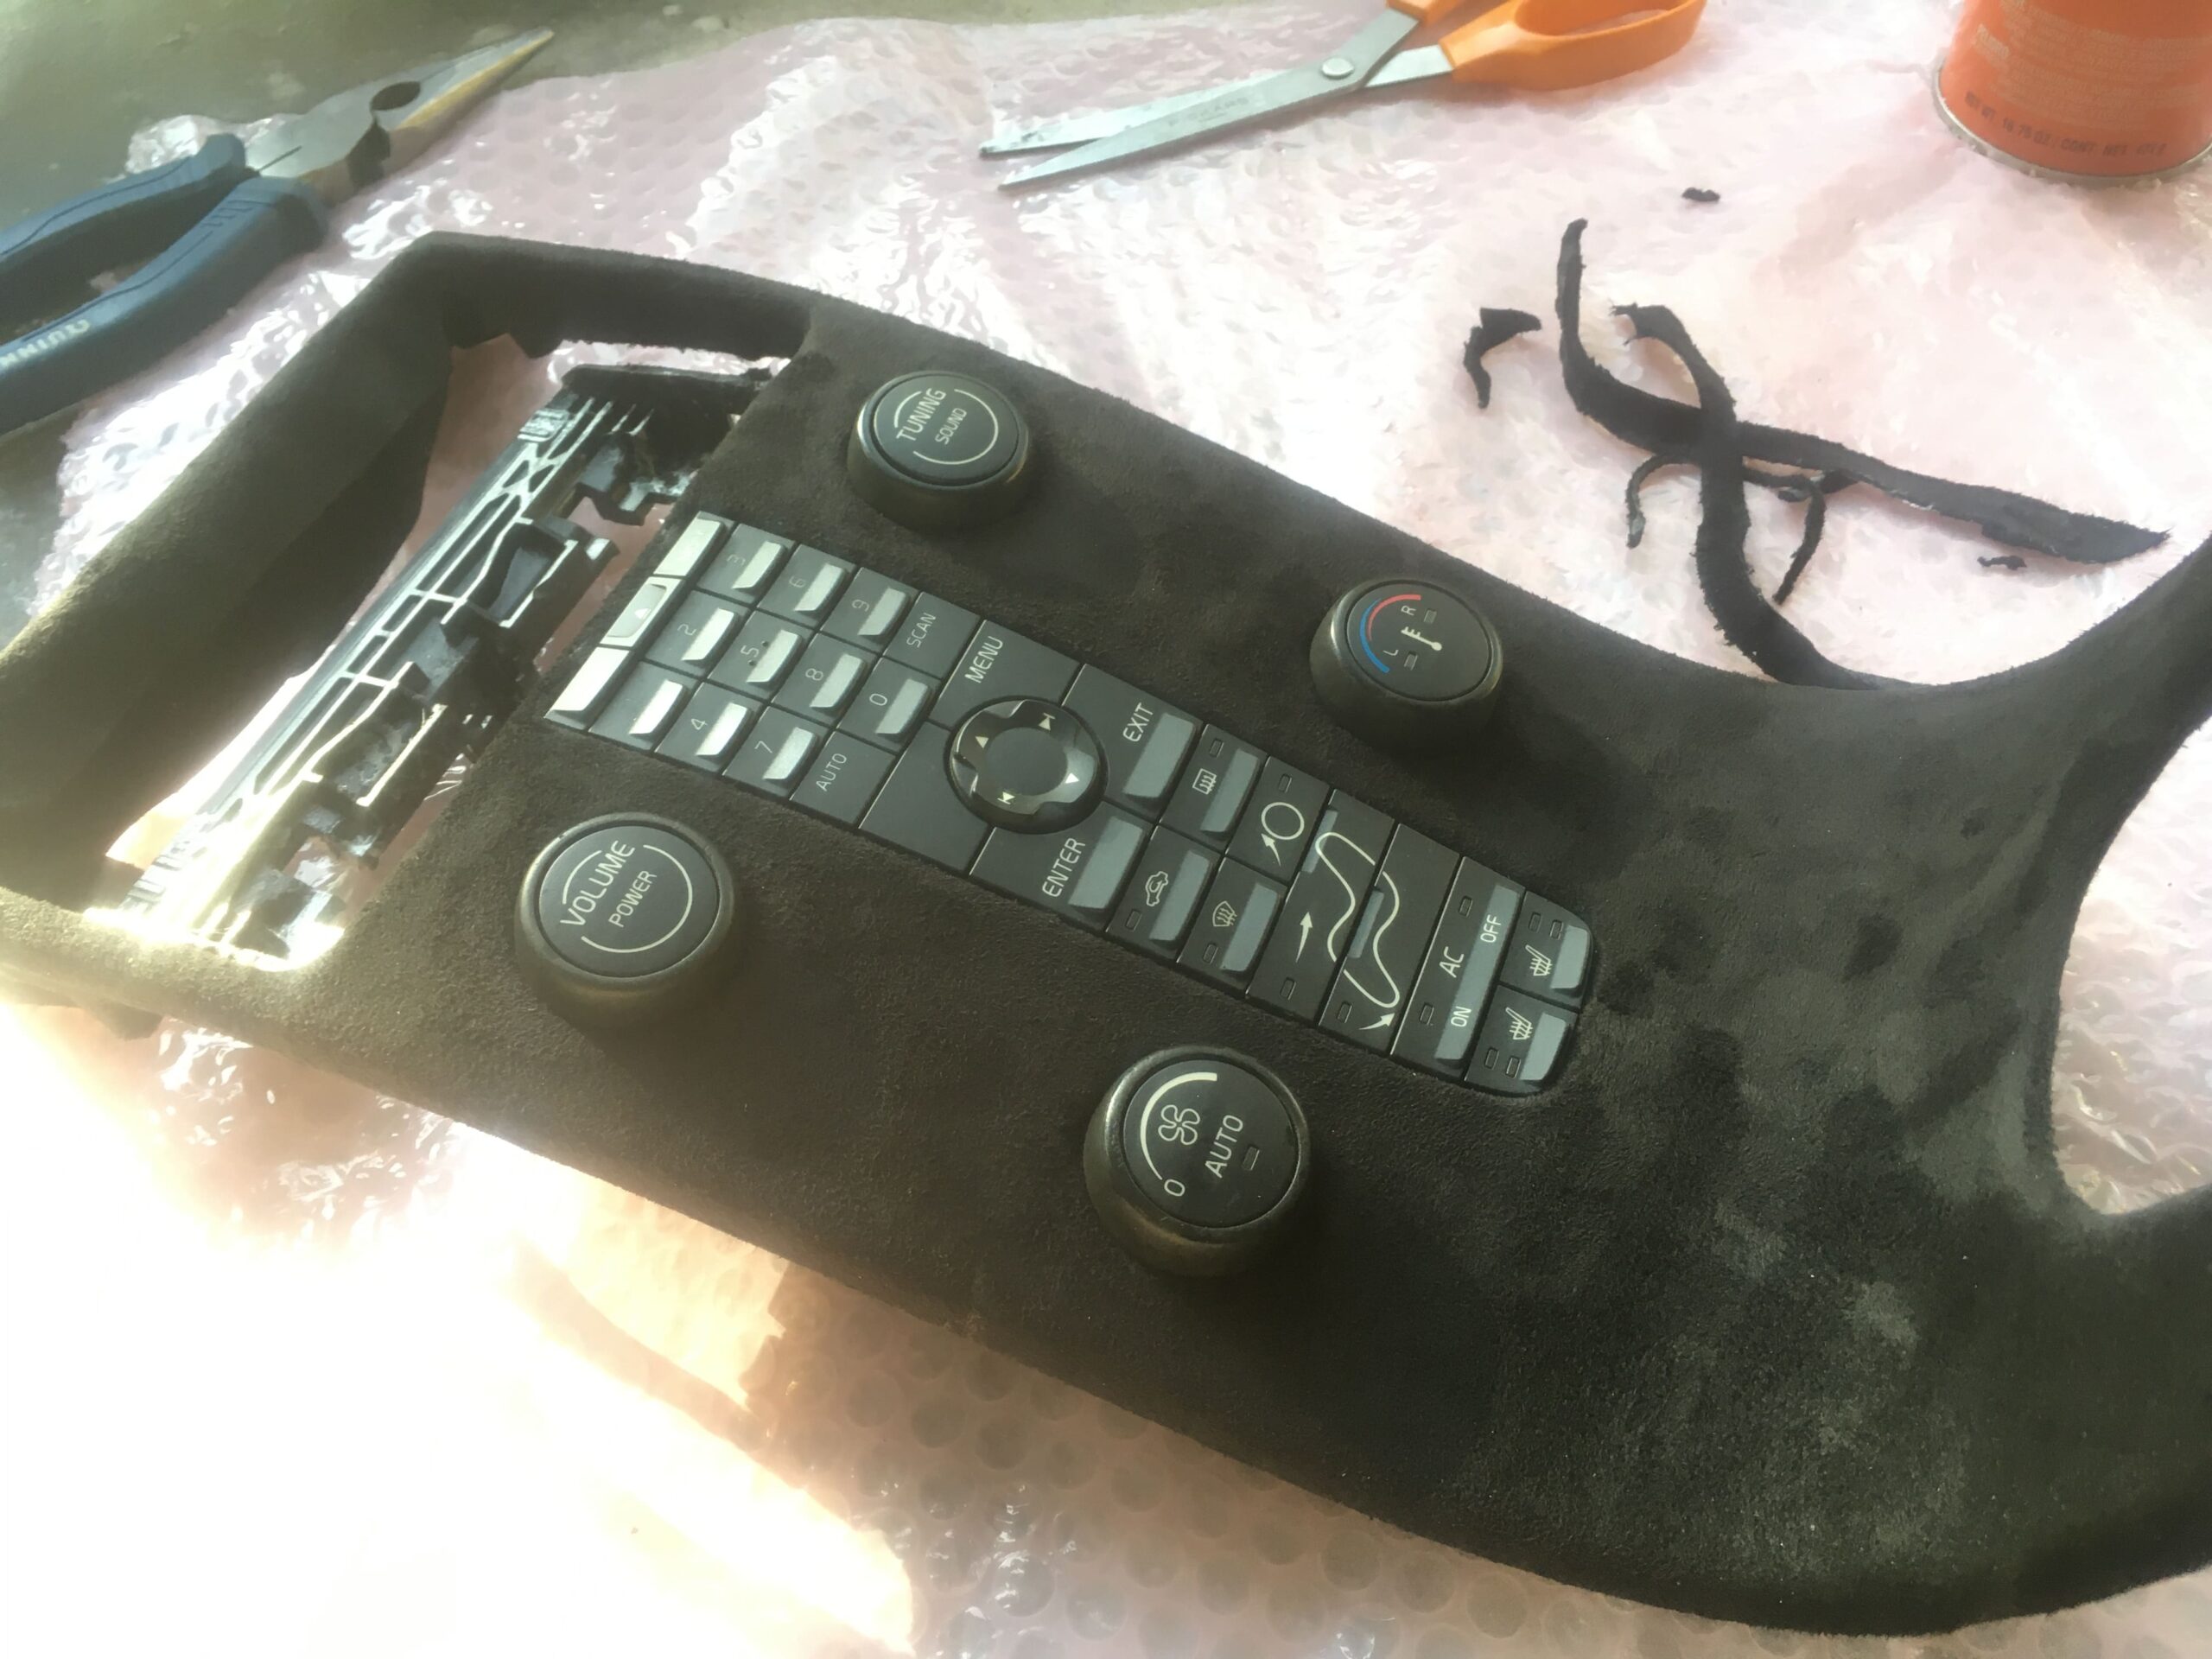
Next you want to remove the control panel inside the water fall. 4 T15 torx screws hold that in.
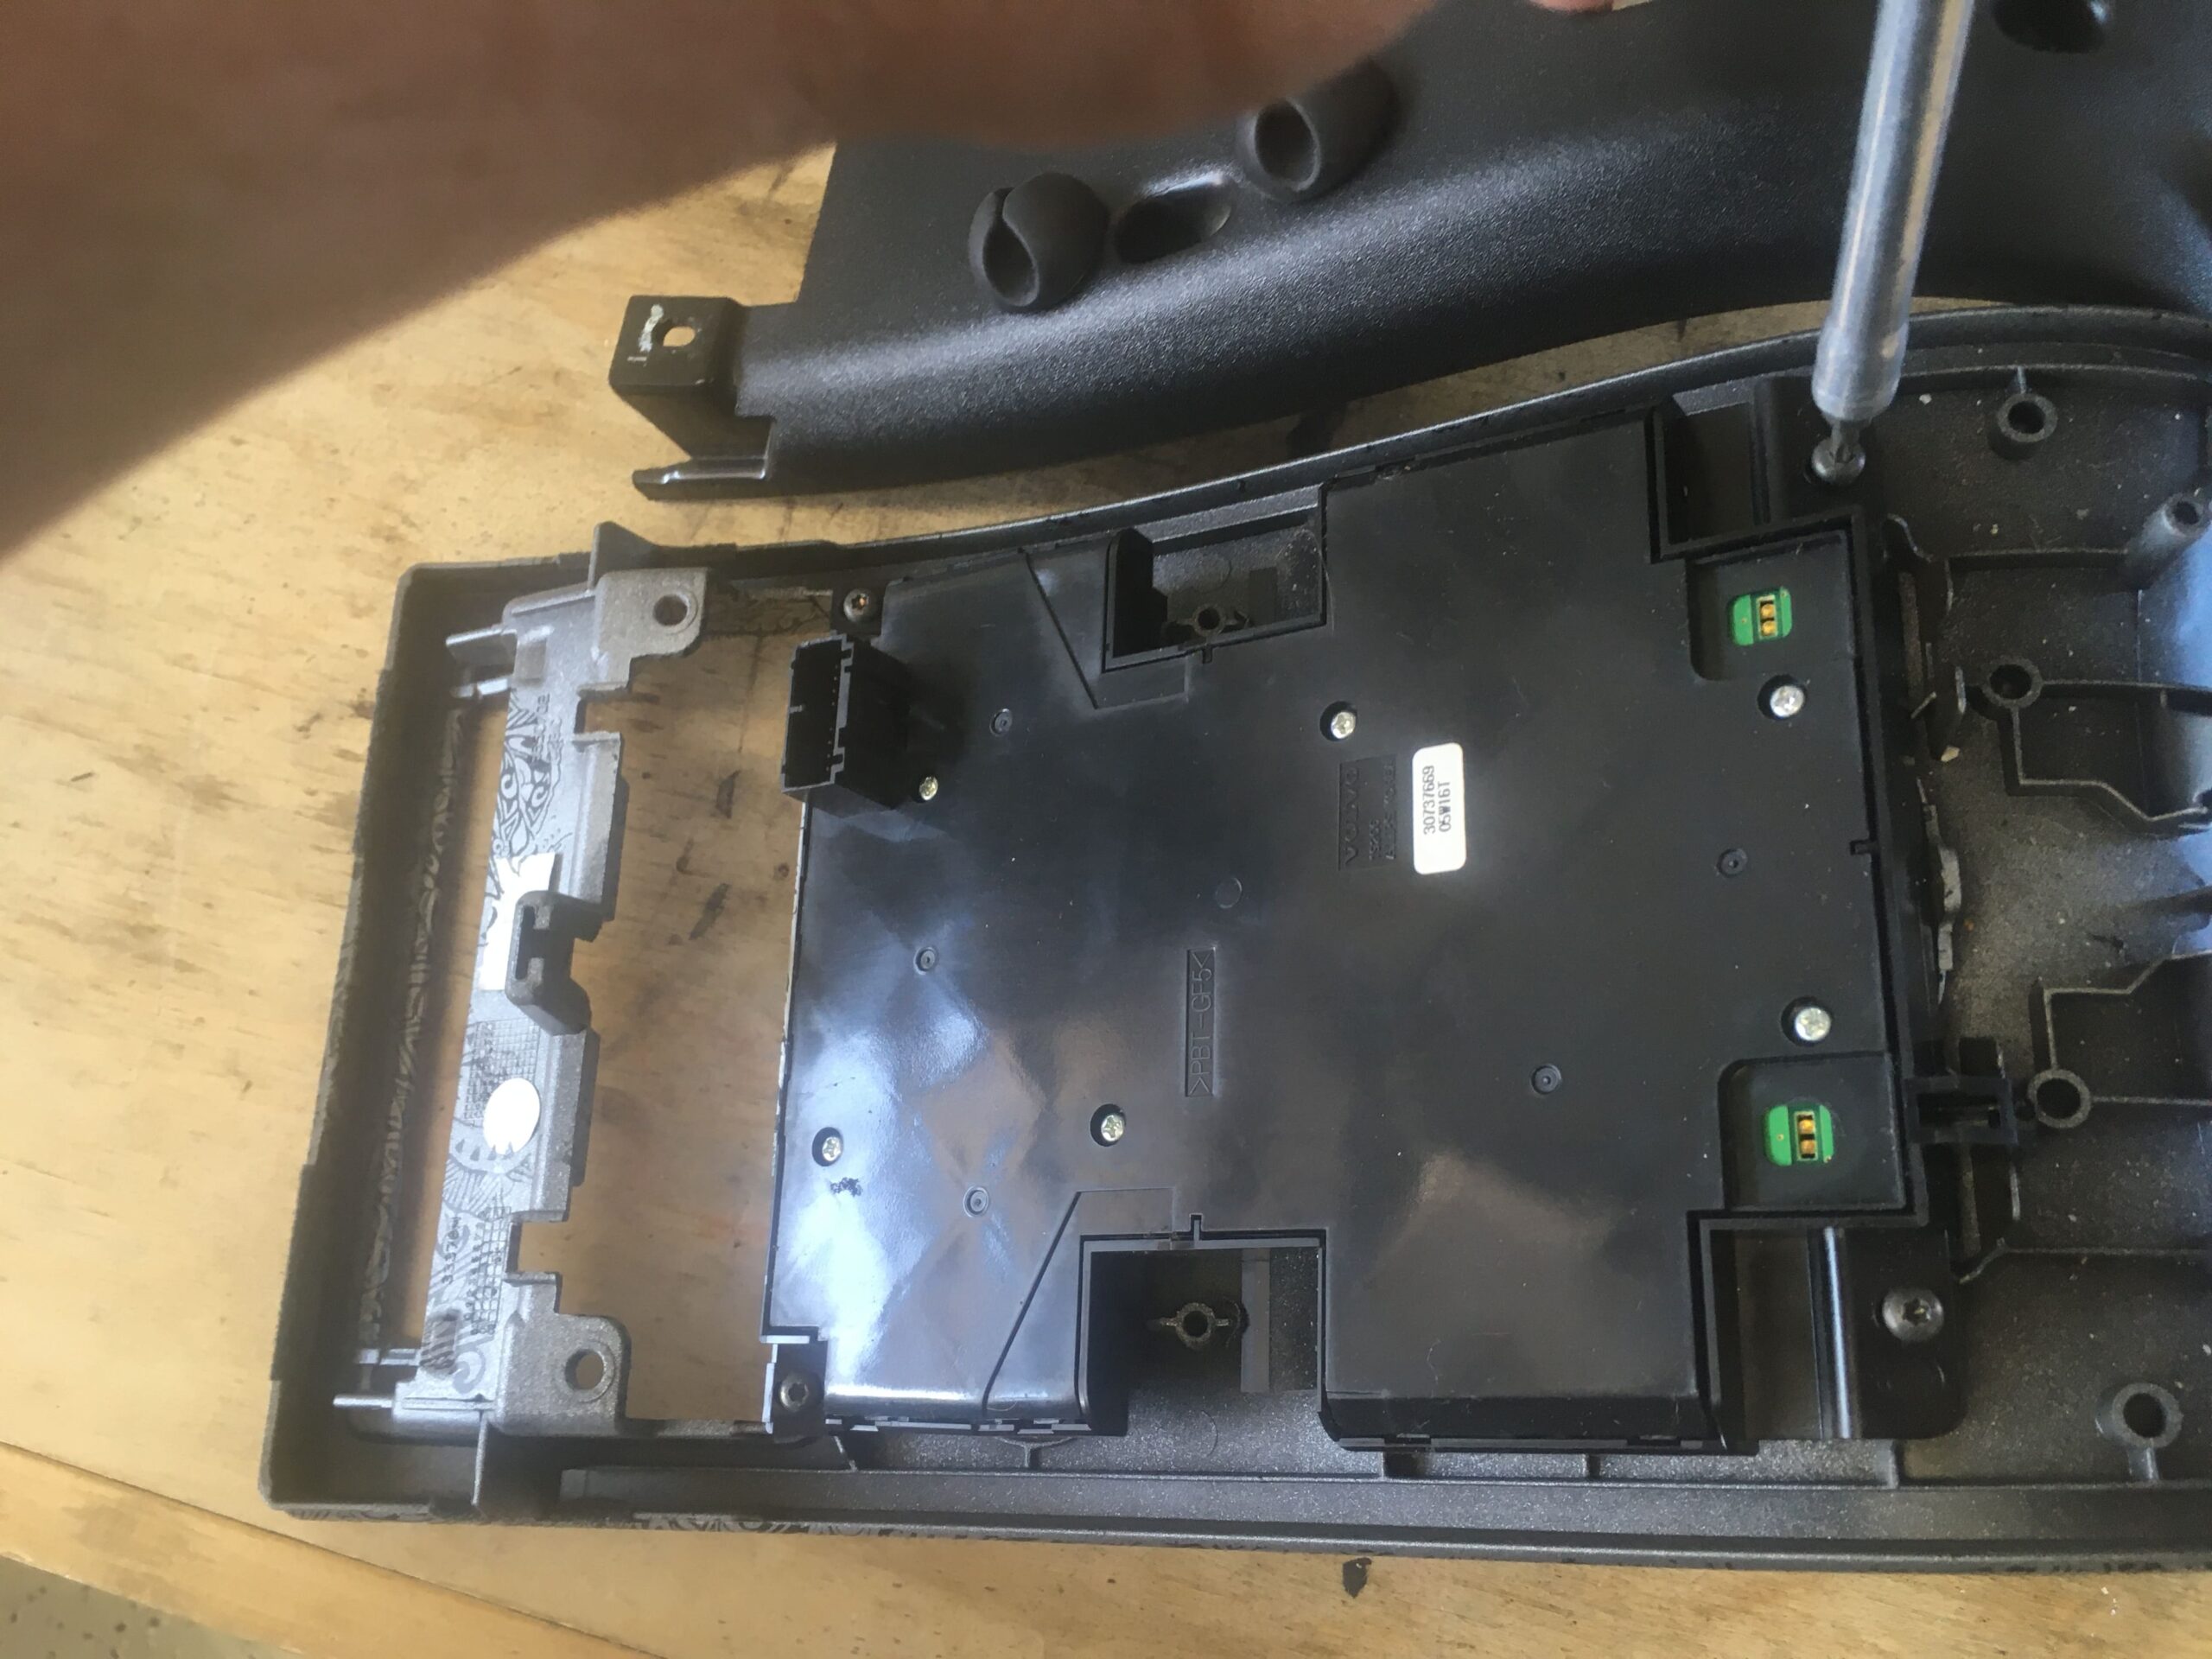
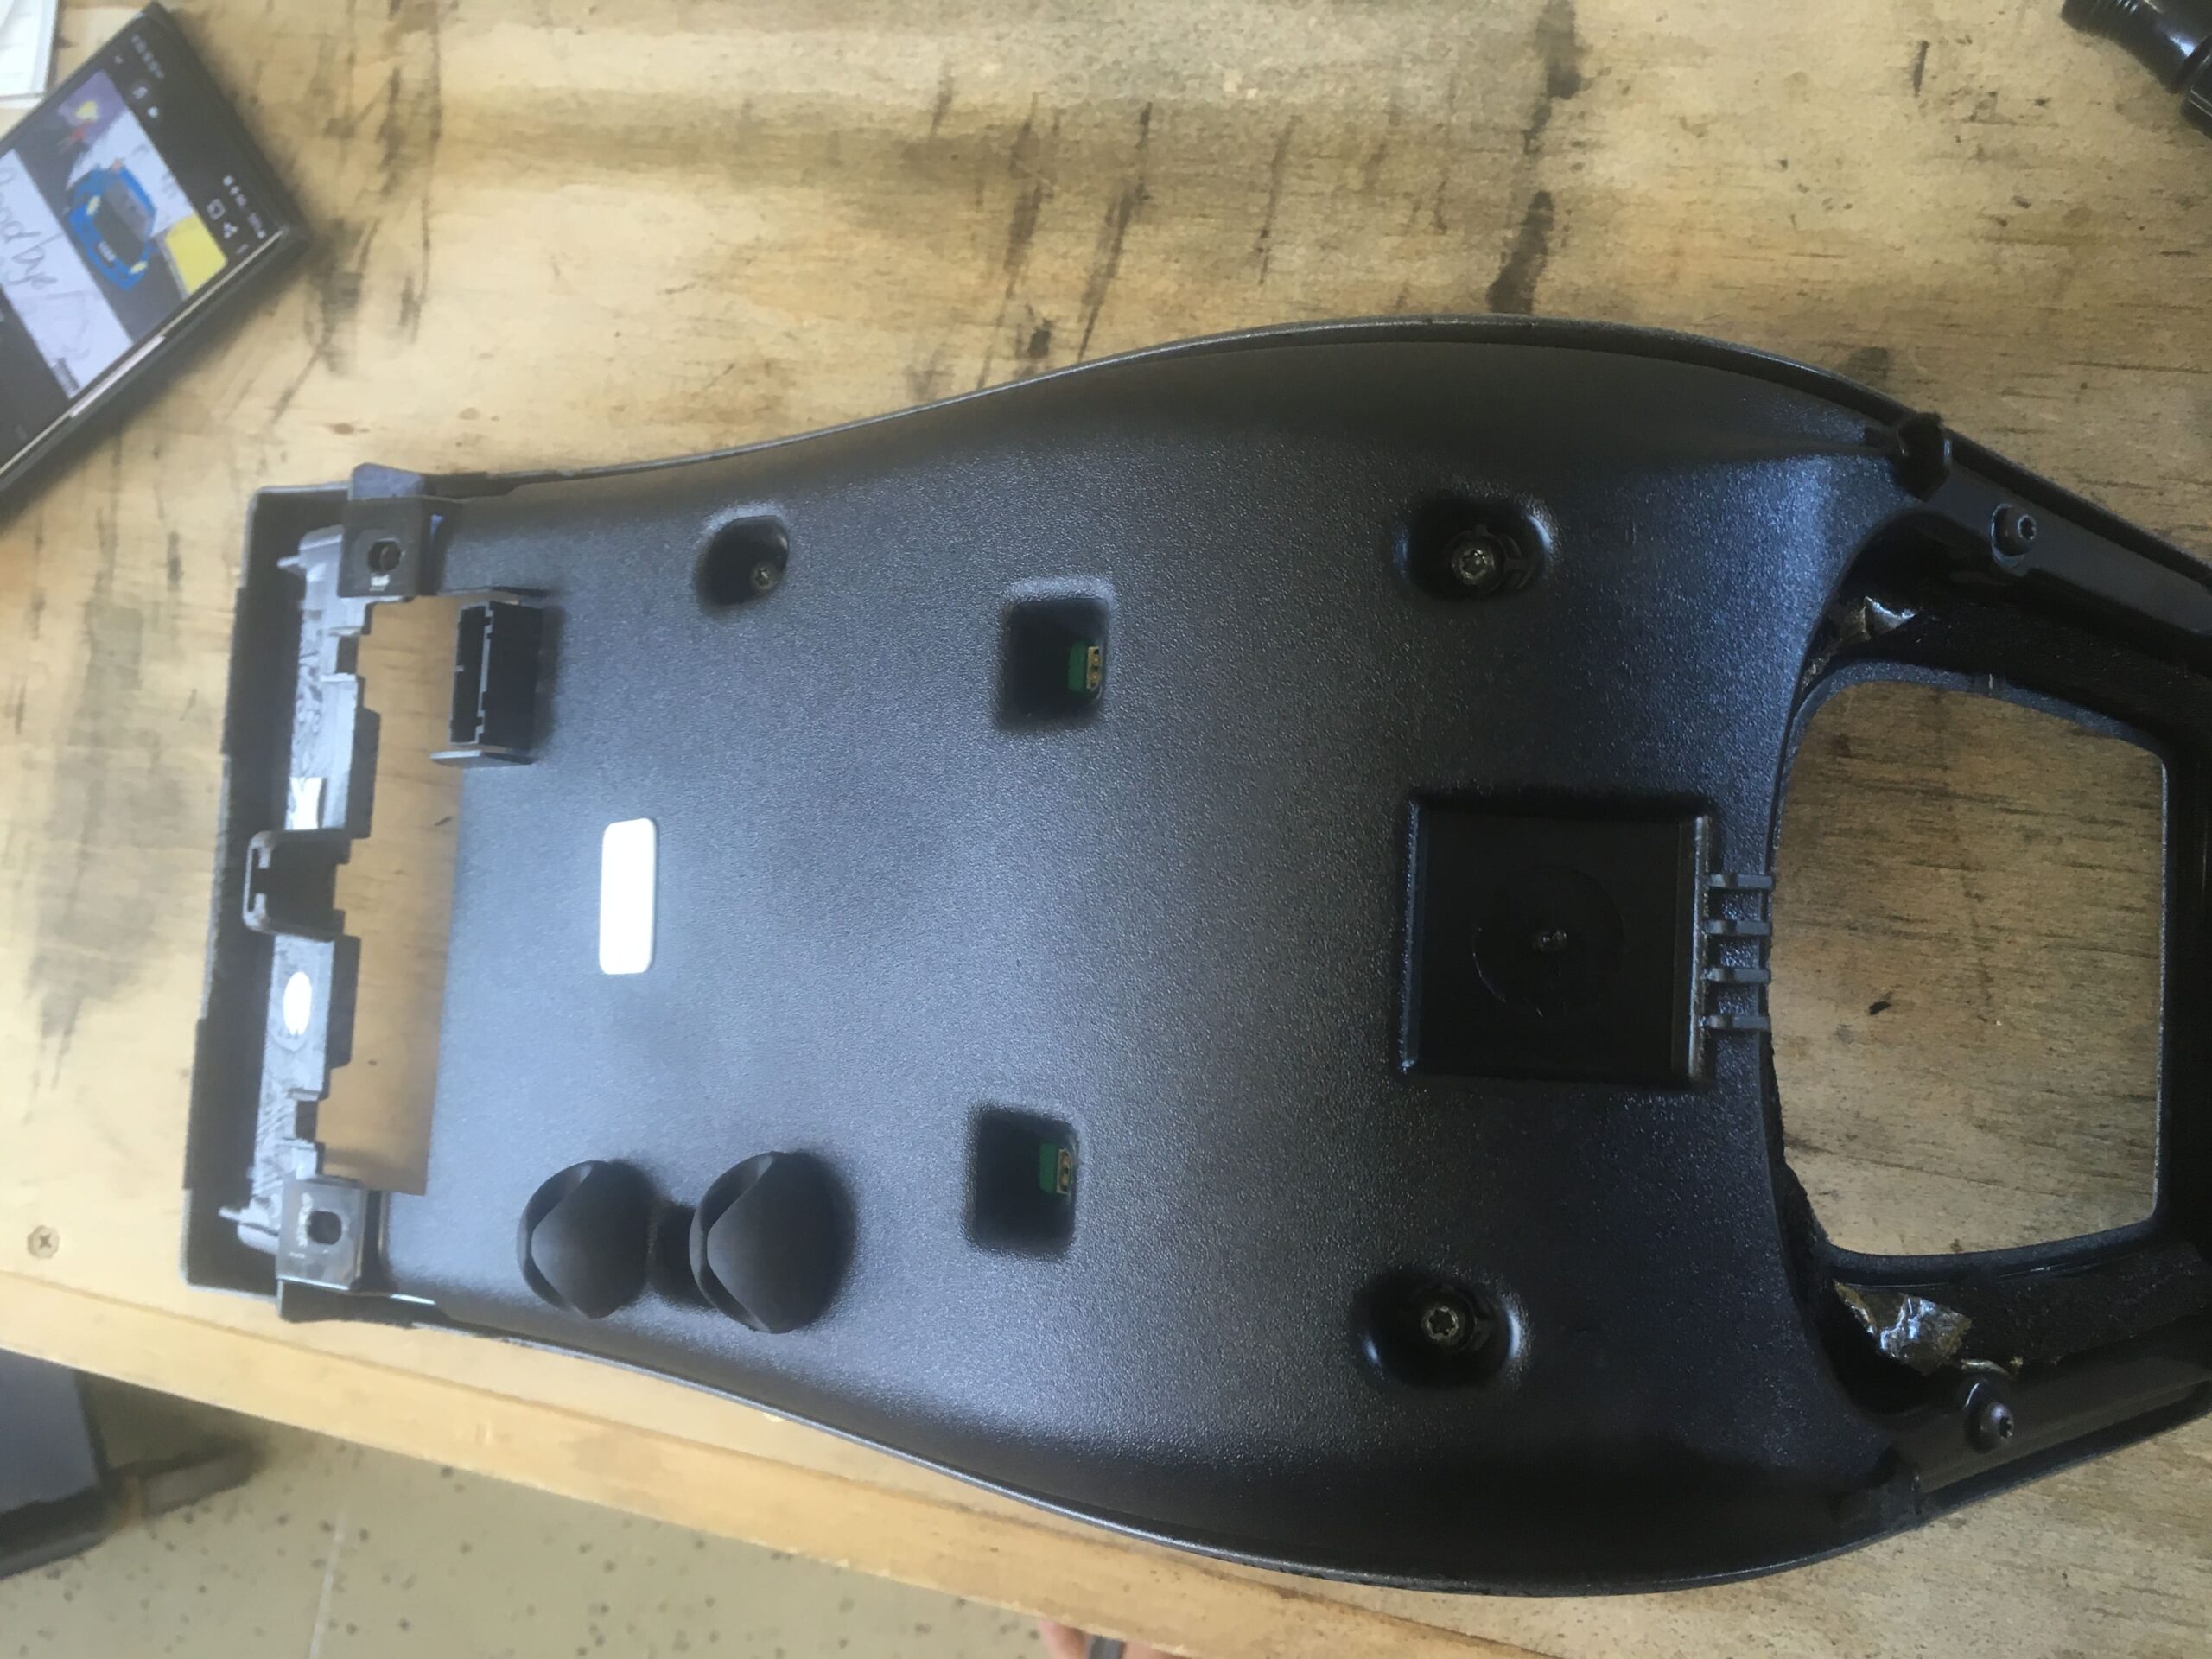
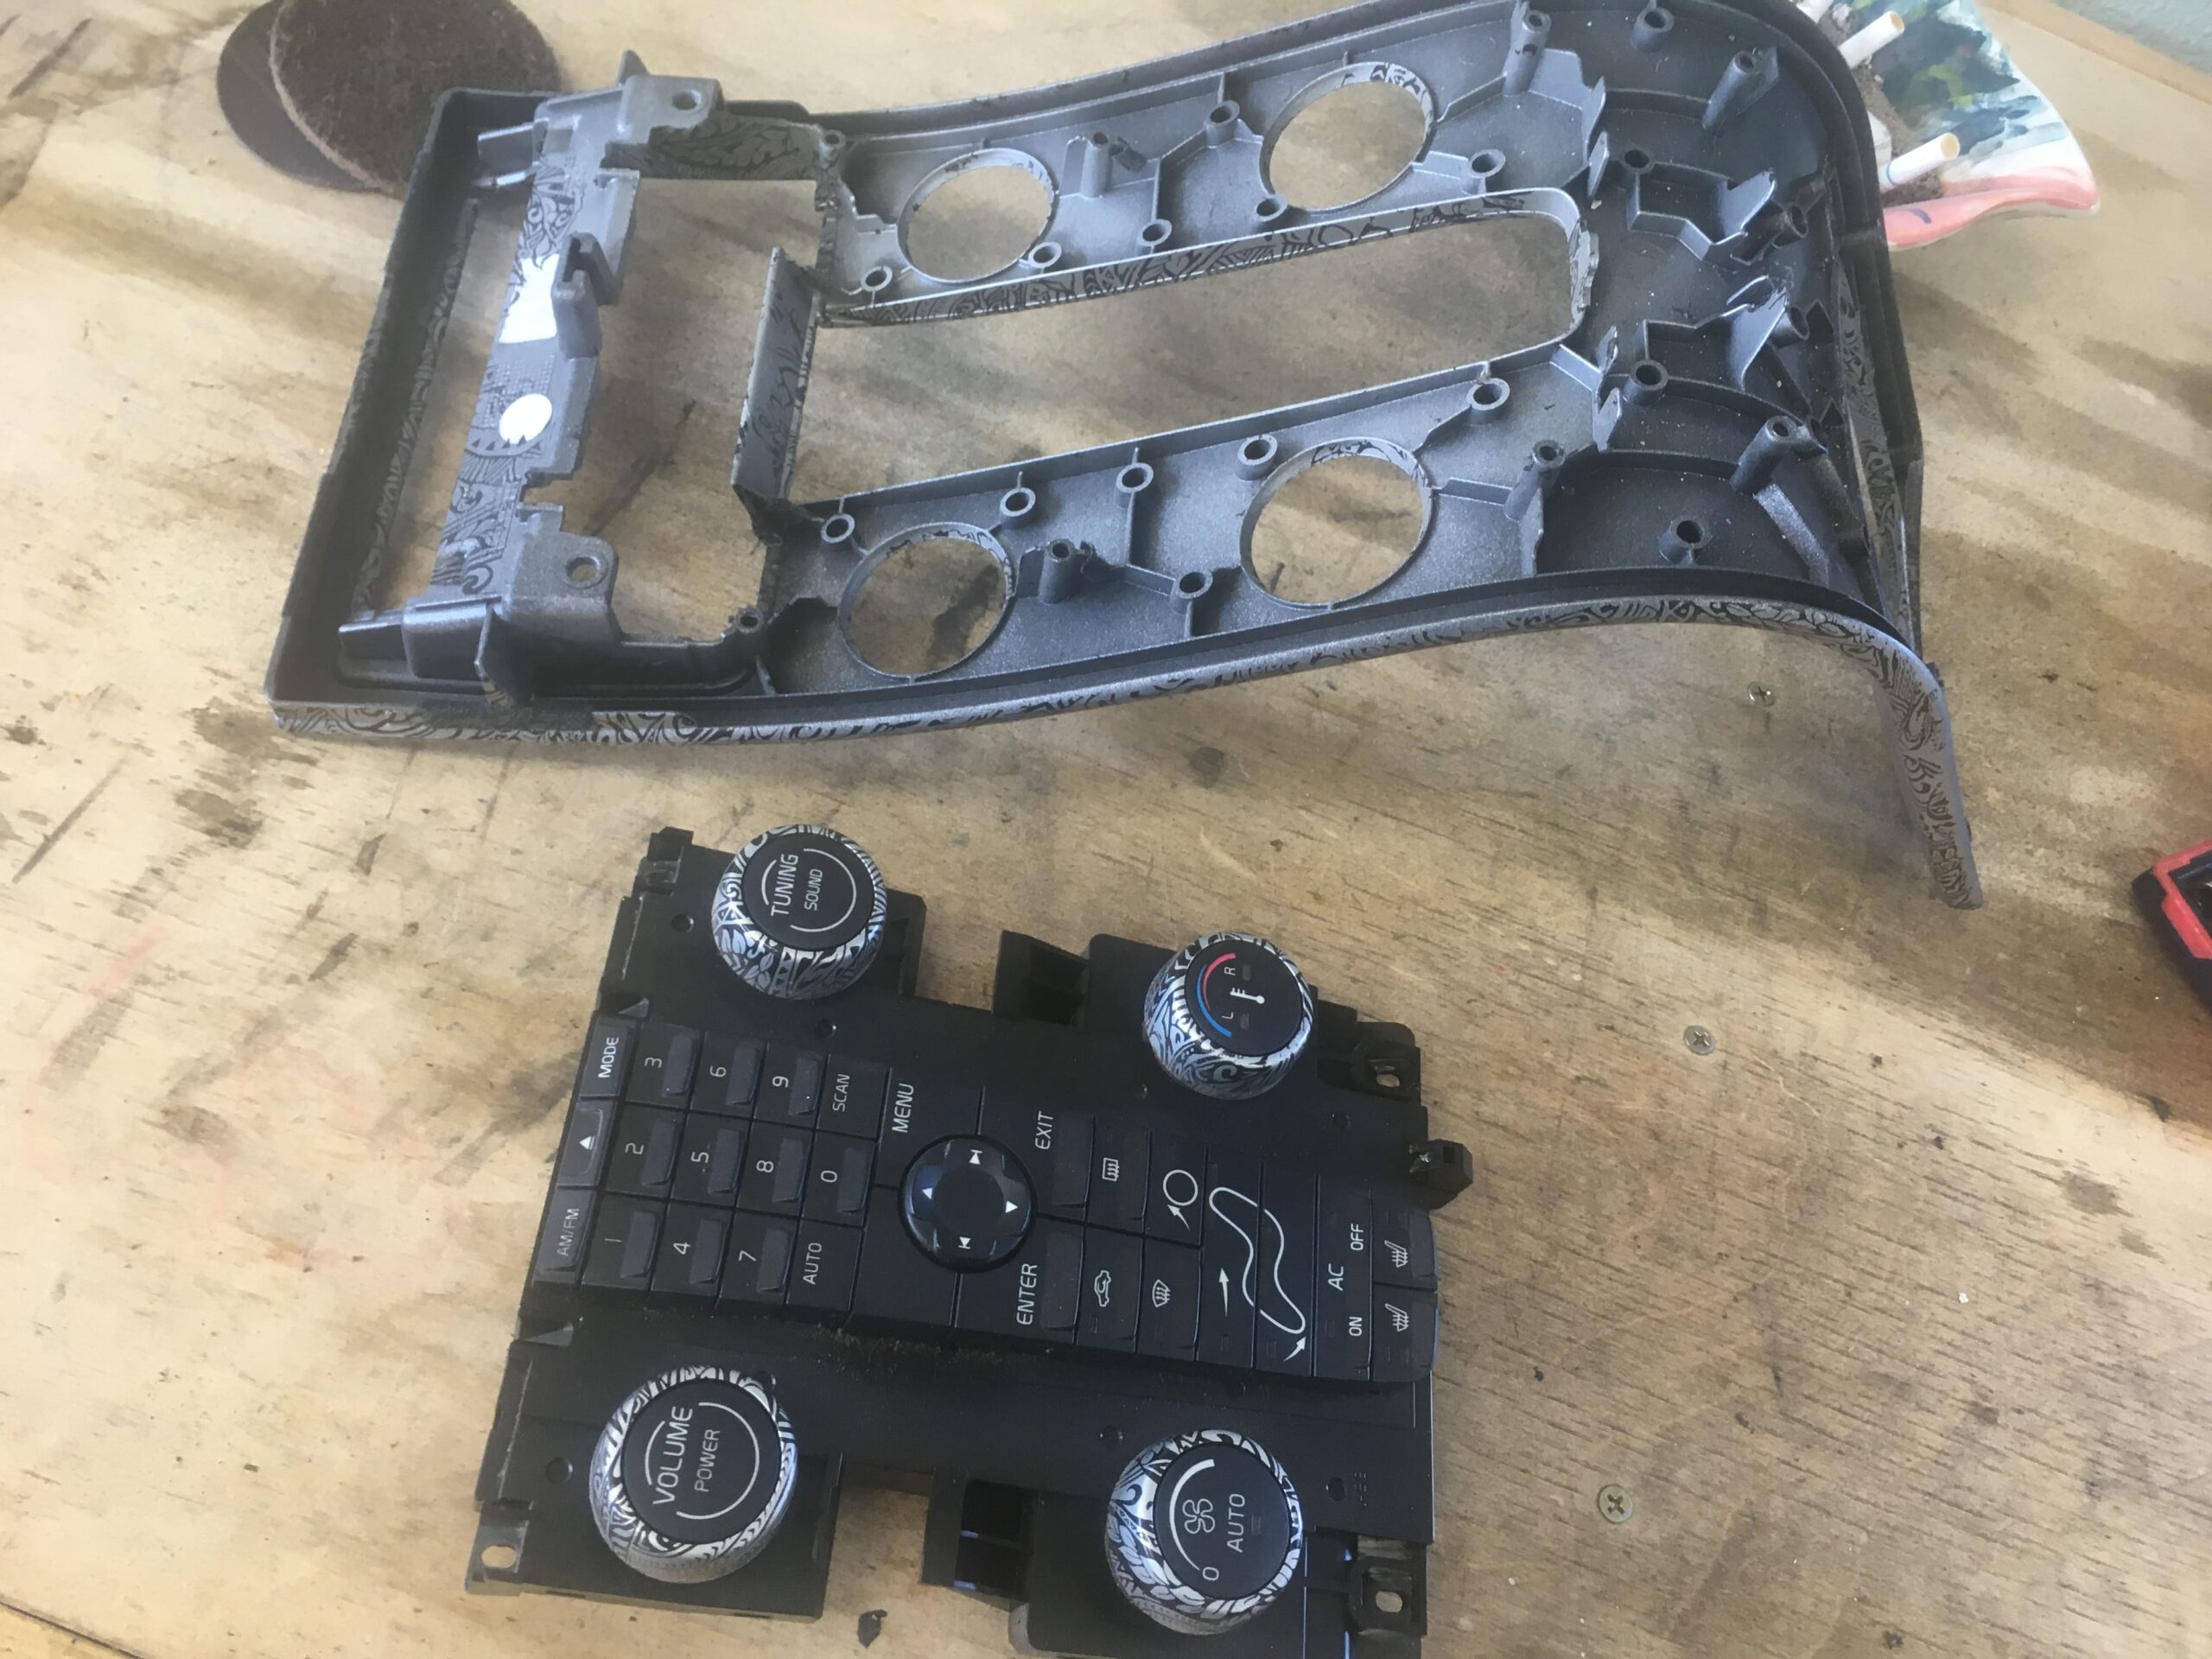
Now you have your three separate parts.
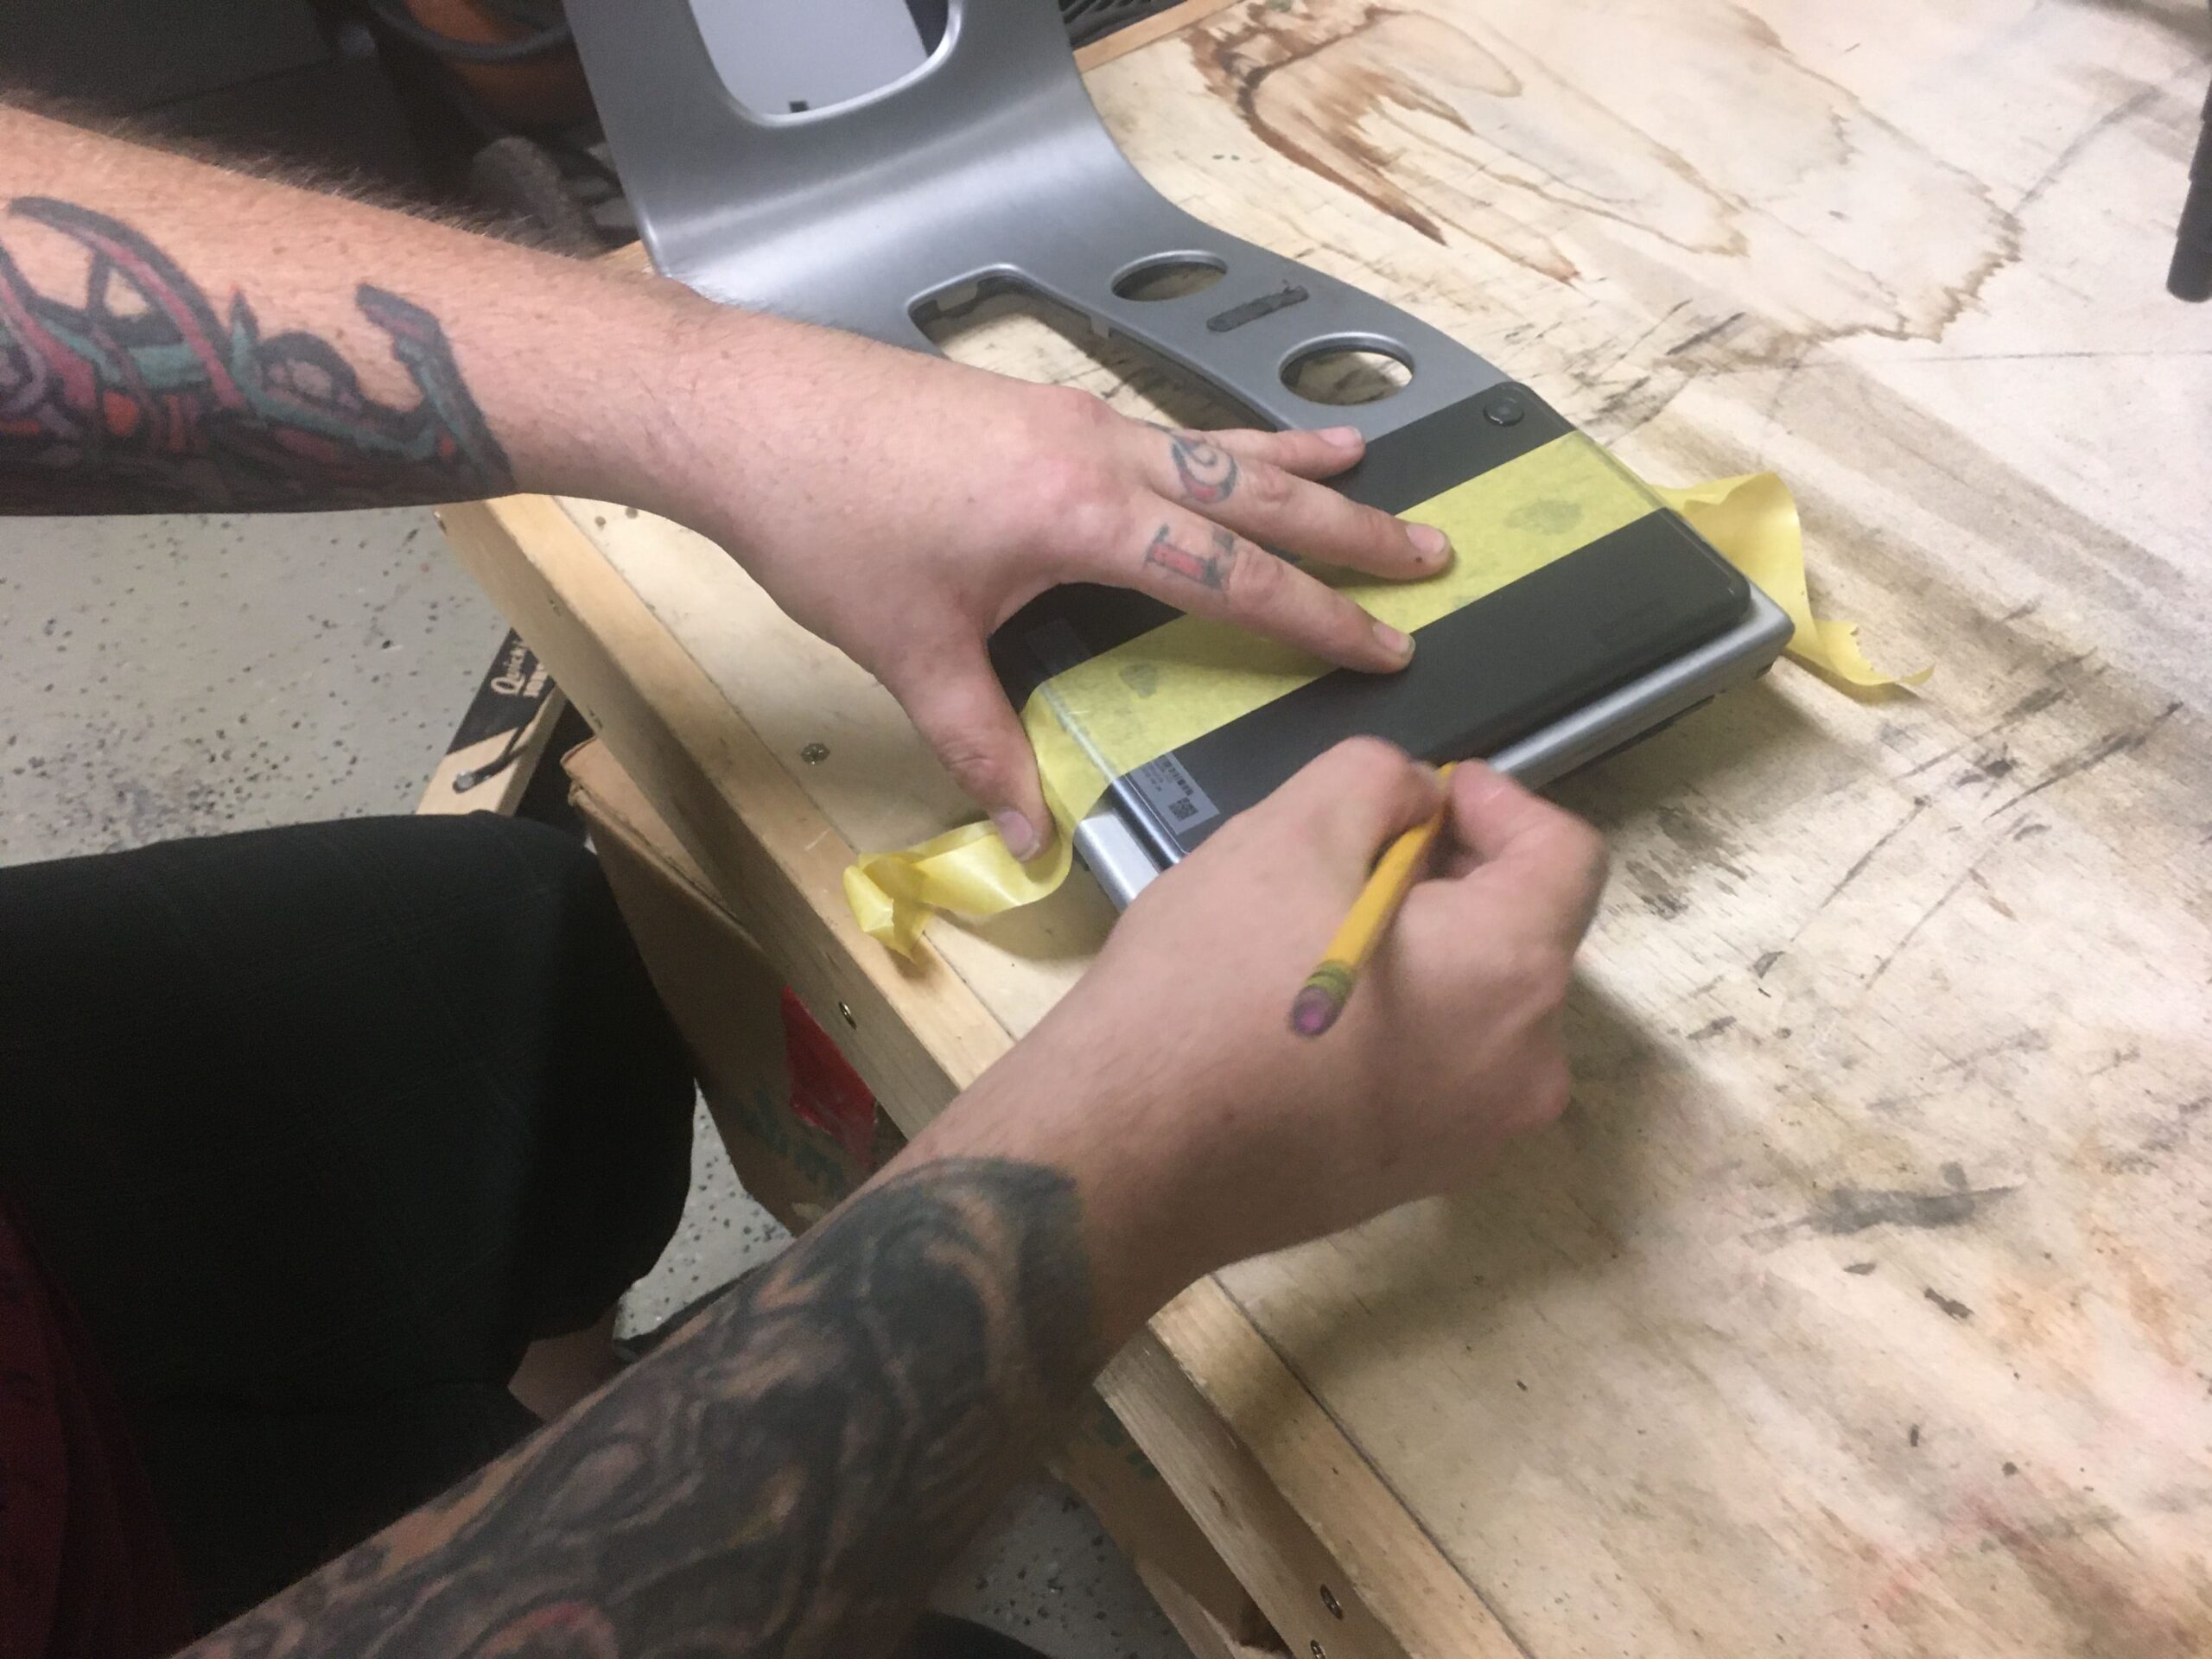
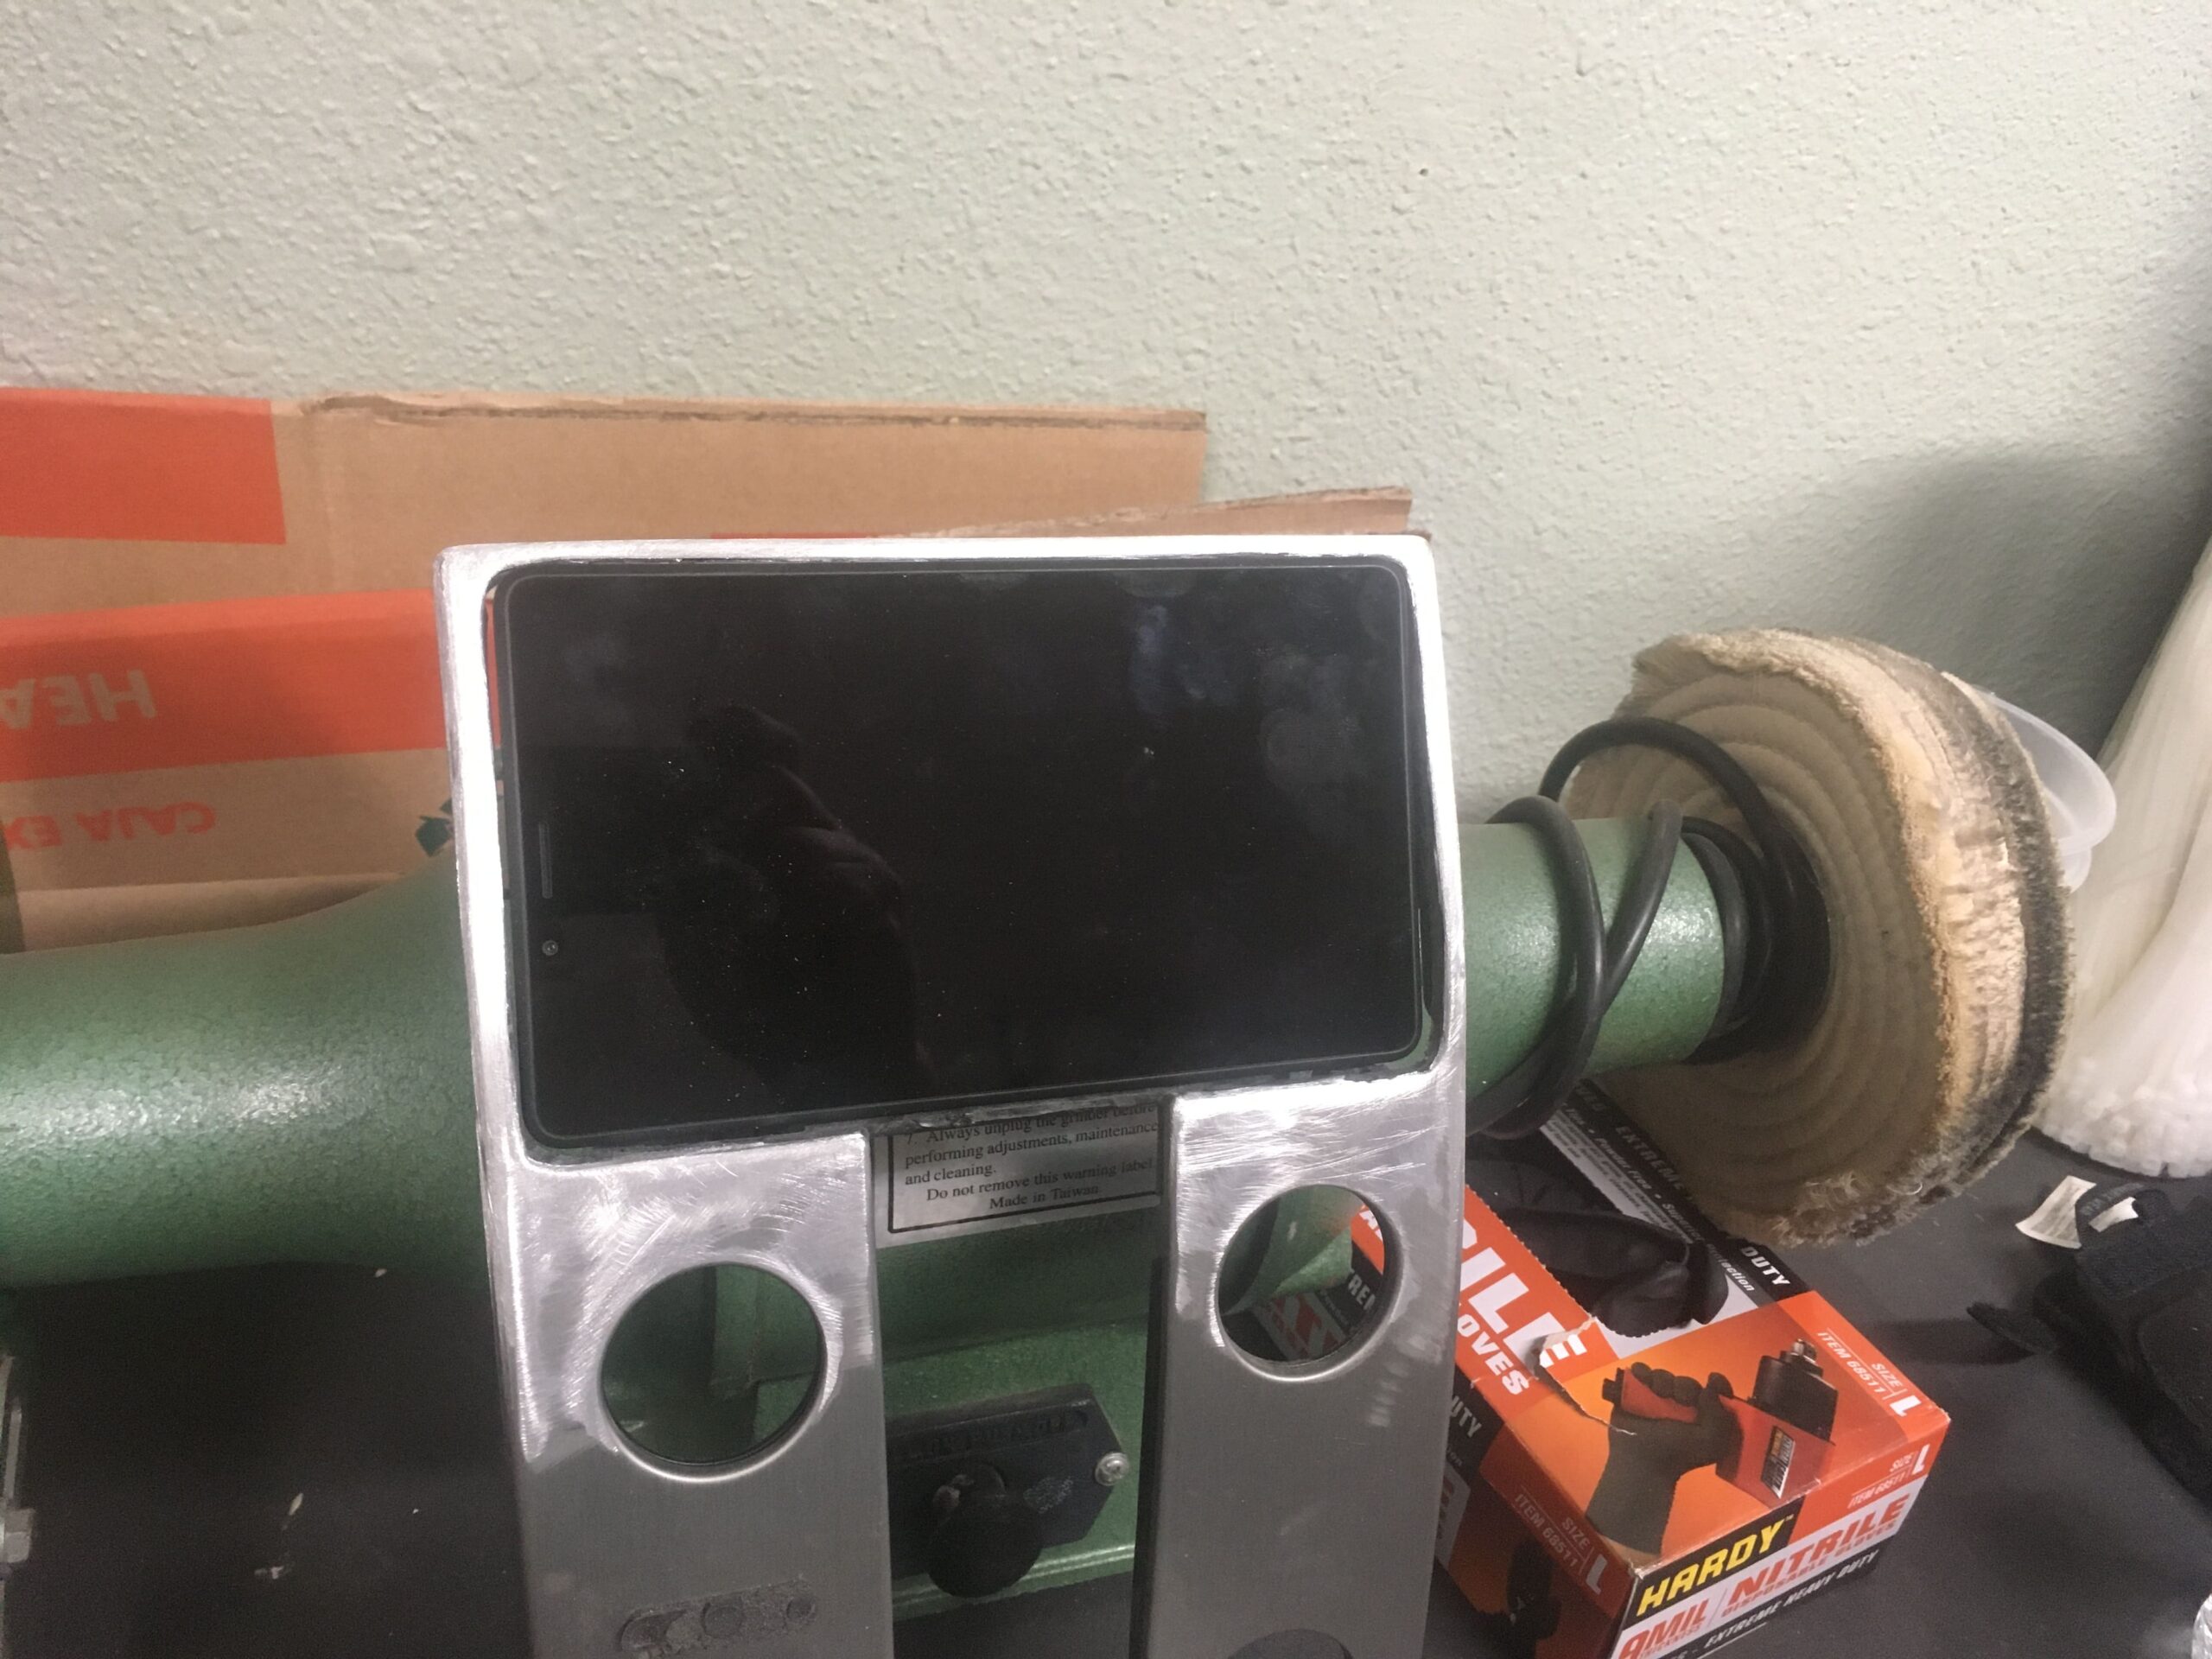
Working with the front of the waterfall, we traced our tablet on the opening to get an initial cut line. We lined up the bottom of the tablet with the top of the AM/FM-Eject/Mode buttons. You cannot cut under this as those buttons need to remain in place.
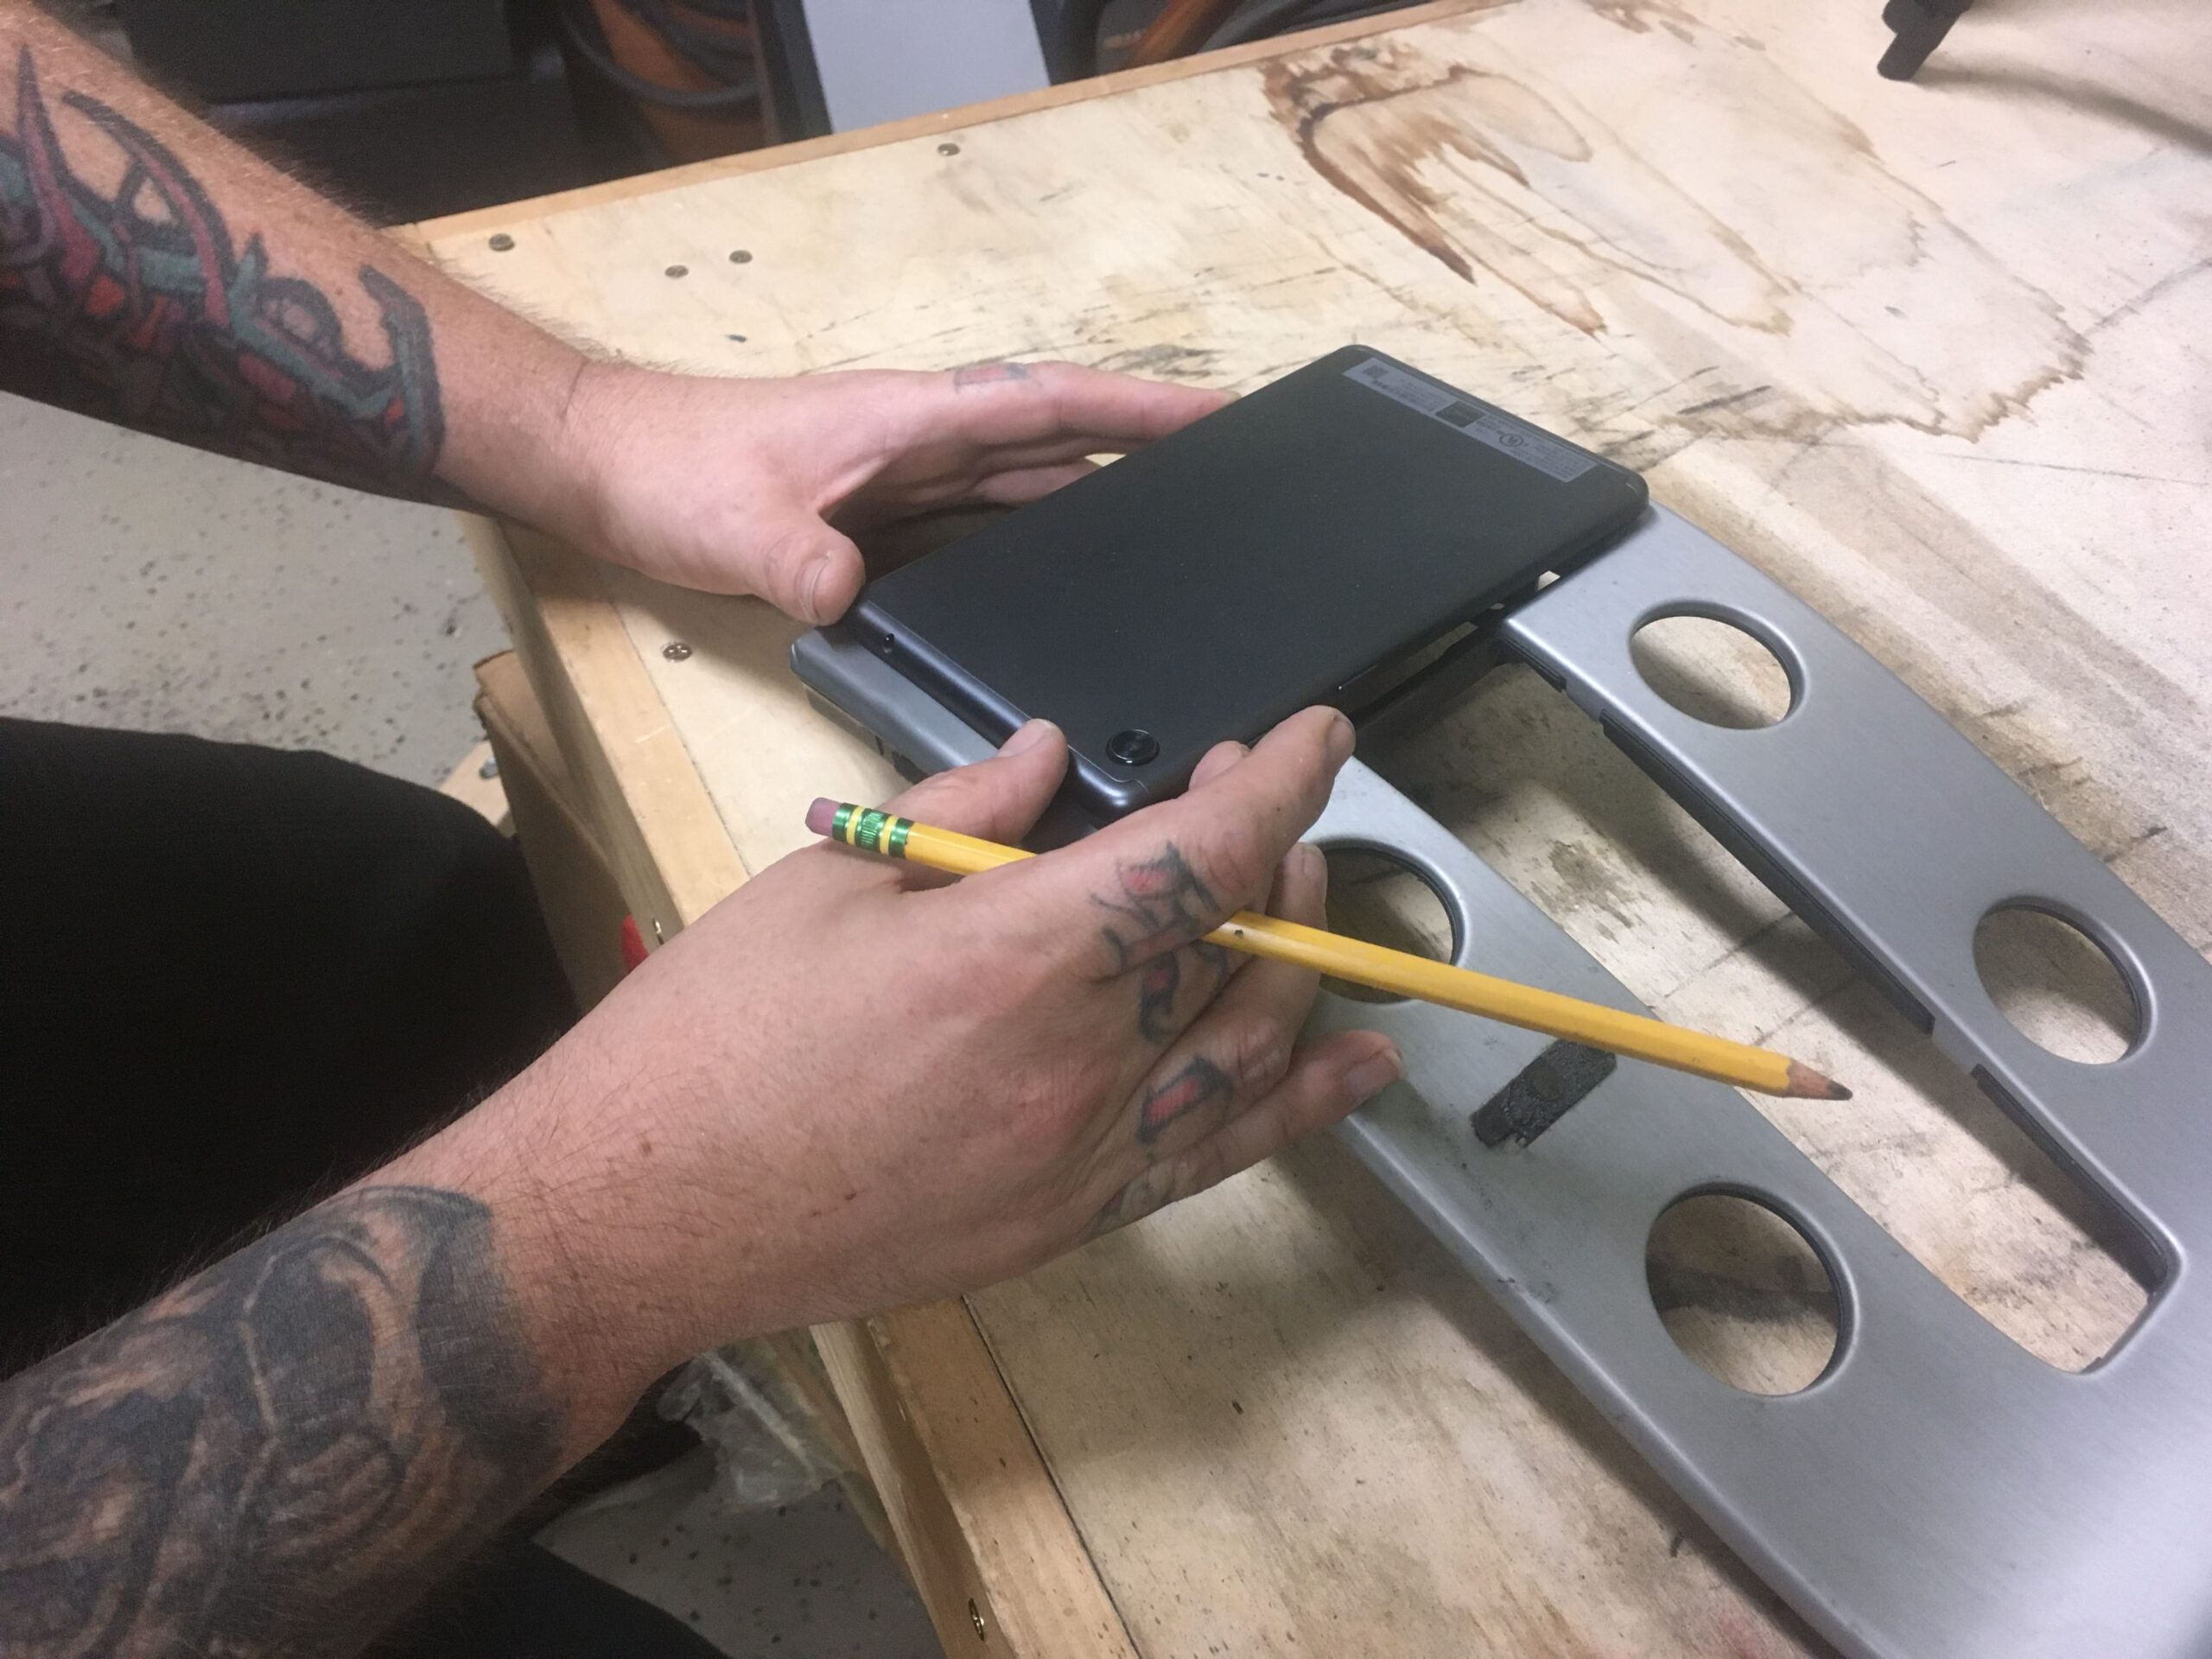
We leveled, measured and balanced, then taped the tablet down for the cut line to be drawn.
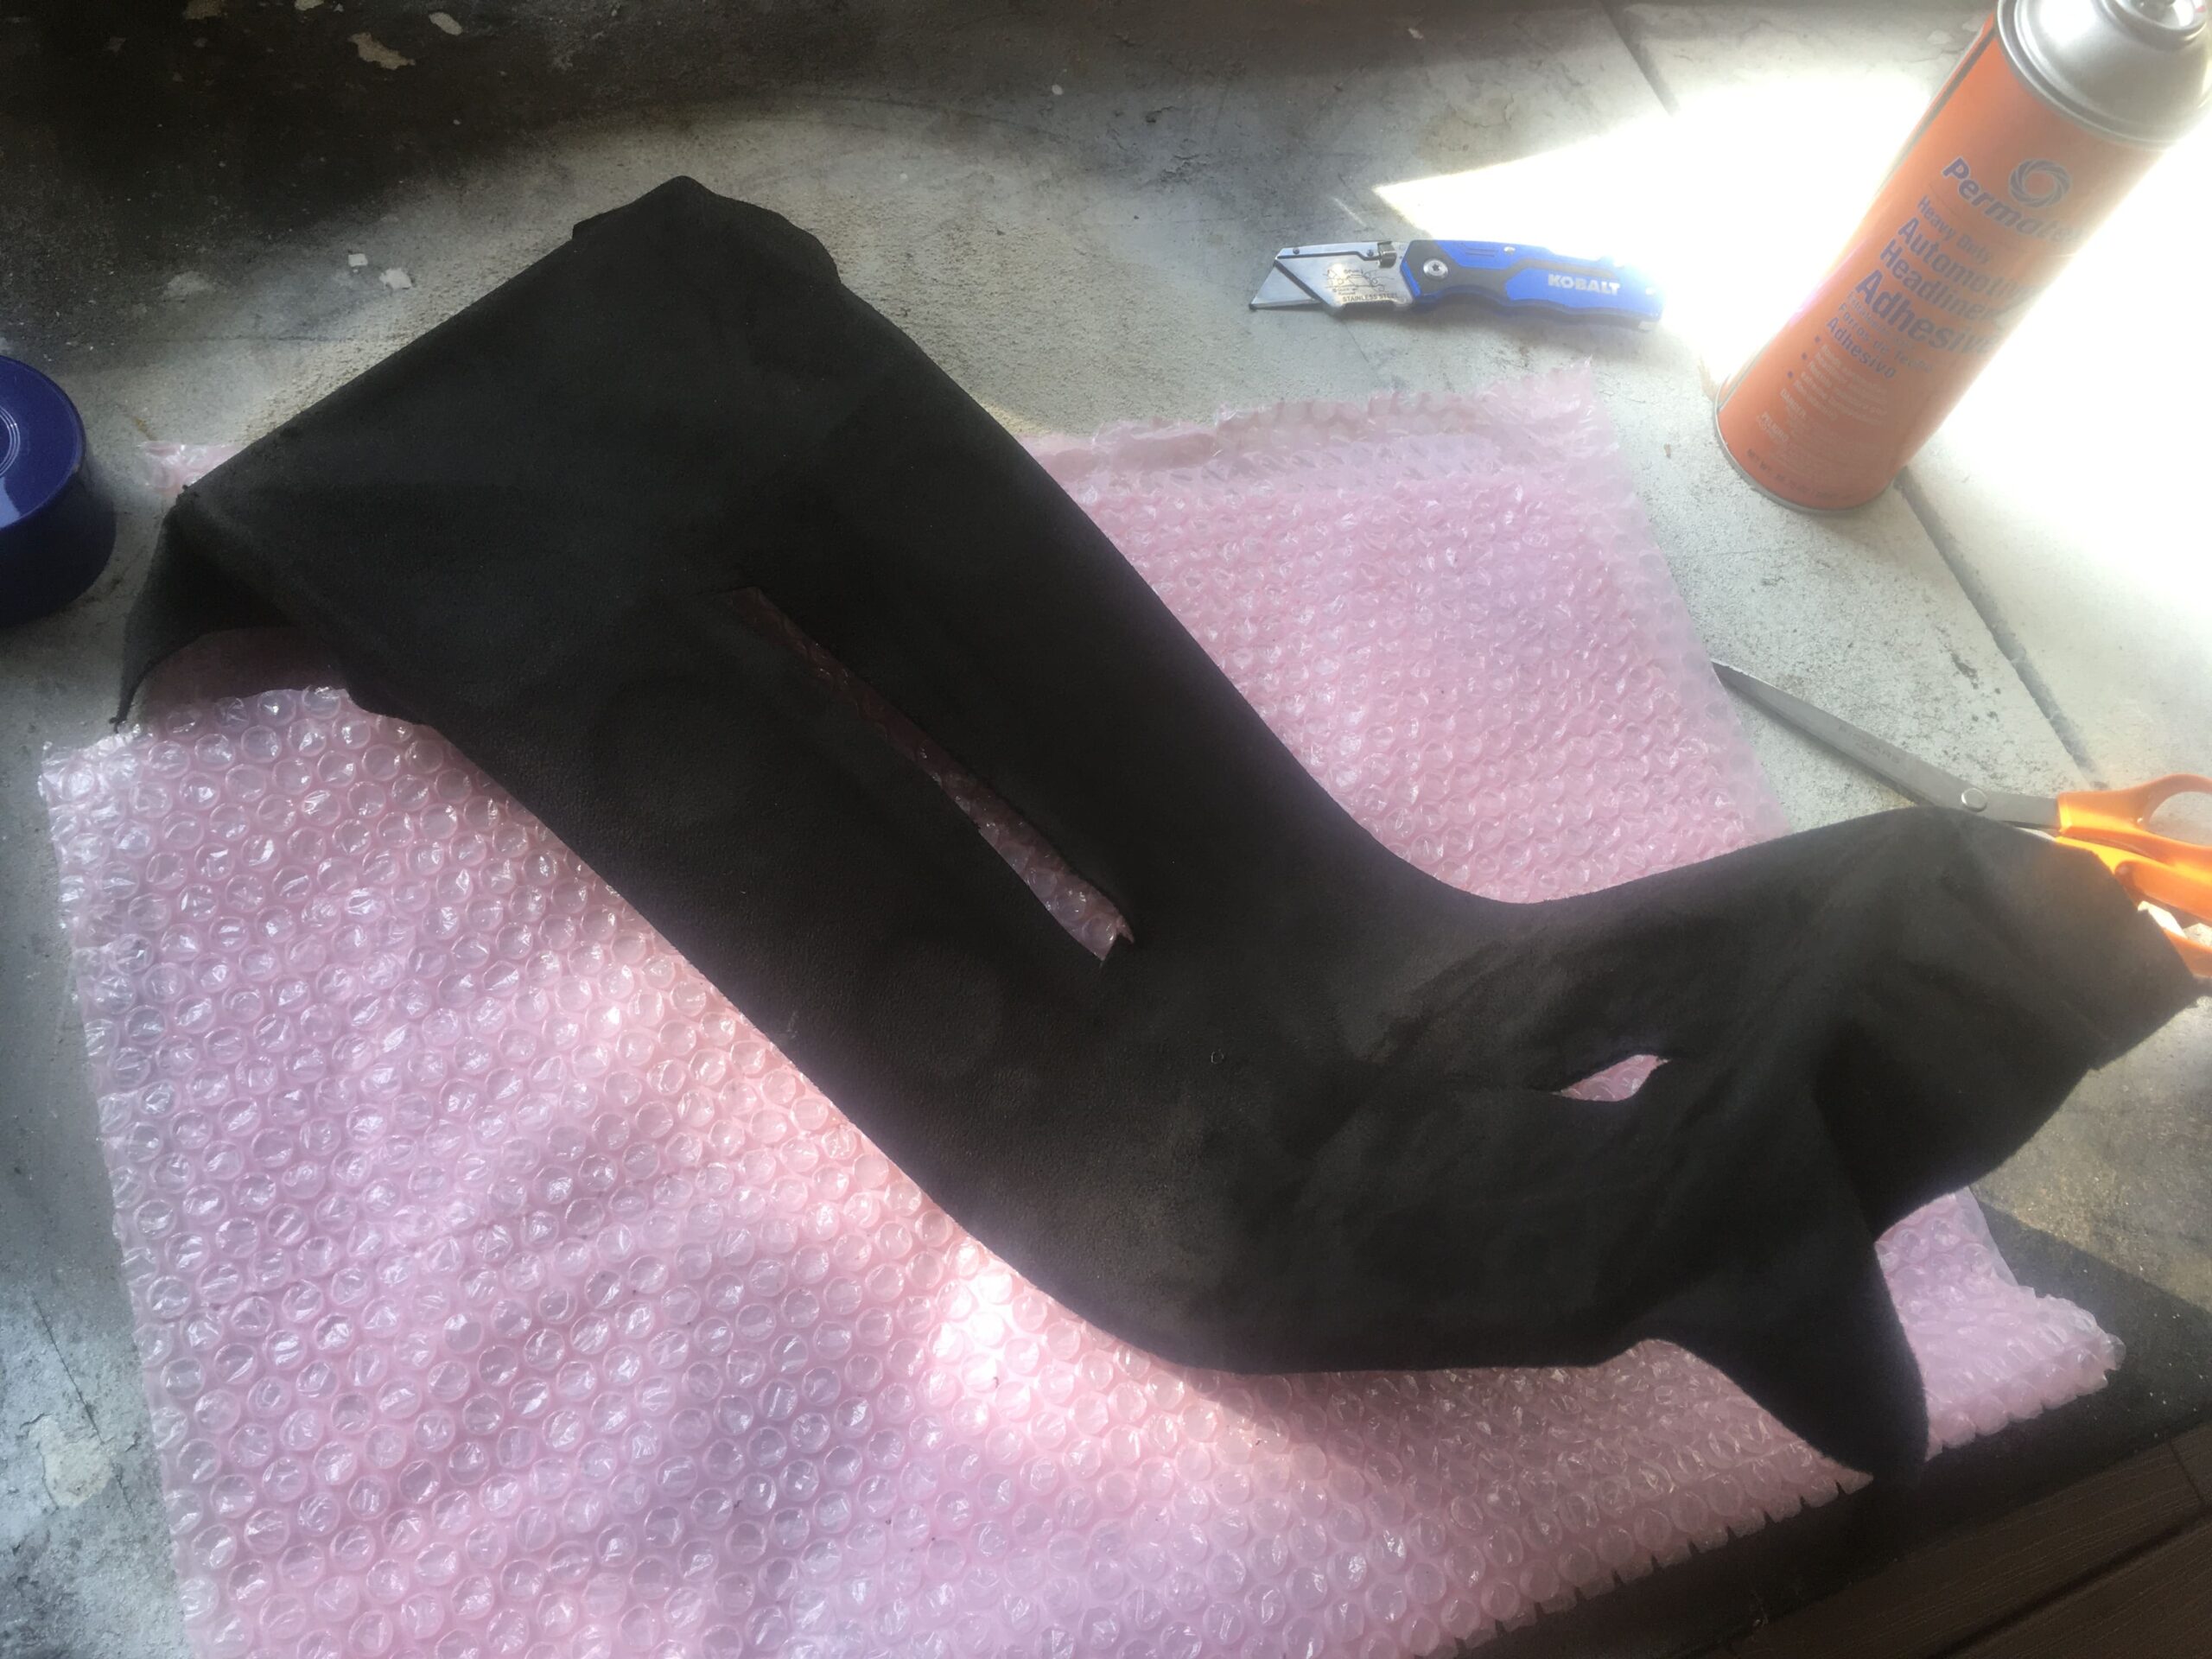
From there we started our cut. It is important to note that there are 2 different types of waterfalls. We have seen many over the years, but this junkyard donor was the first we saw that was actual aluminum. All others were plastic, so the cutting here was a bit more involved since it was actual metal. We cut inside the line, so we can always take more off. Go too far and you will have some gap issues later, or be at the junkyard grabbing a backup waterfall.
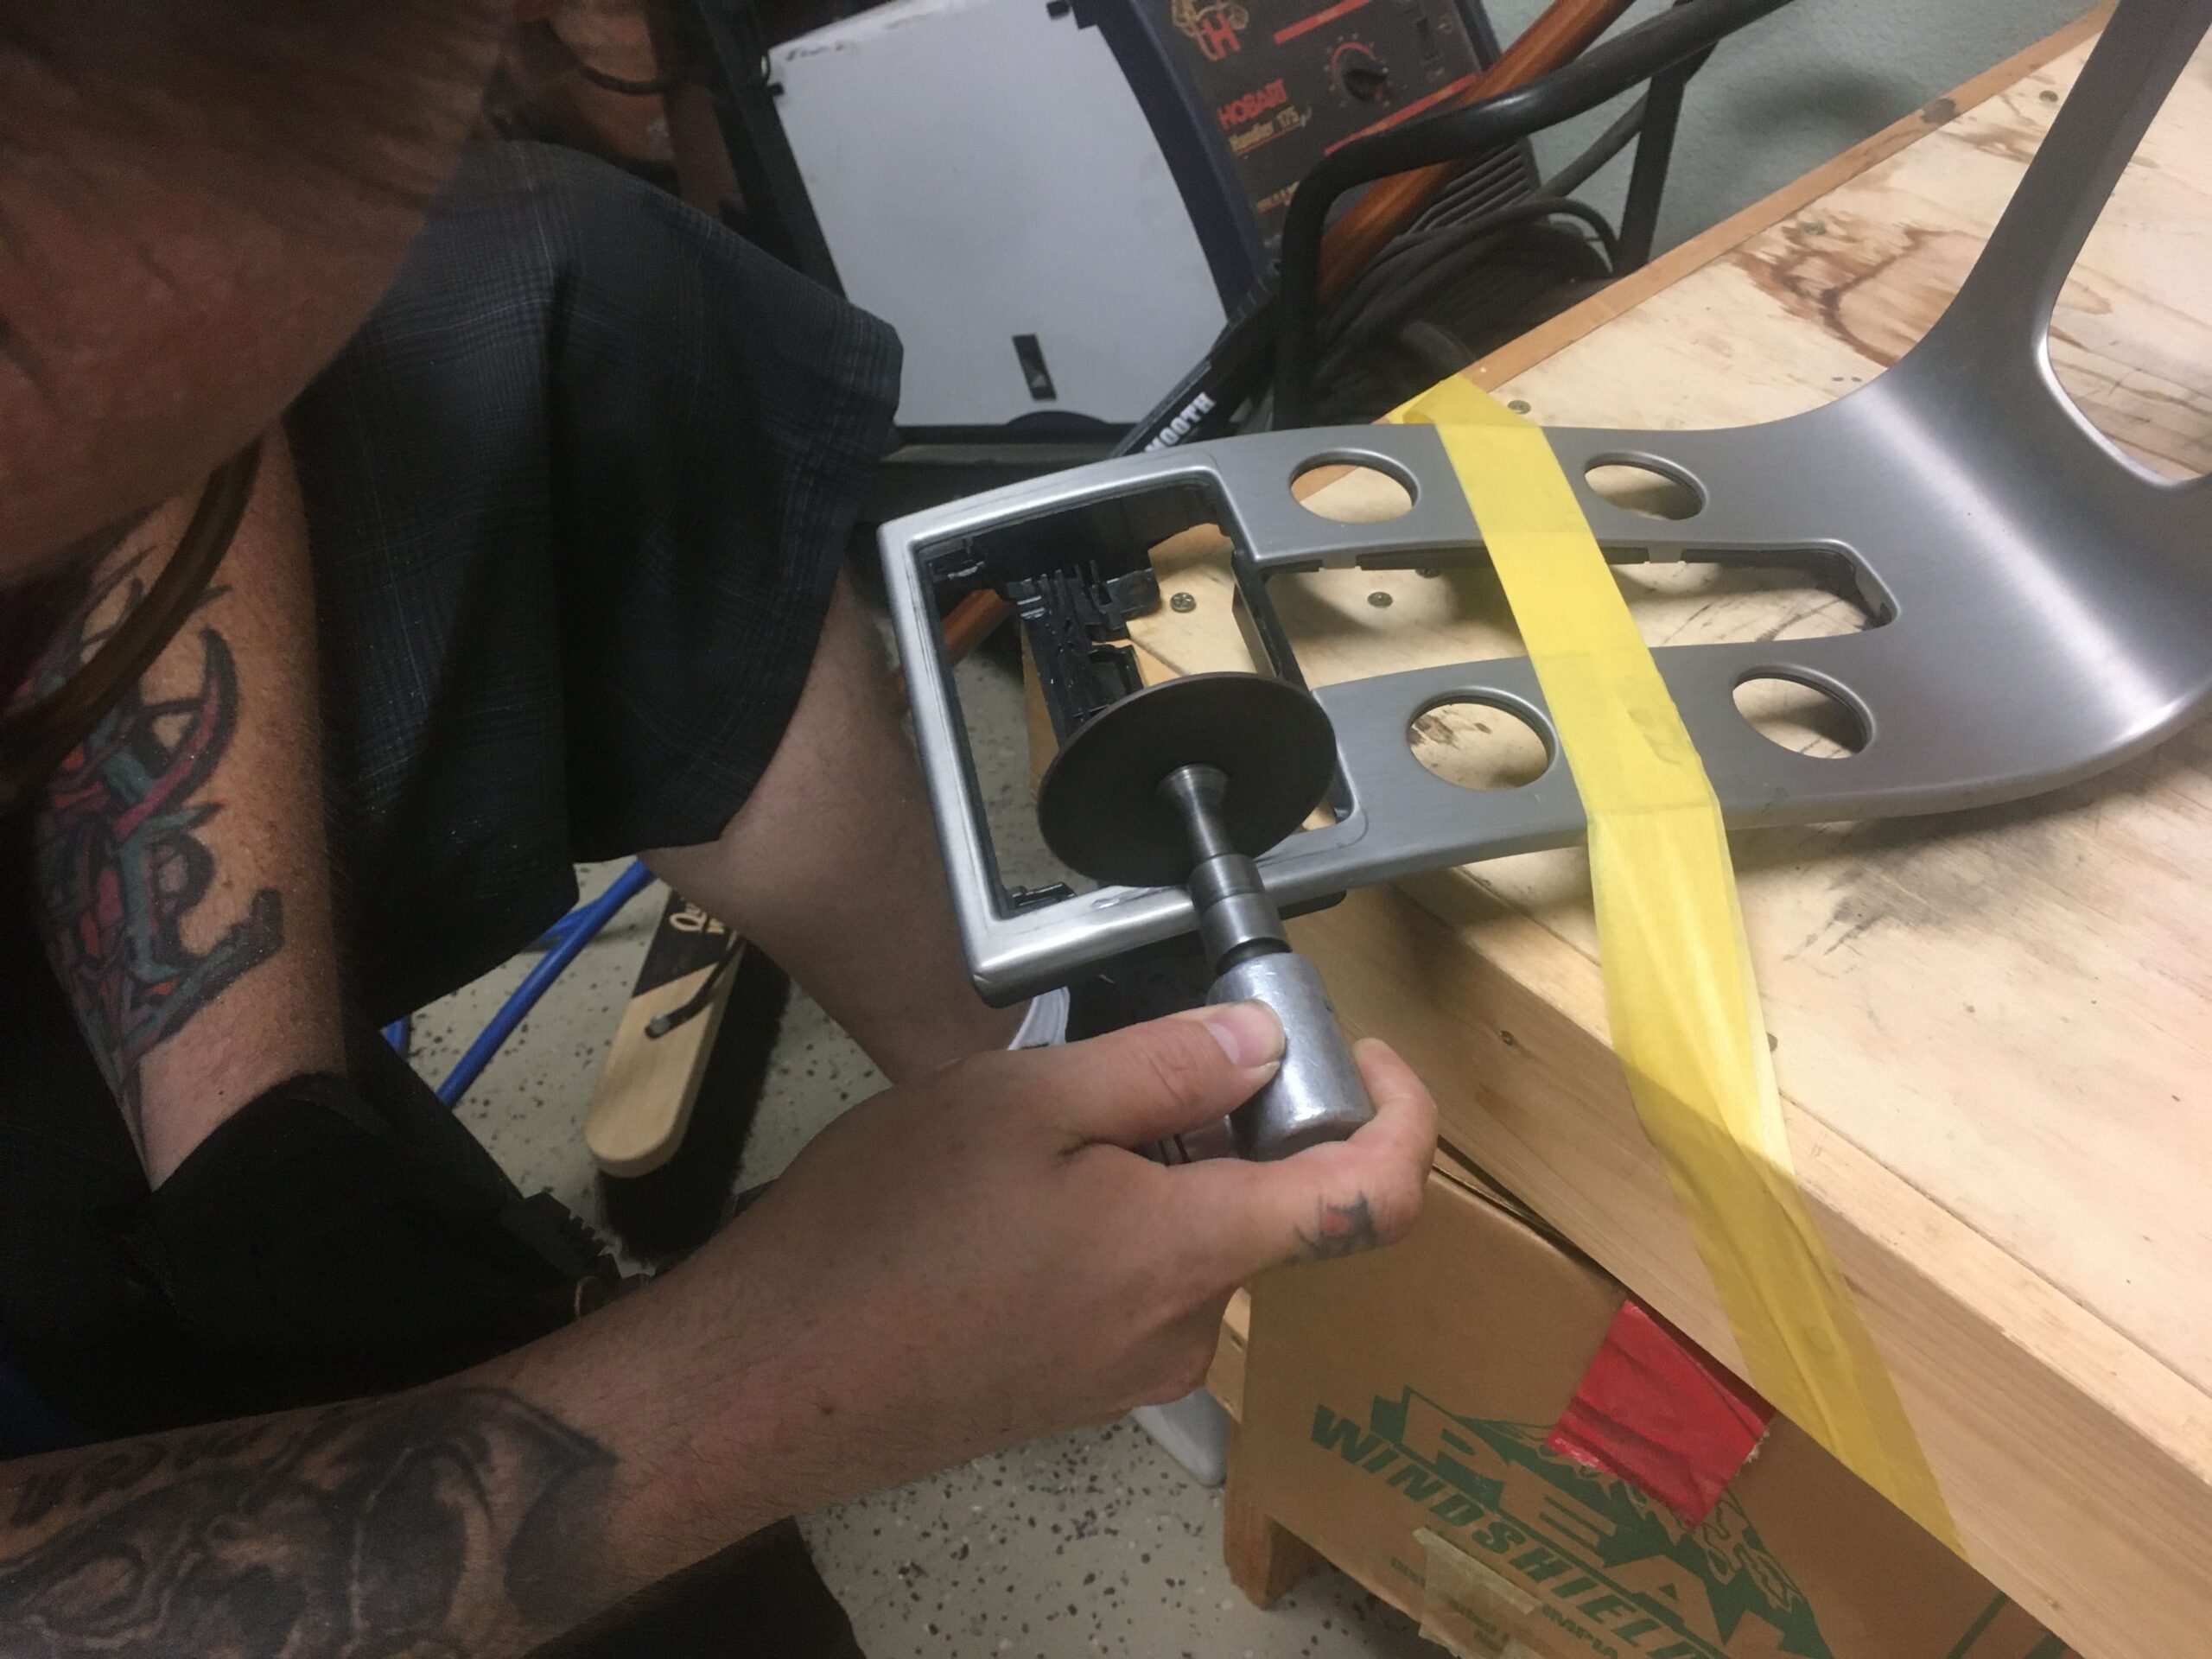
Next we use a sanding wheel to clean up the cut edges.
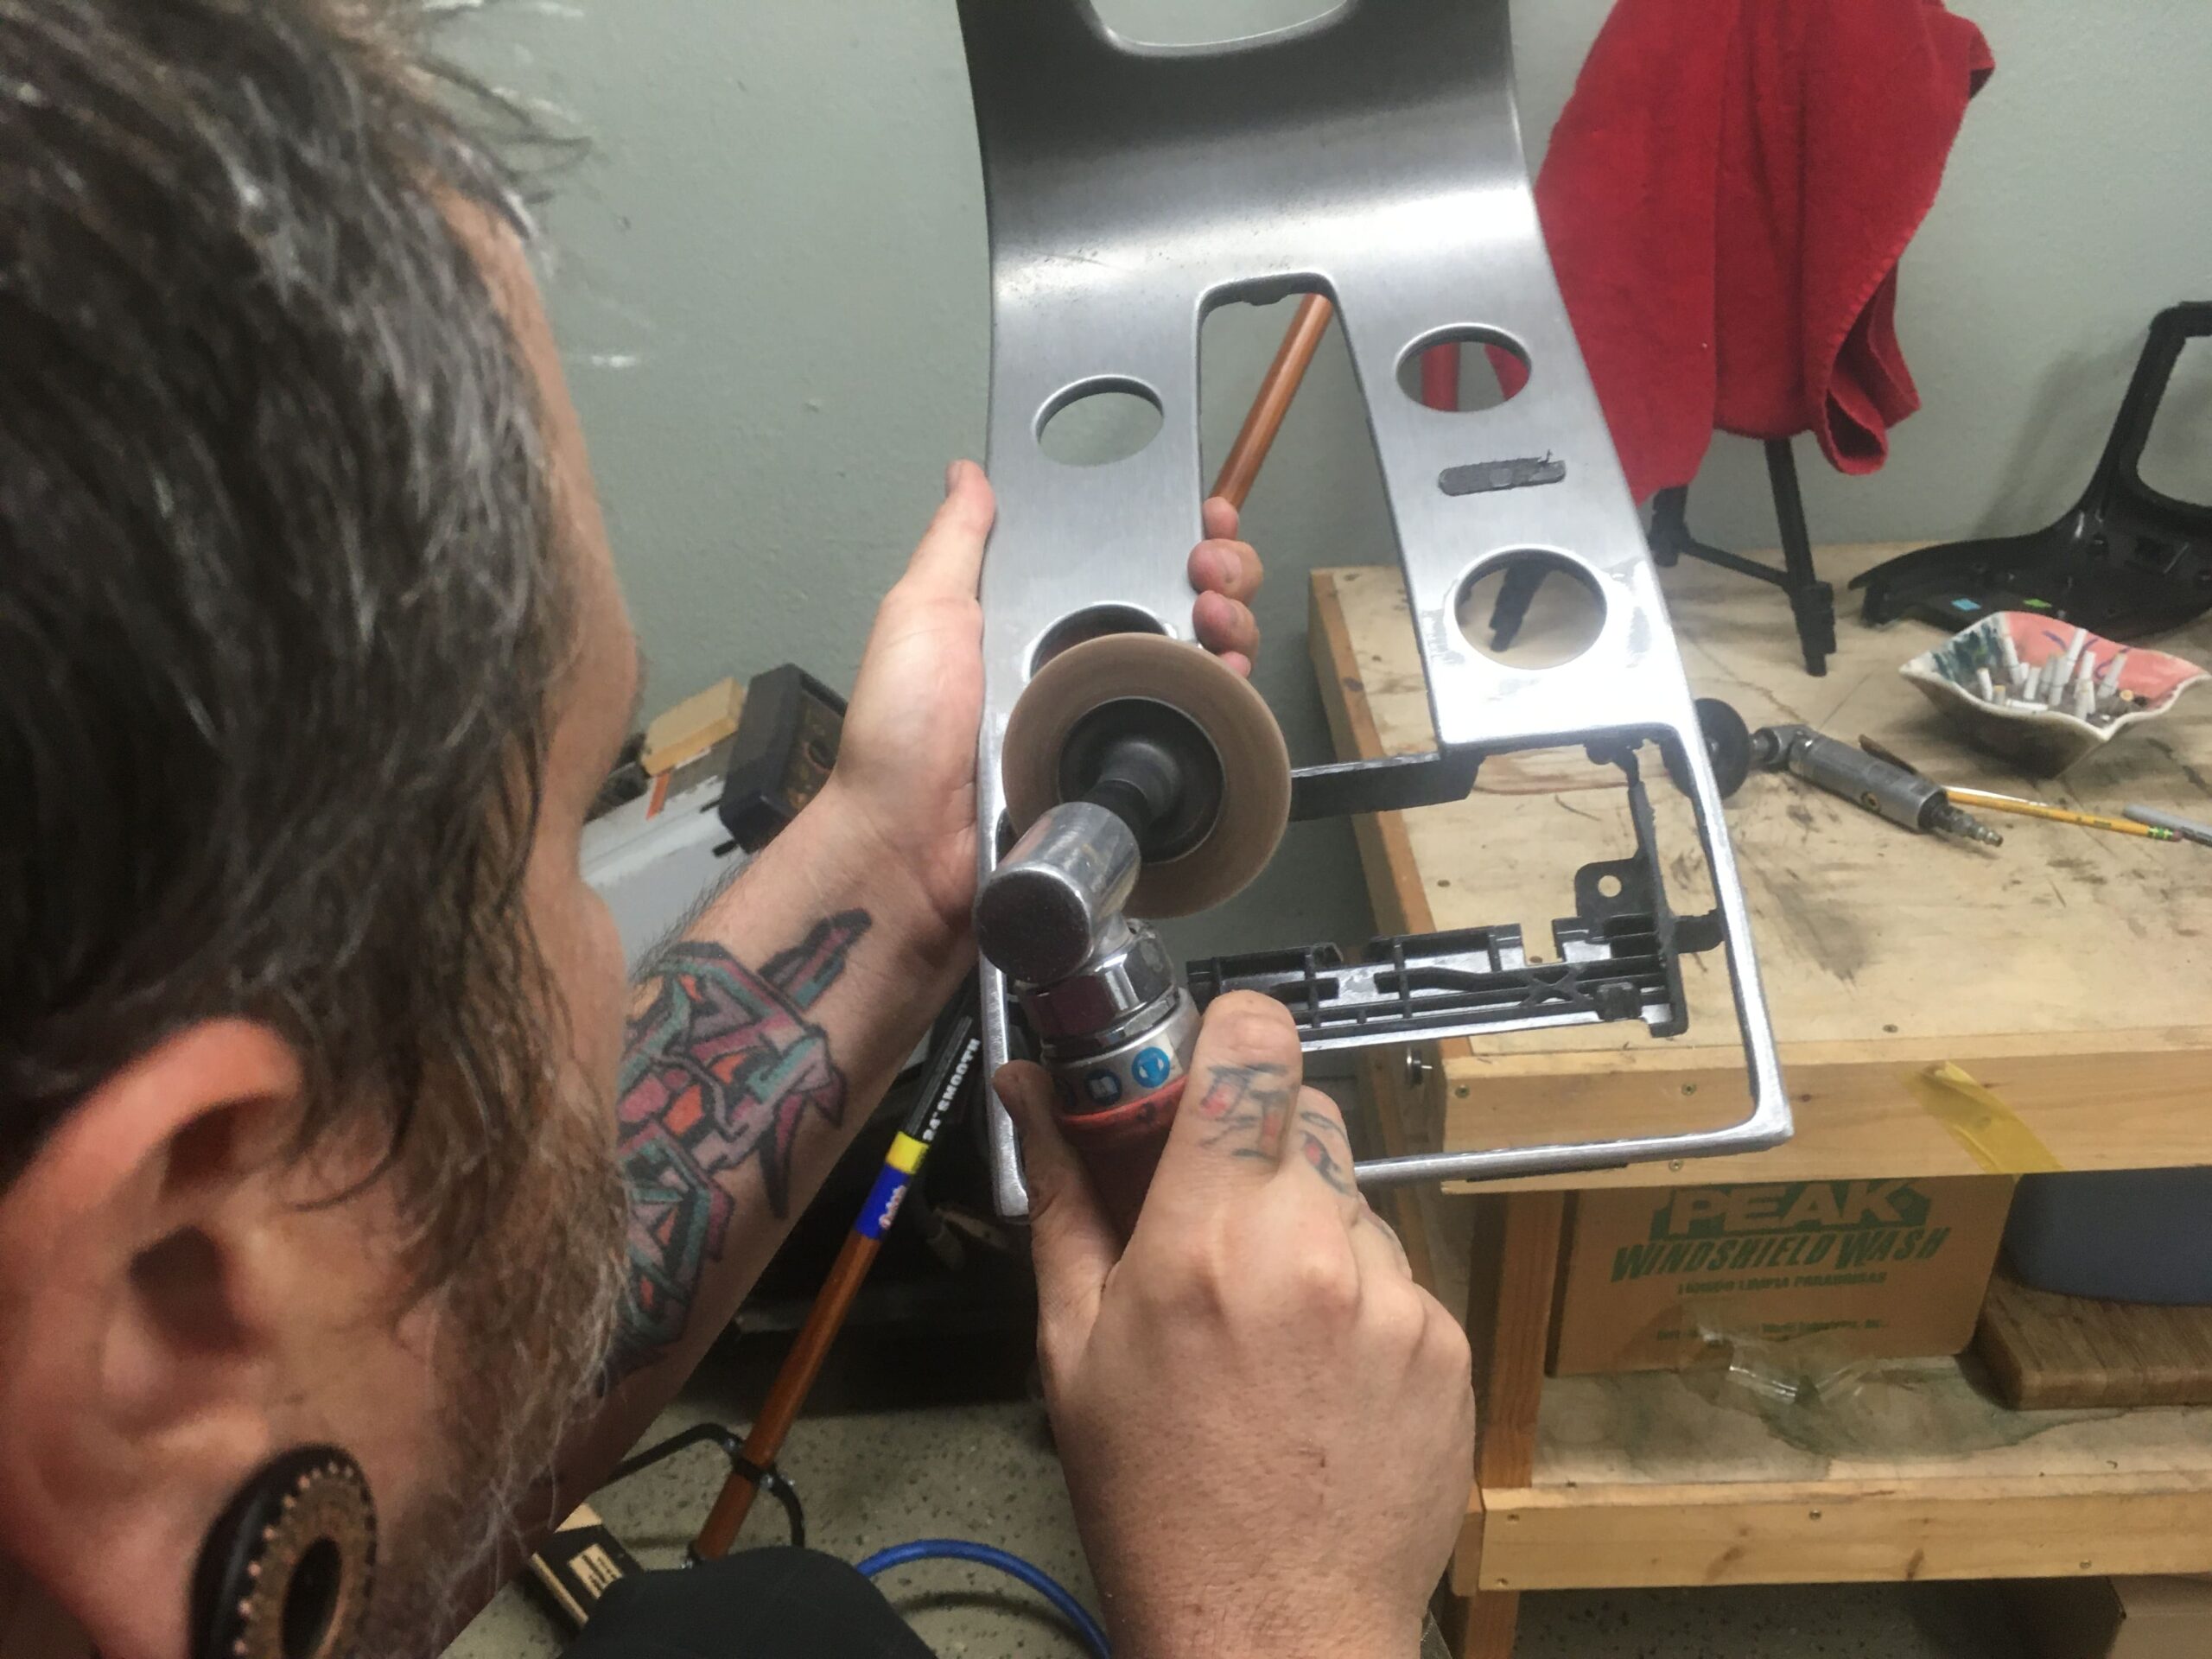
New test fit by hand.
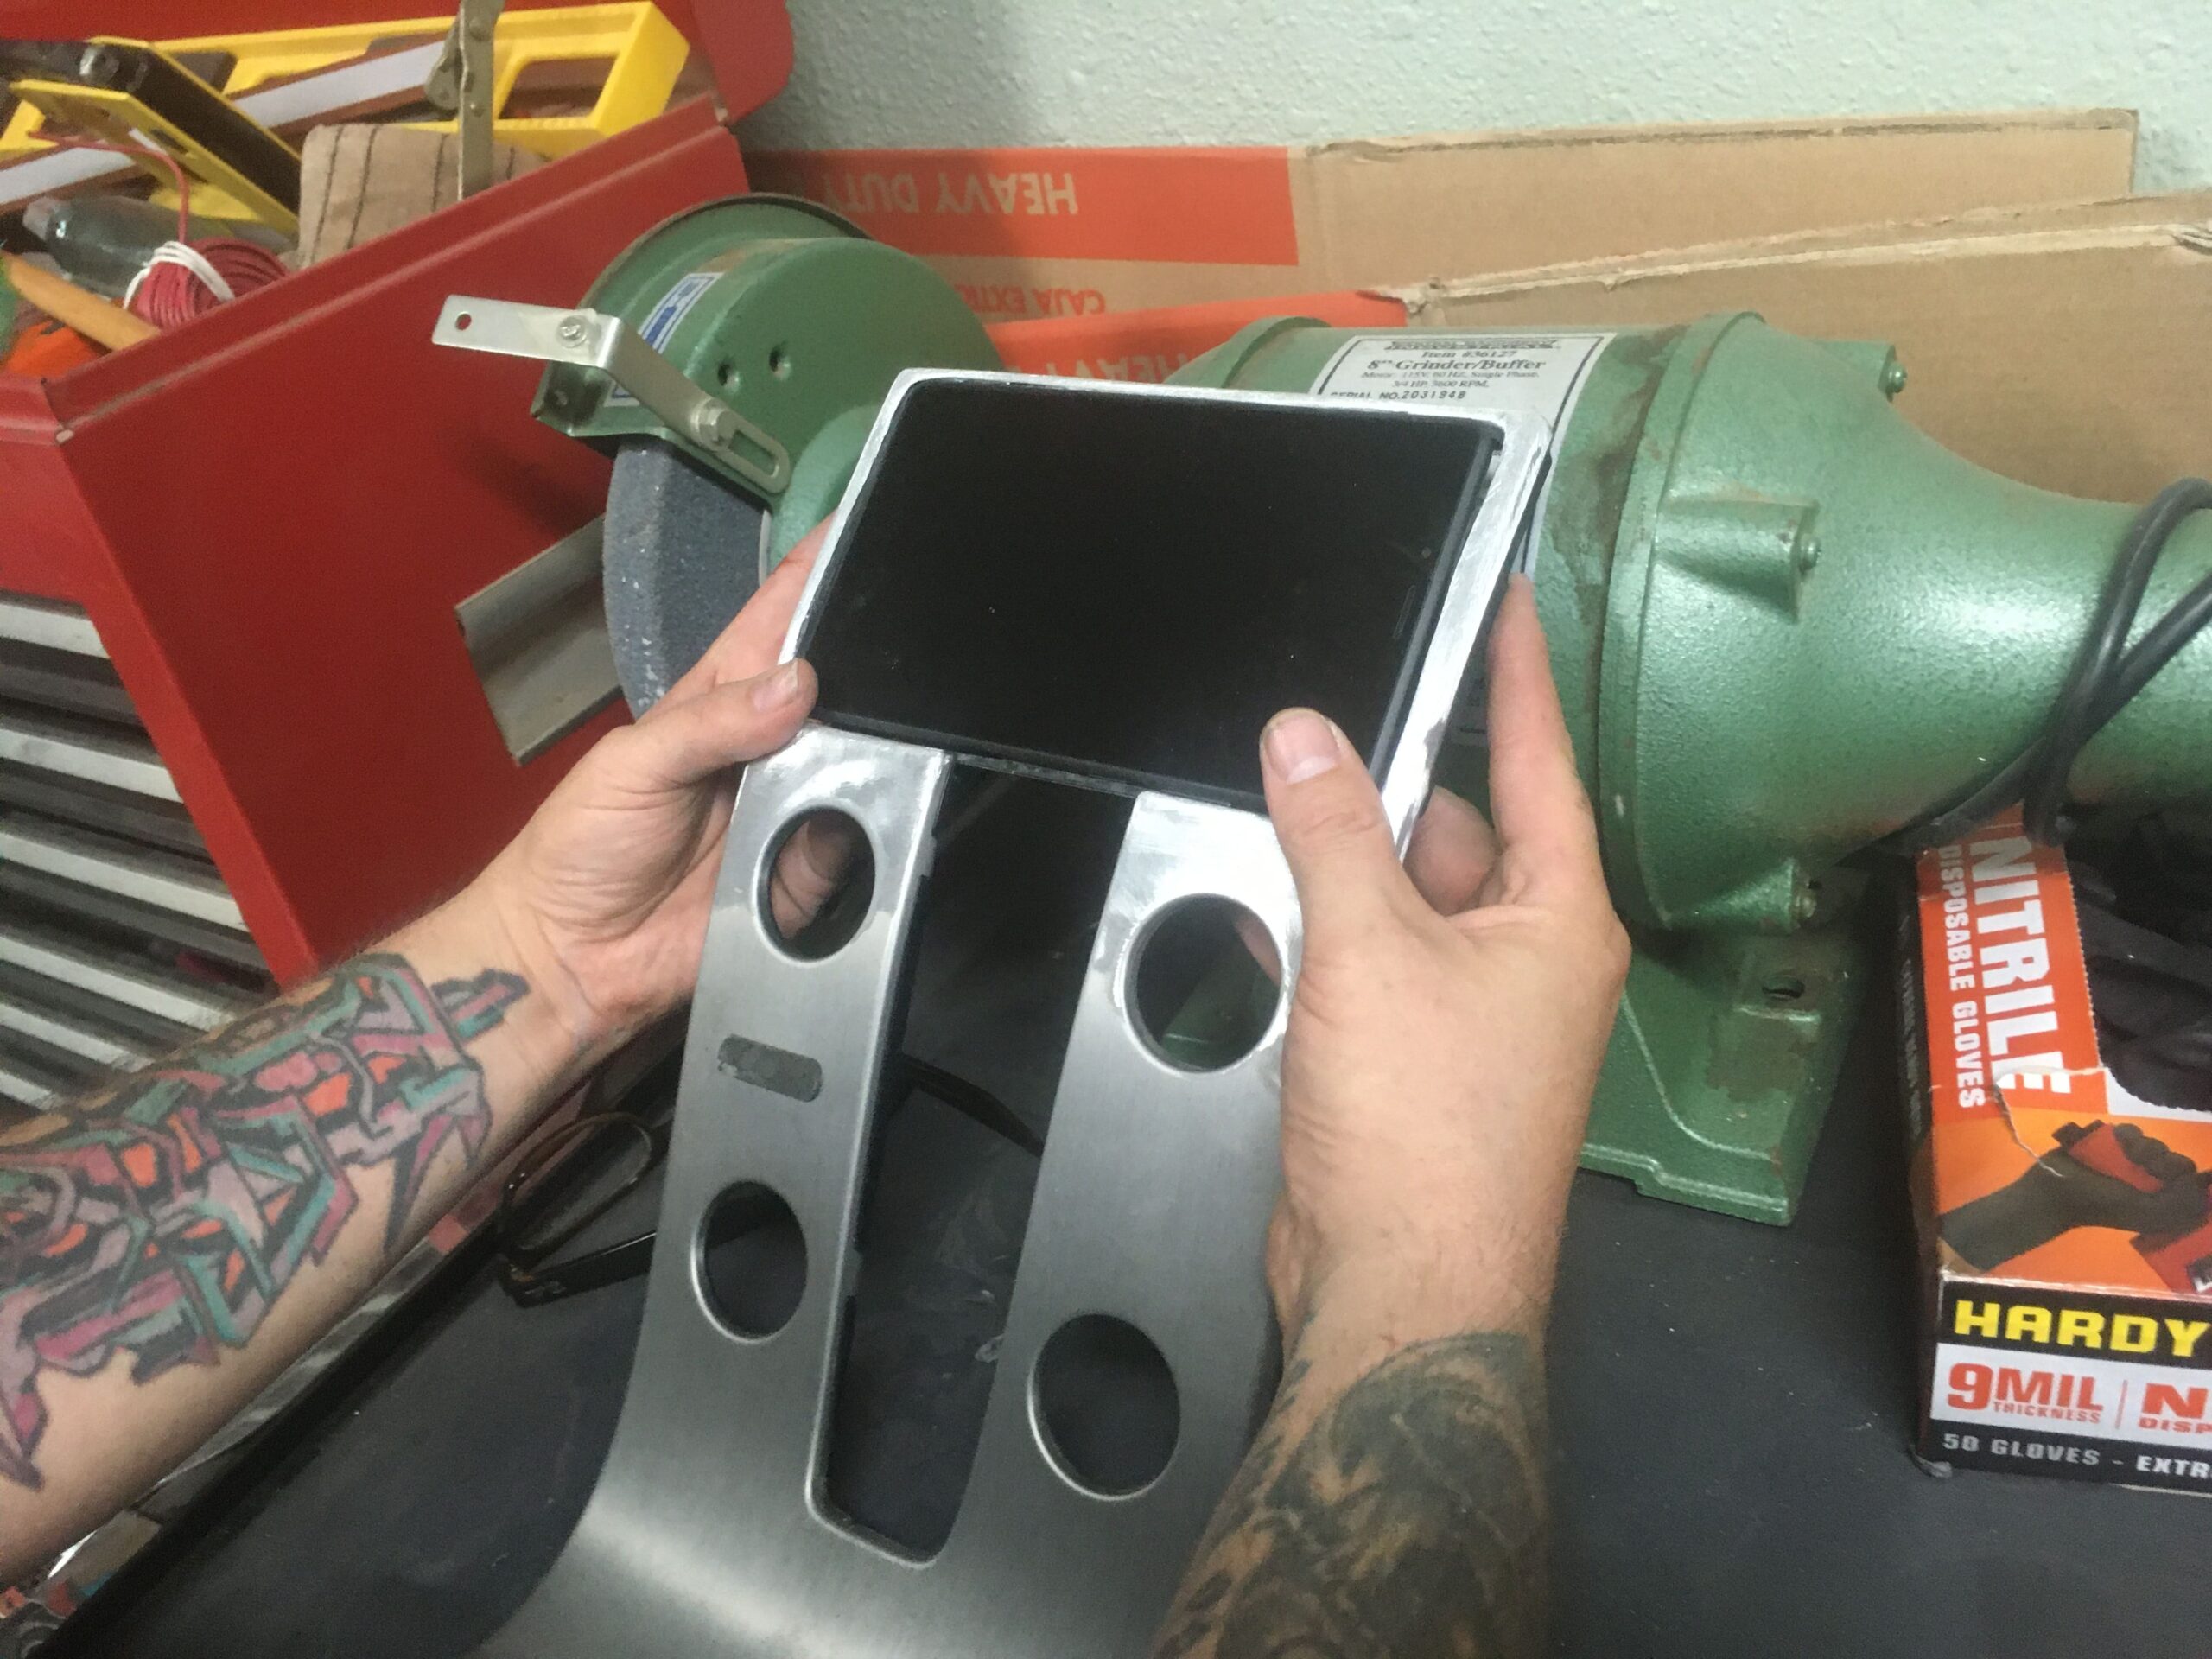
Test fit by itself.
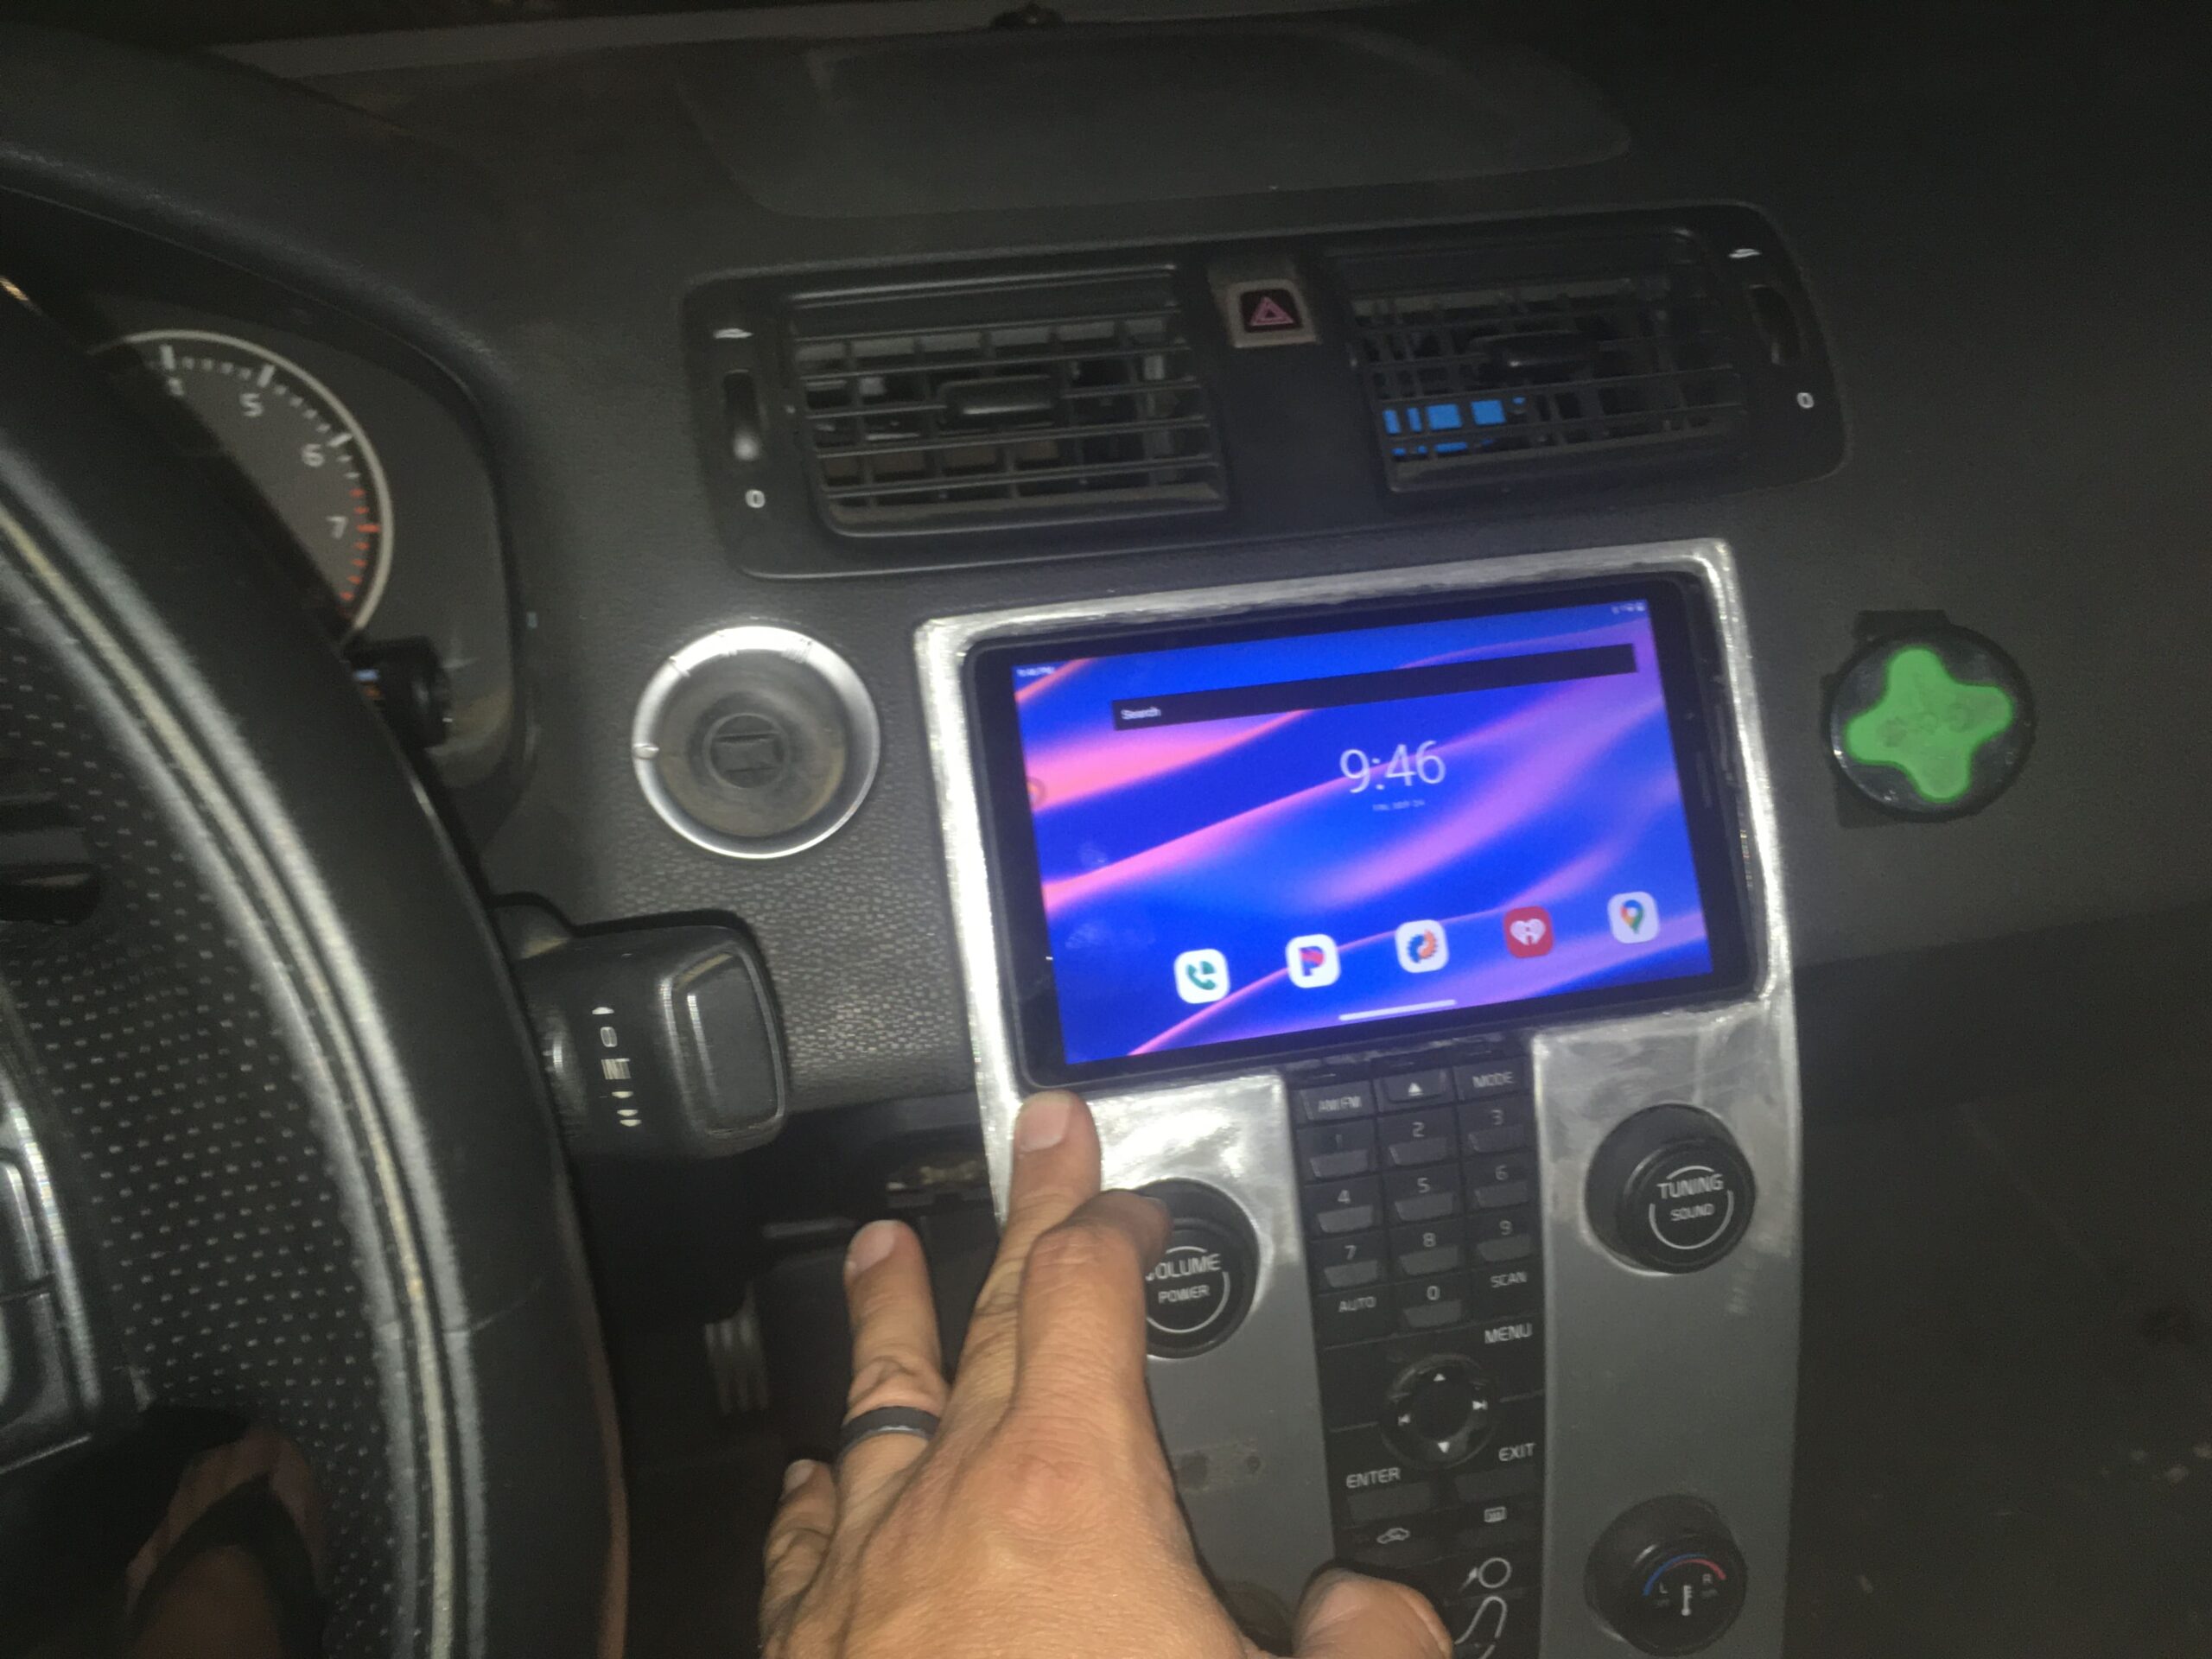
Test fit in the car. We do see some edge gaps, but we are upholstering the waterfall, so those will all be gone. If we were doing paint, we would clean the edges a bit more, and possibly do some body work on it to get it super clean and ready for paint.
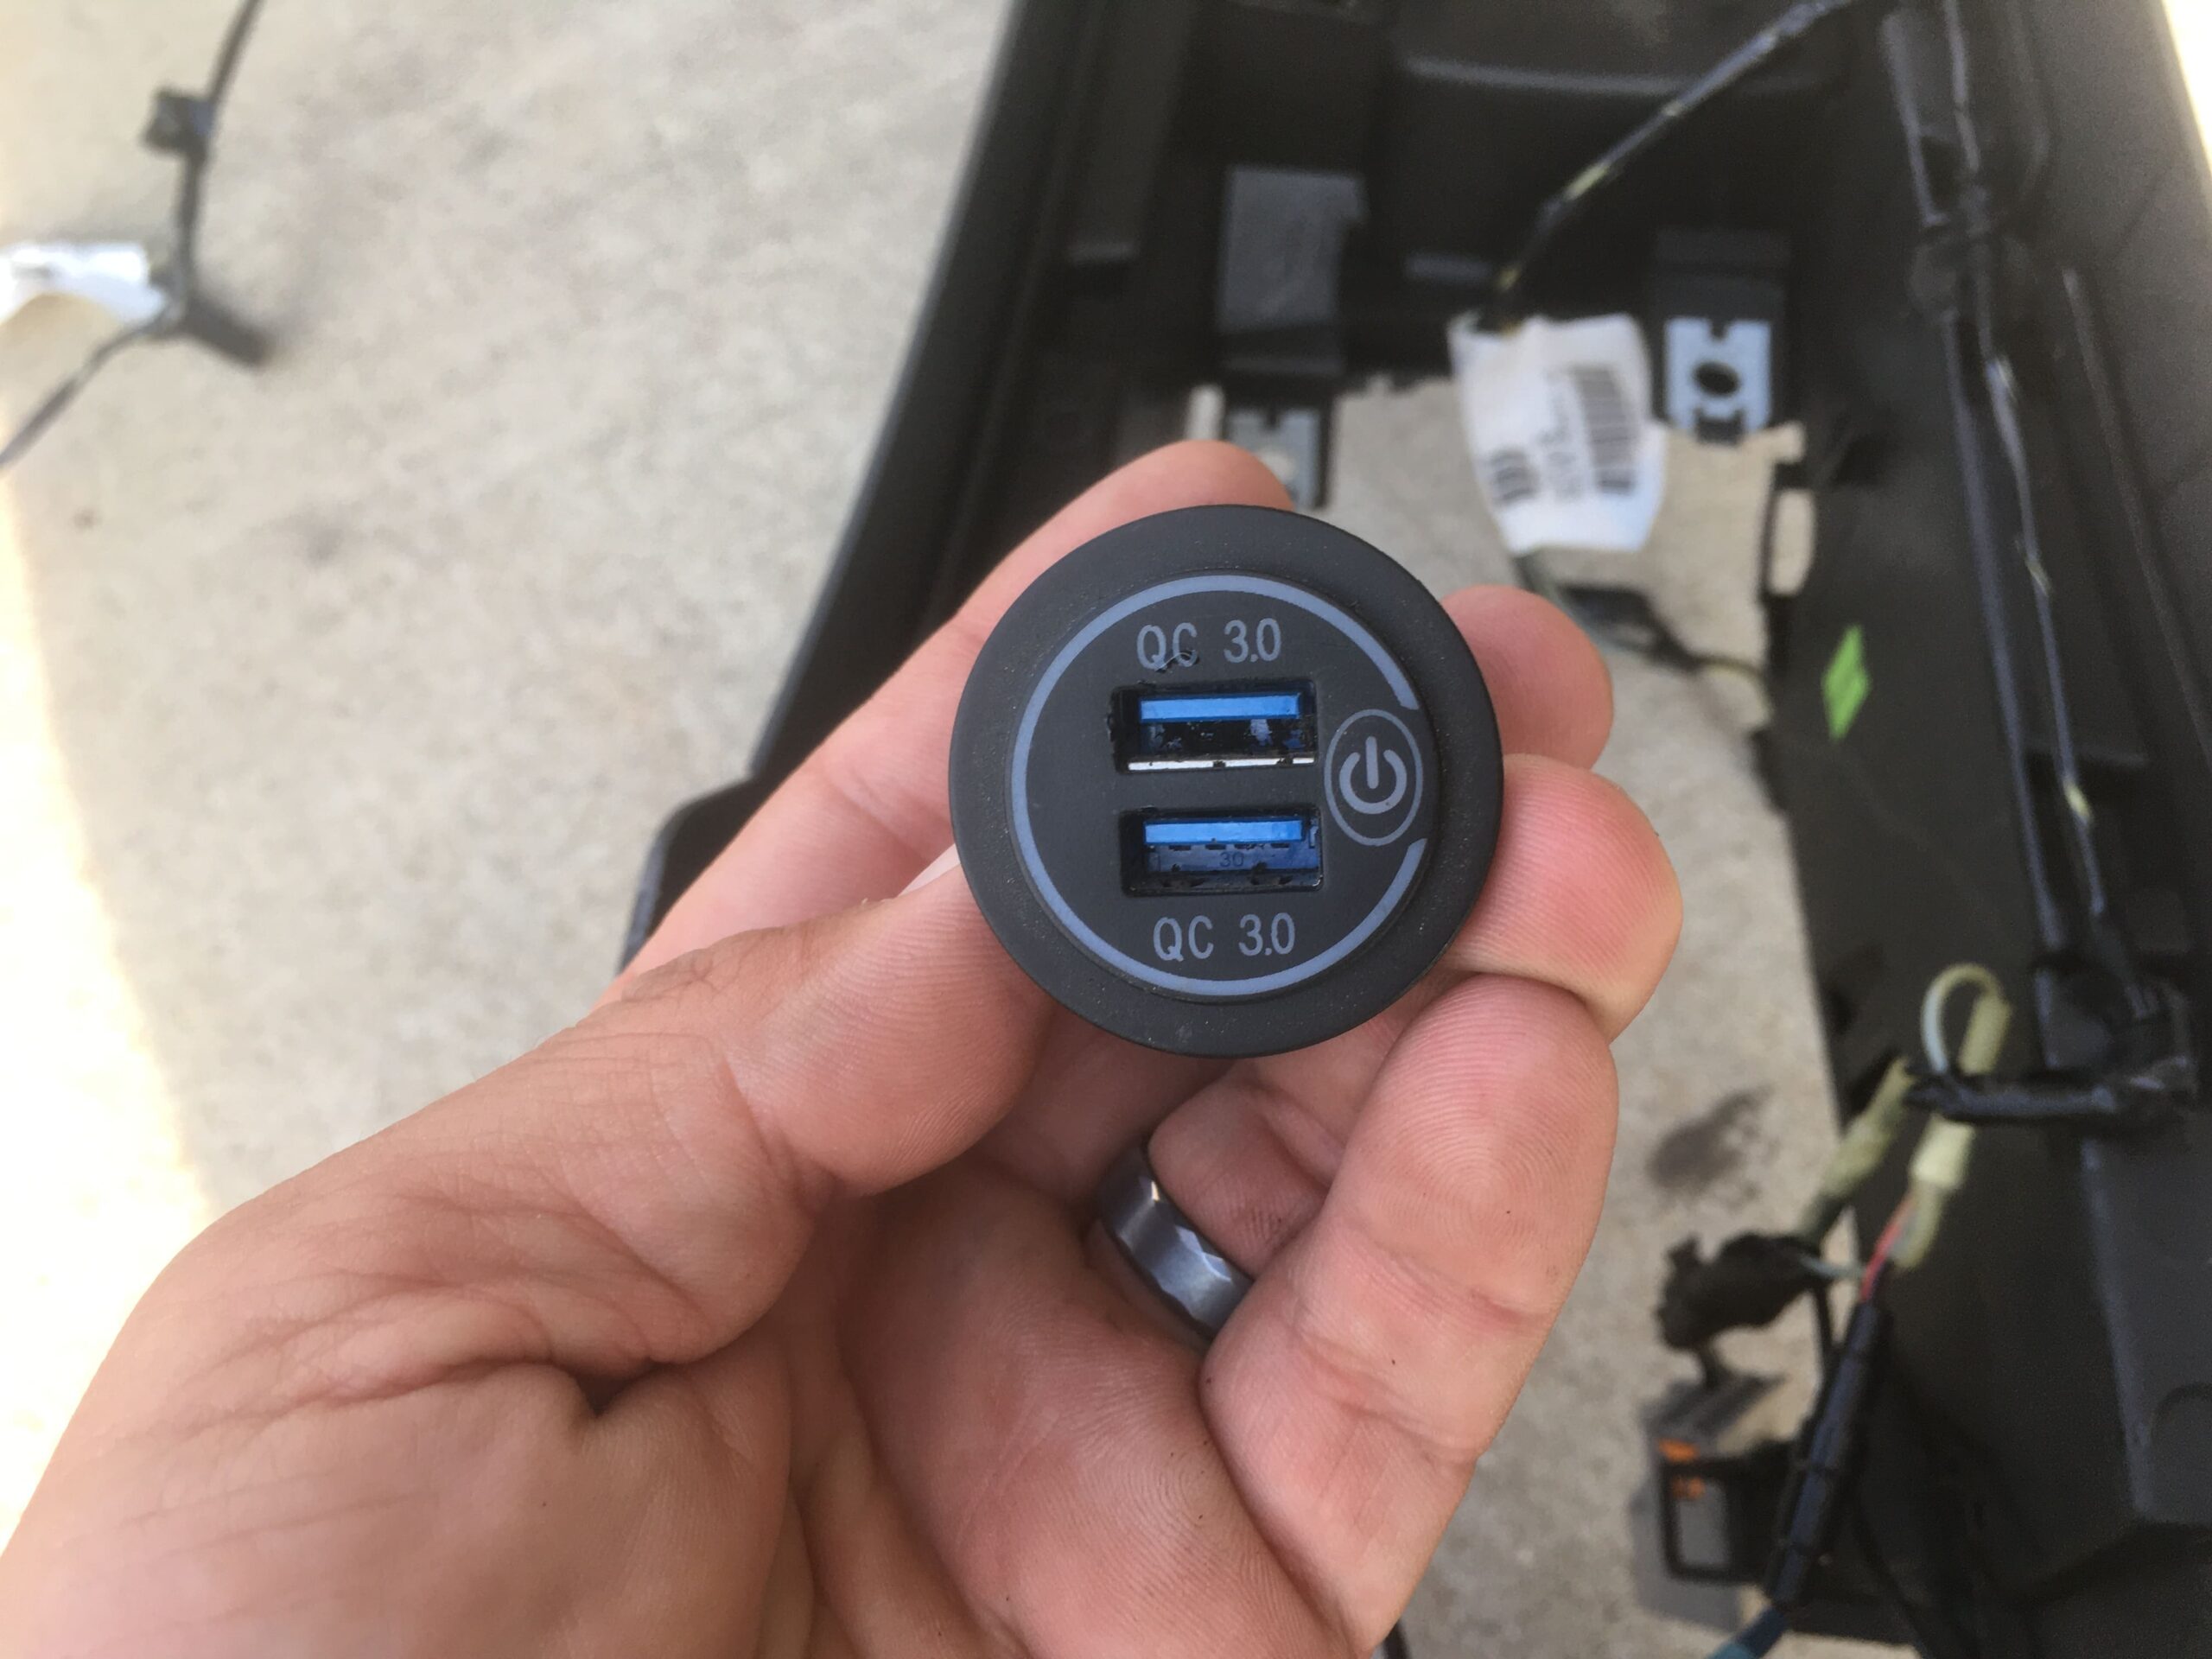
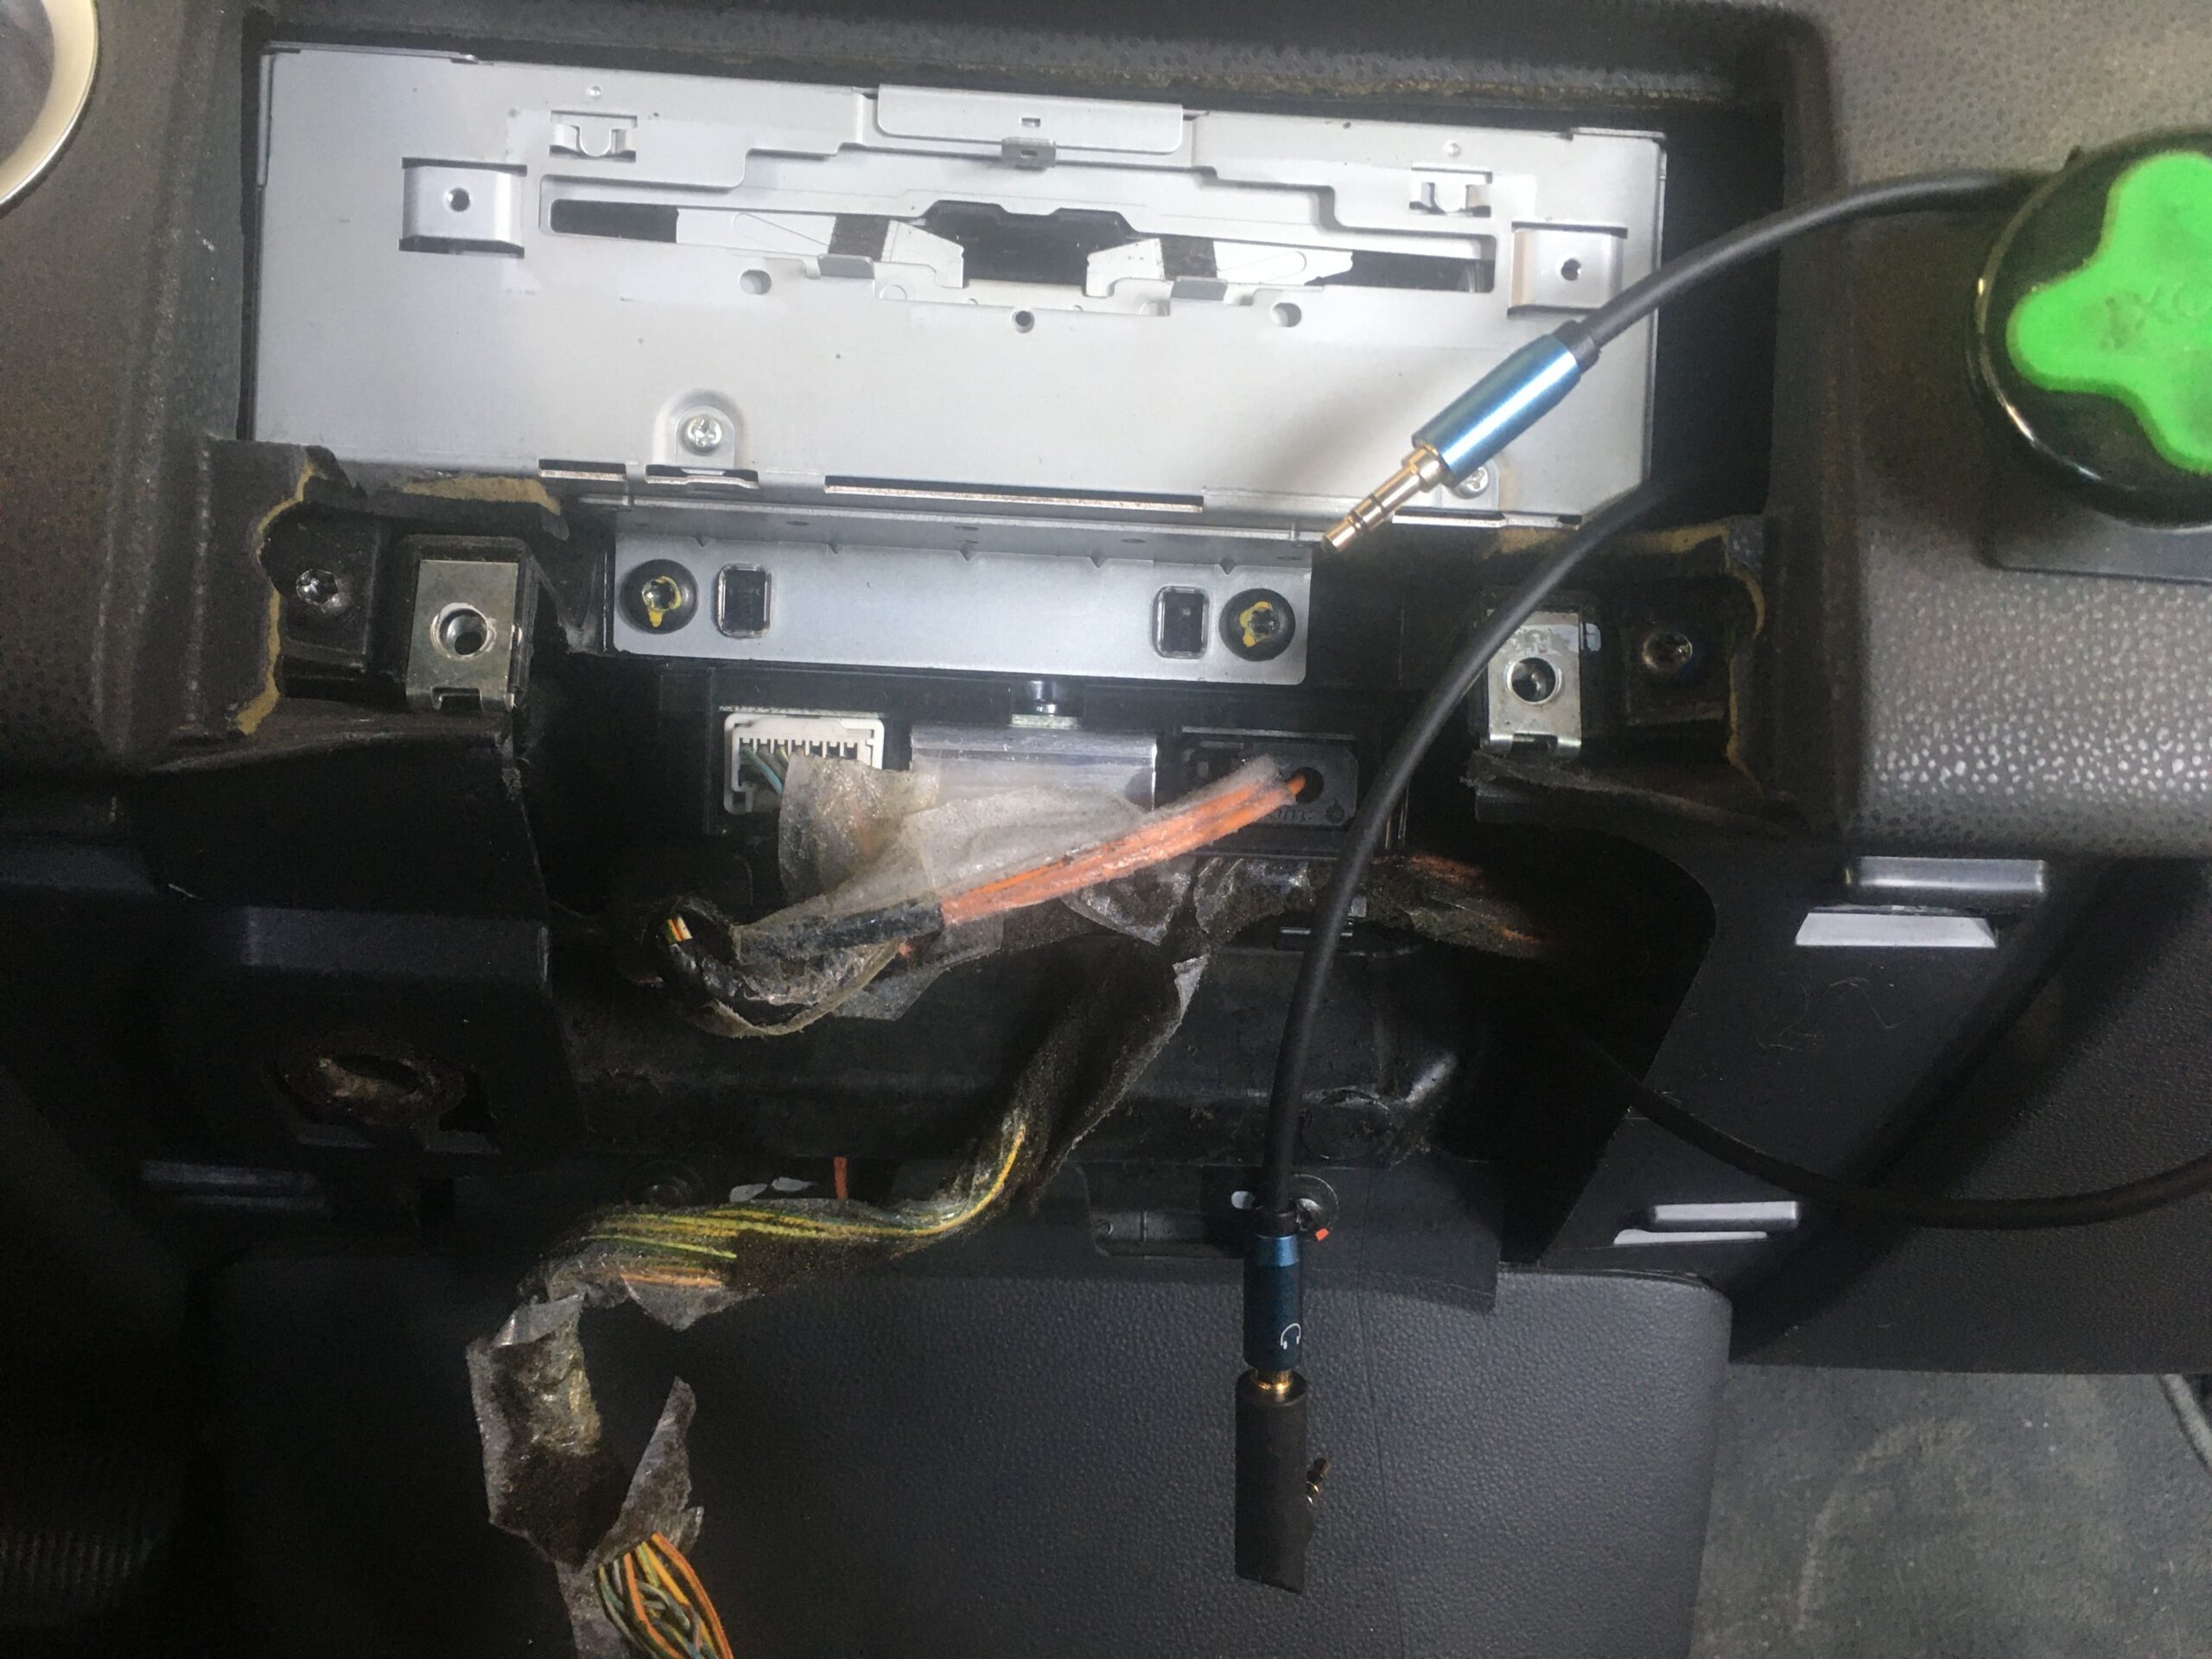
Here is the 12V USB port.
Simple ground and power wire.
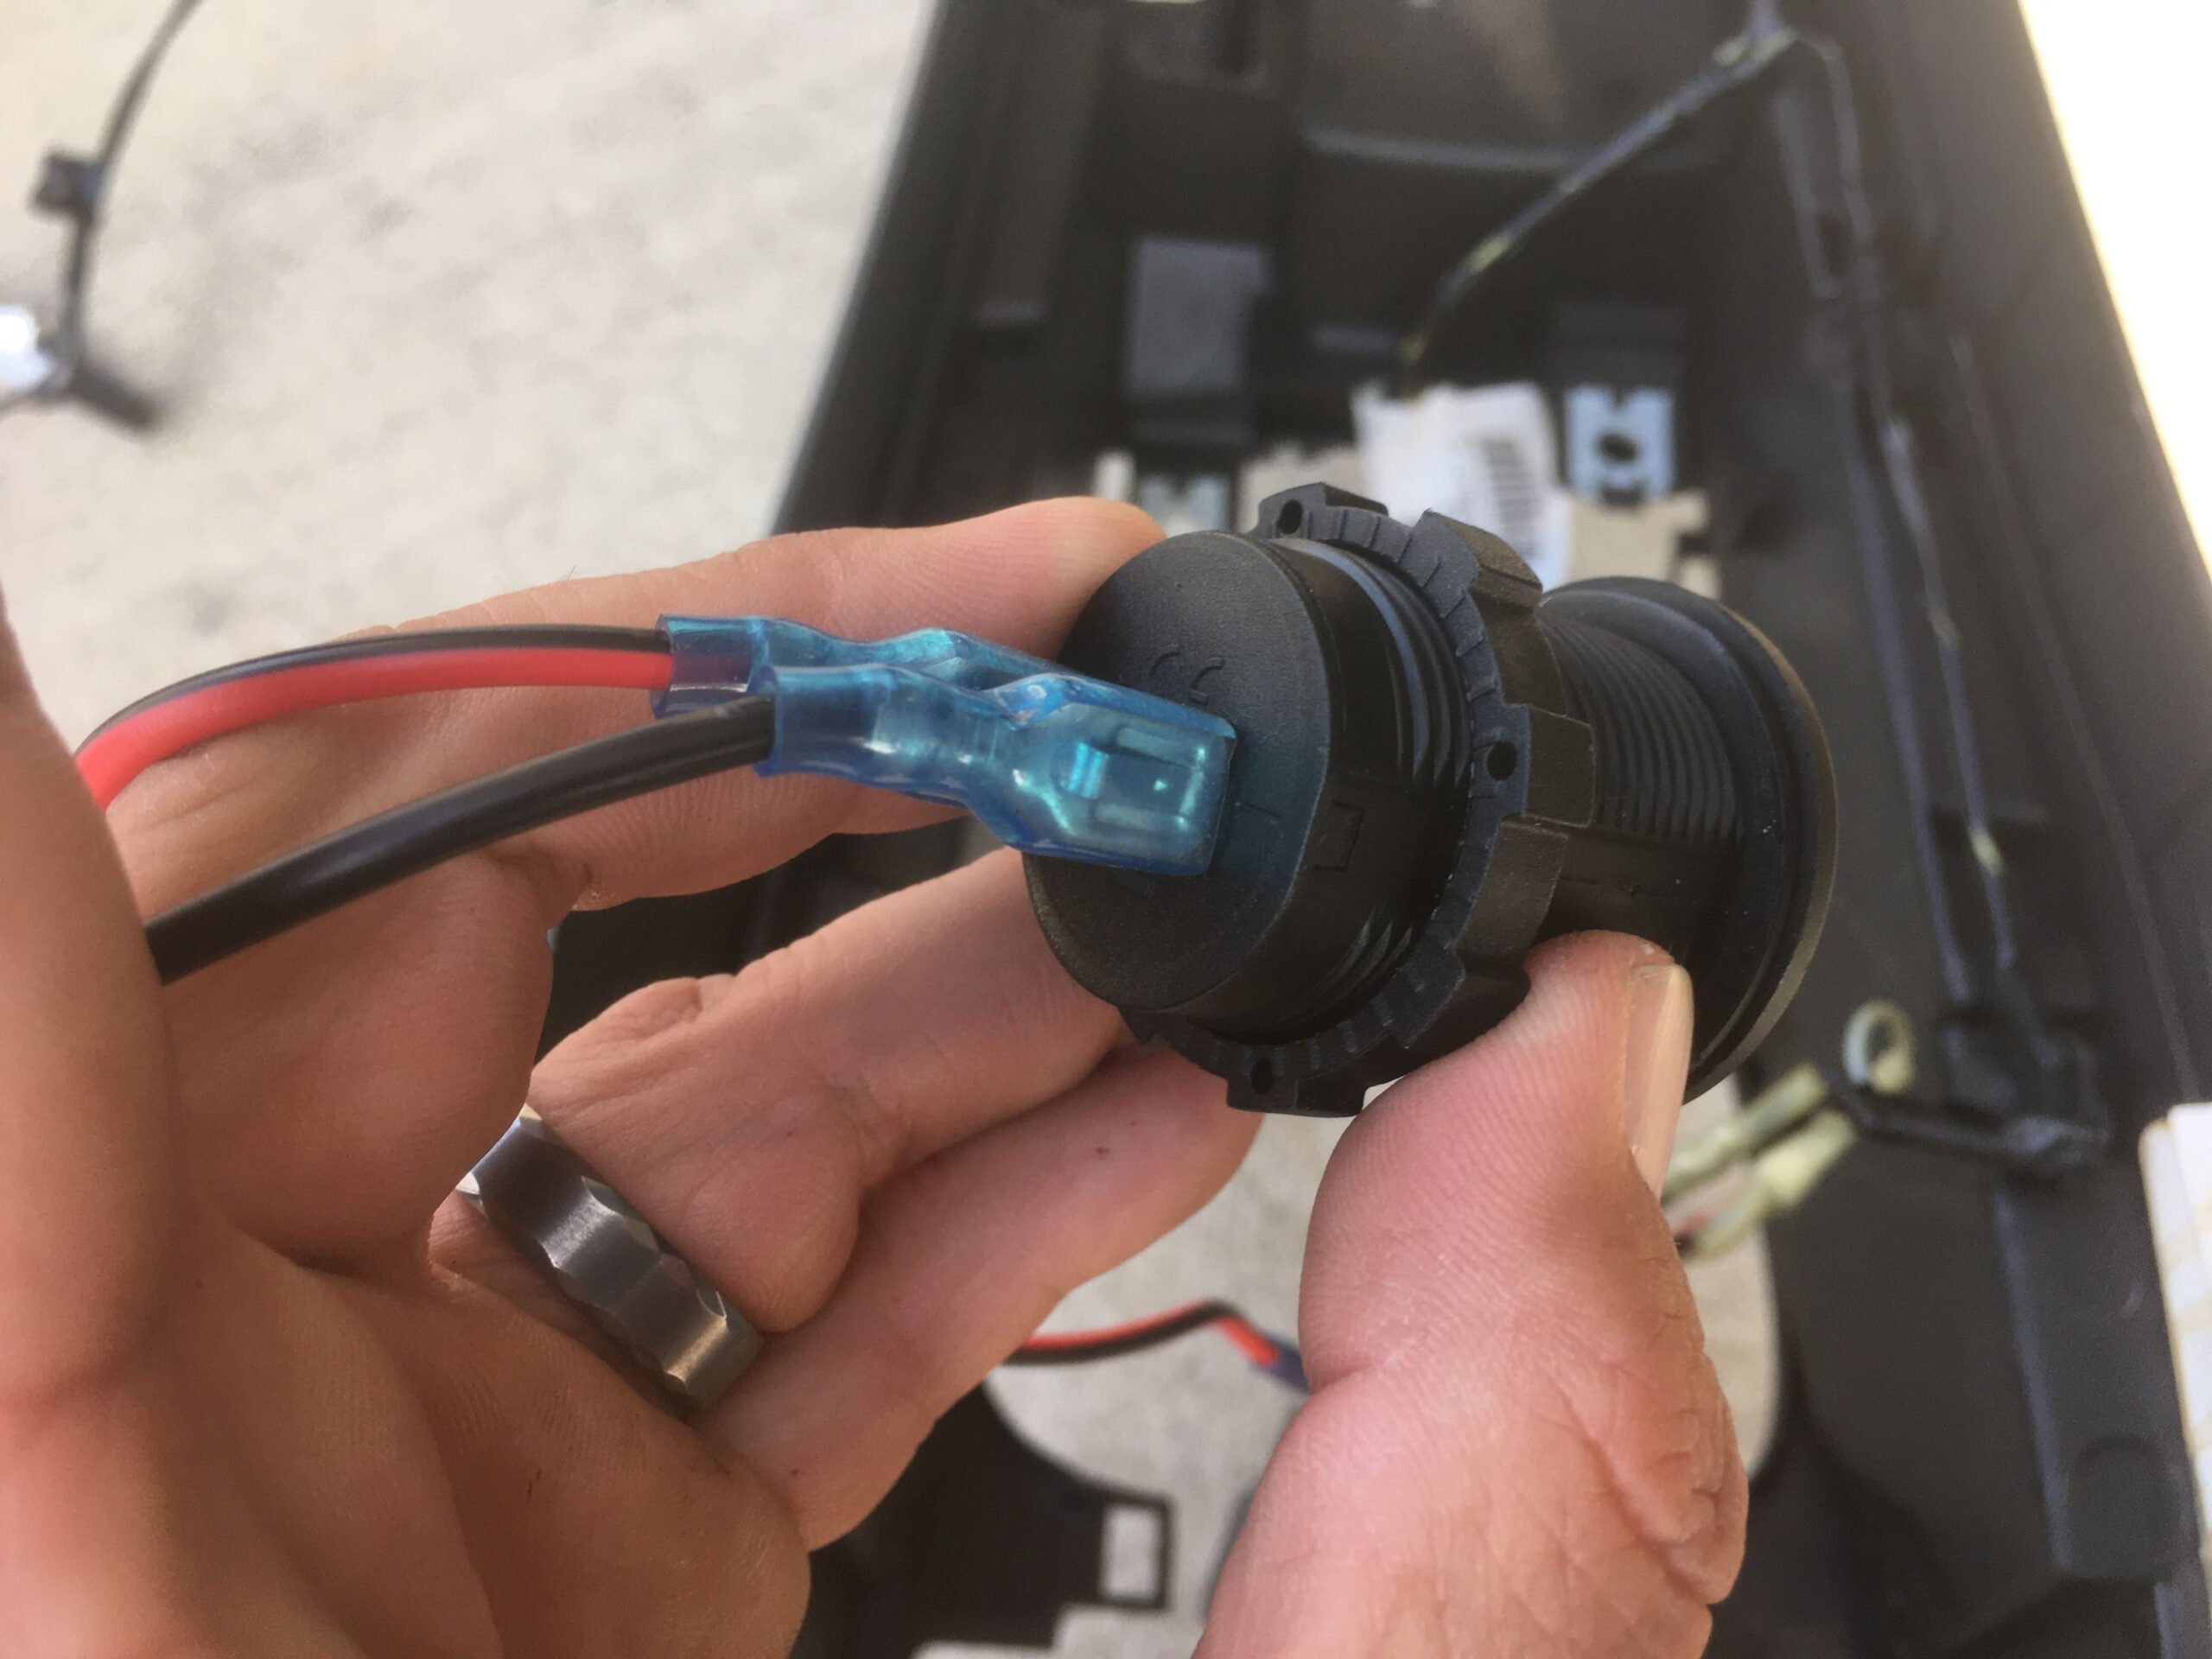
under the center console is your 12V port plug. We tapped into the ground and power, adding an inline fuse for power, then just ran this up to the radio area.
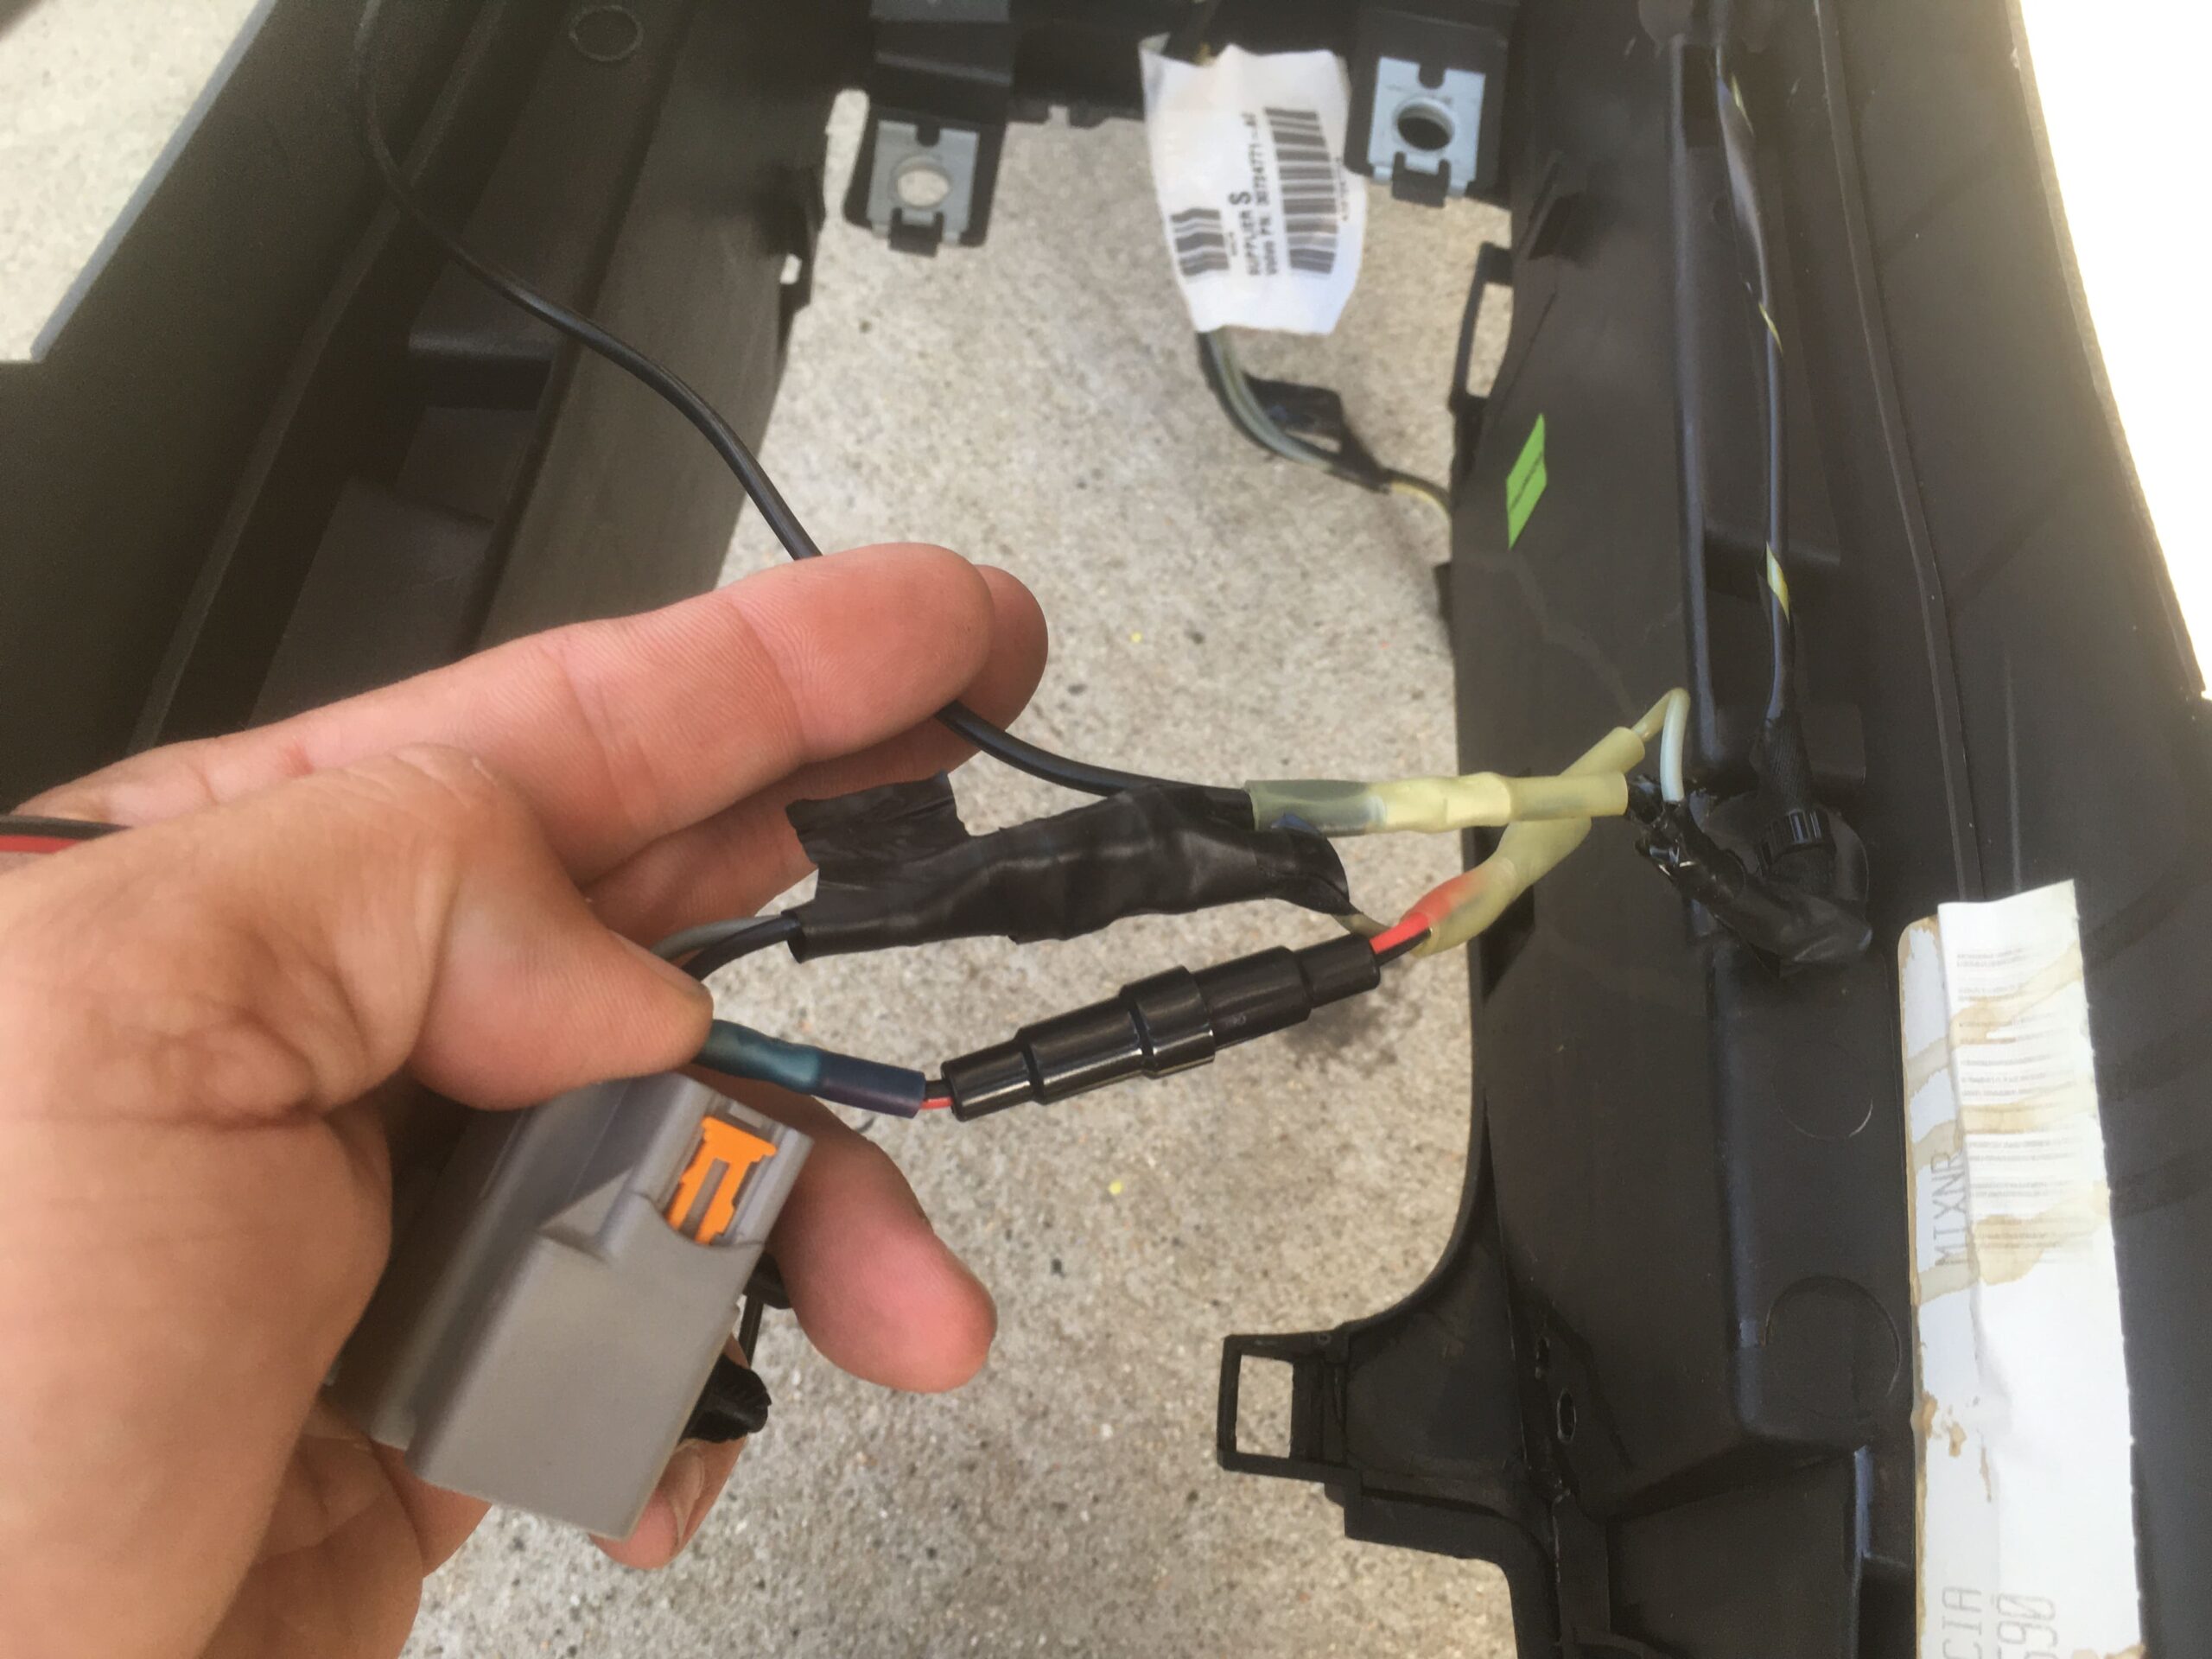
Now our tablet and iPhone have power when the car is on, and our factory aux port will also be behind the waterfall, out of view.
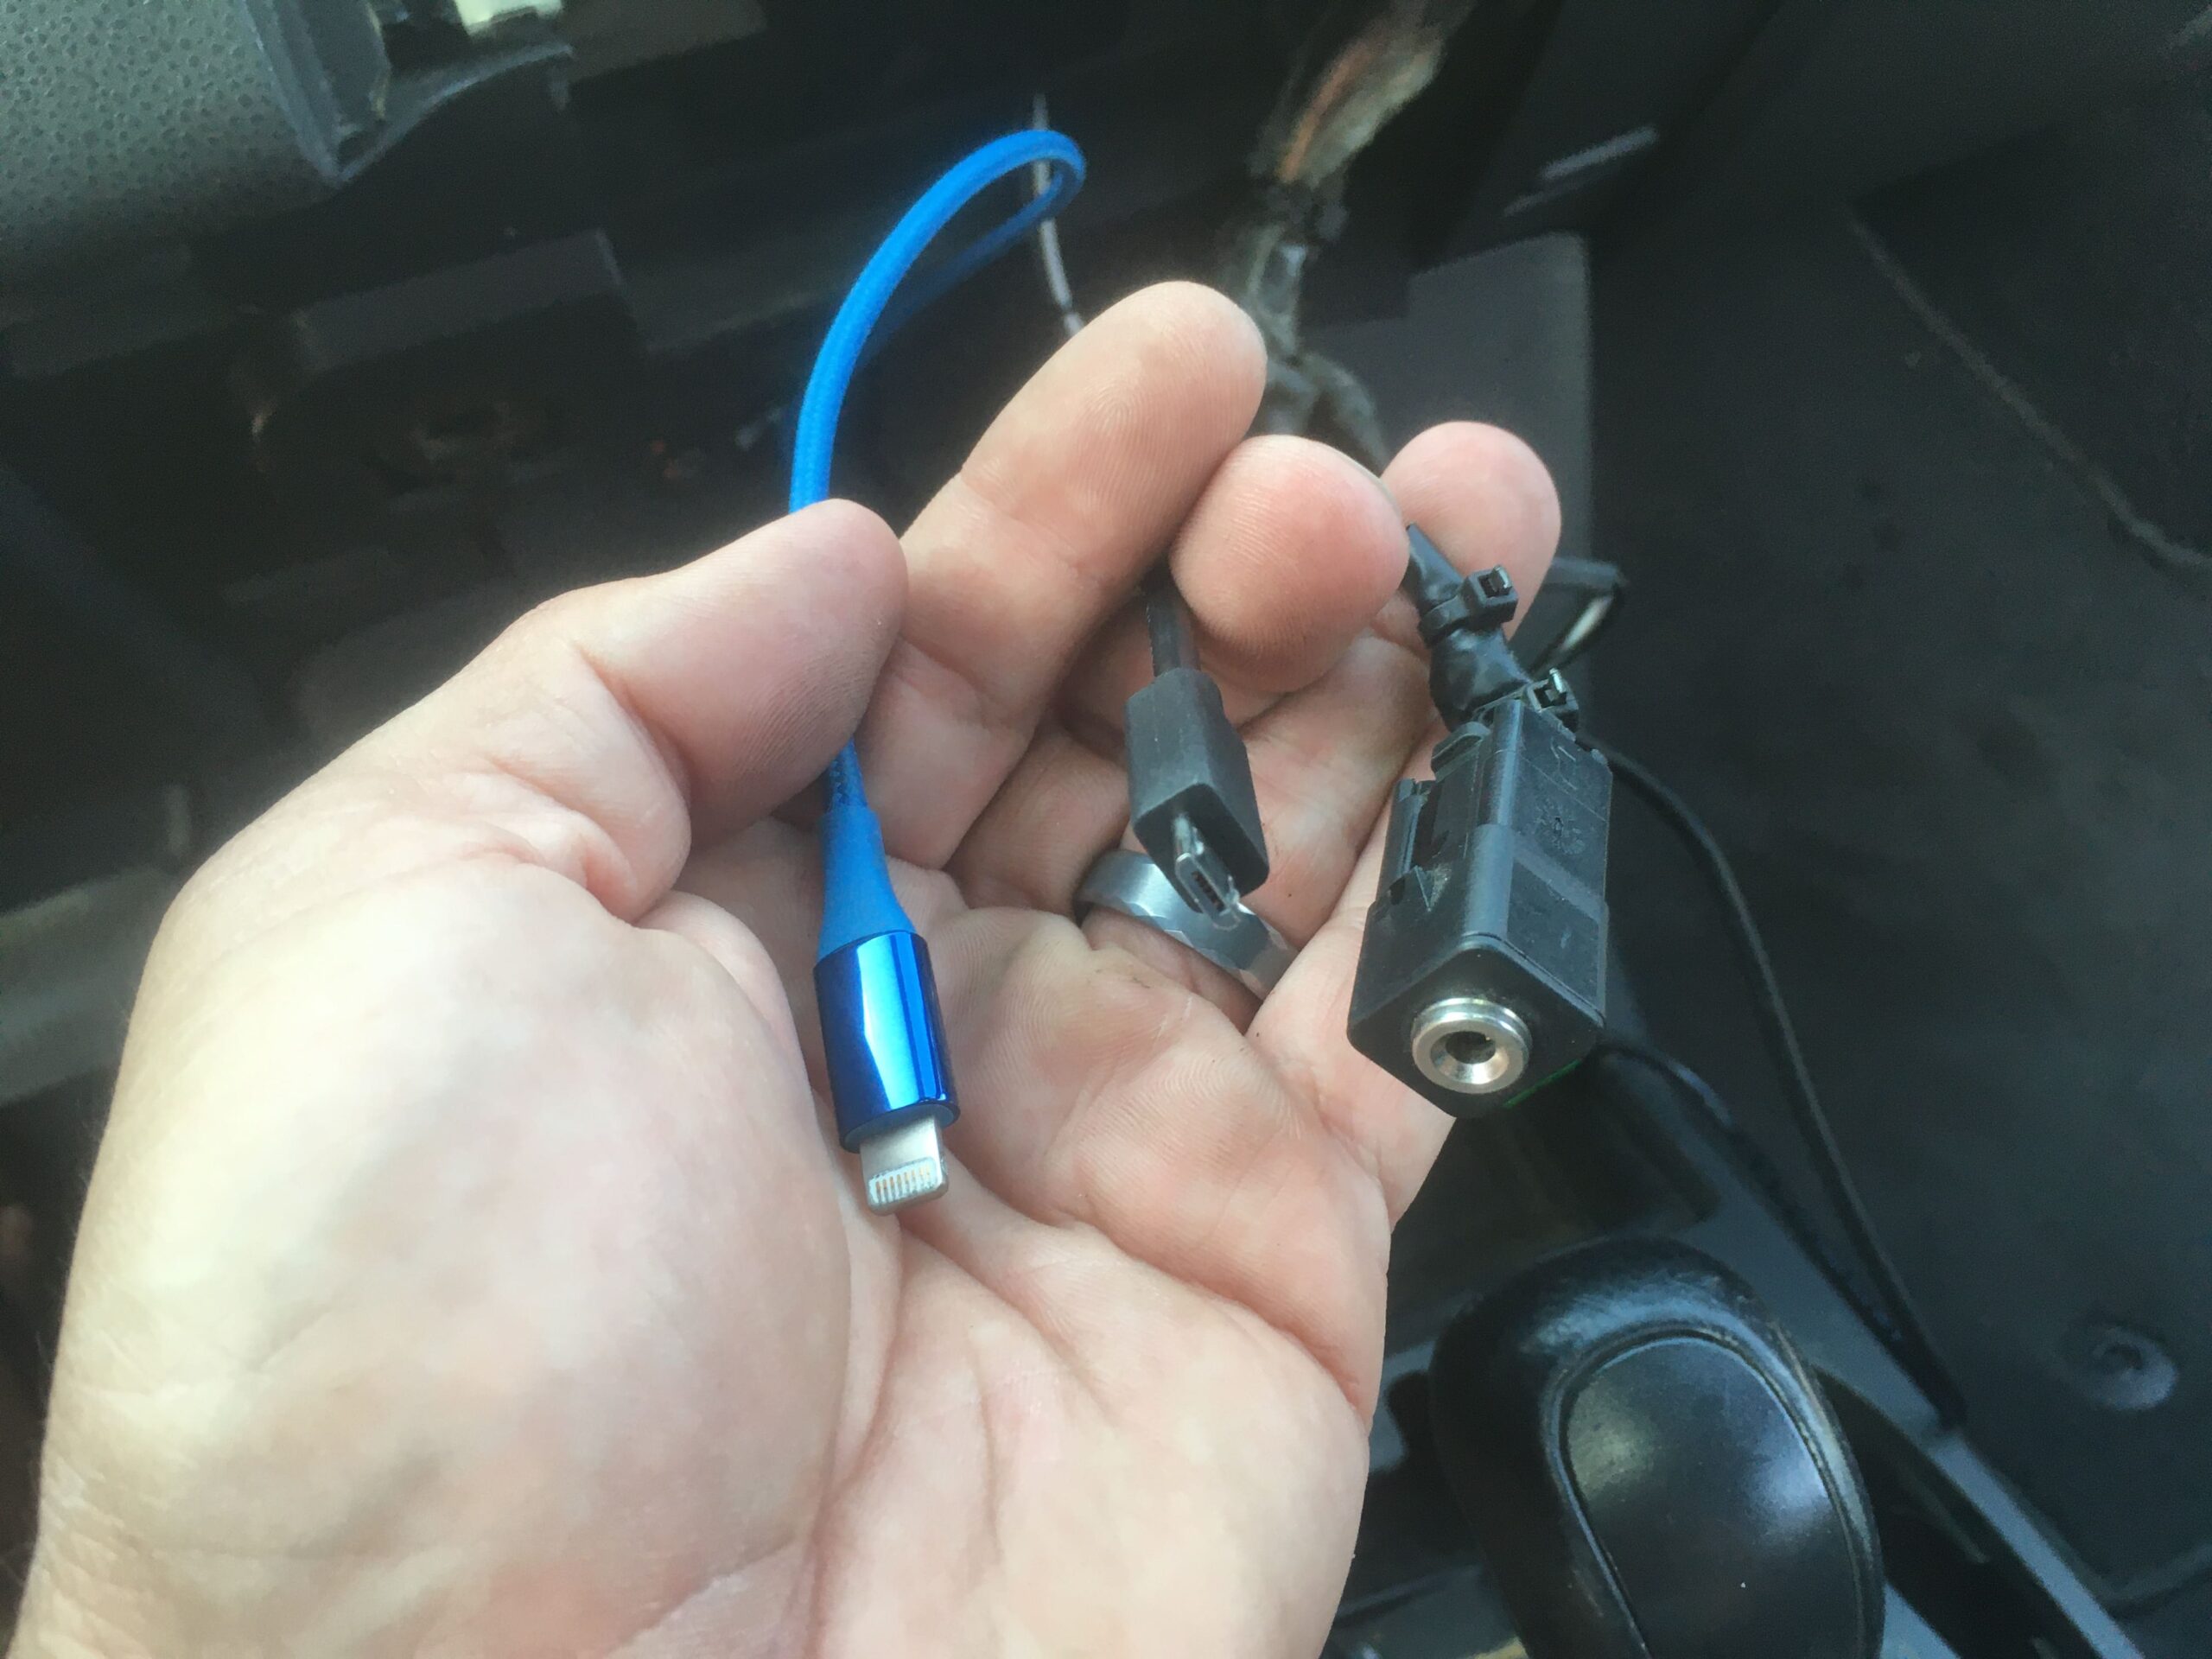
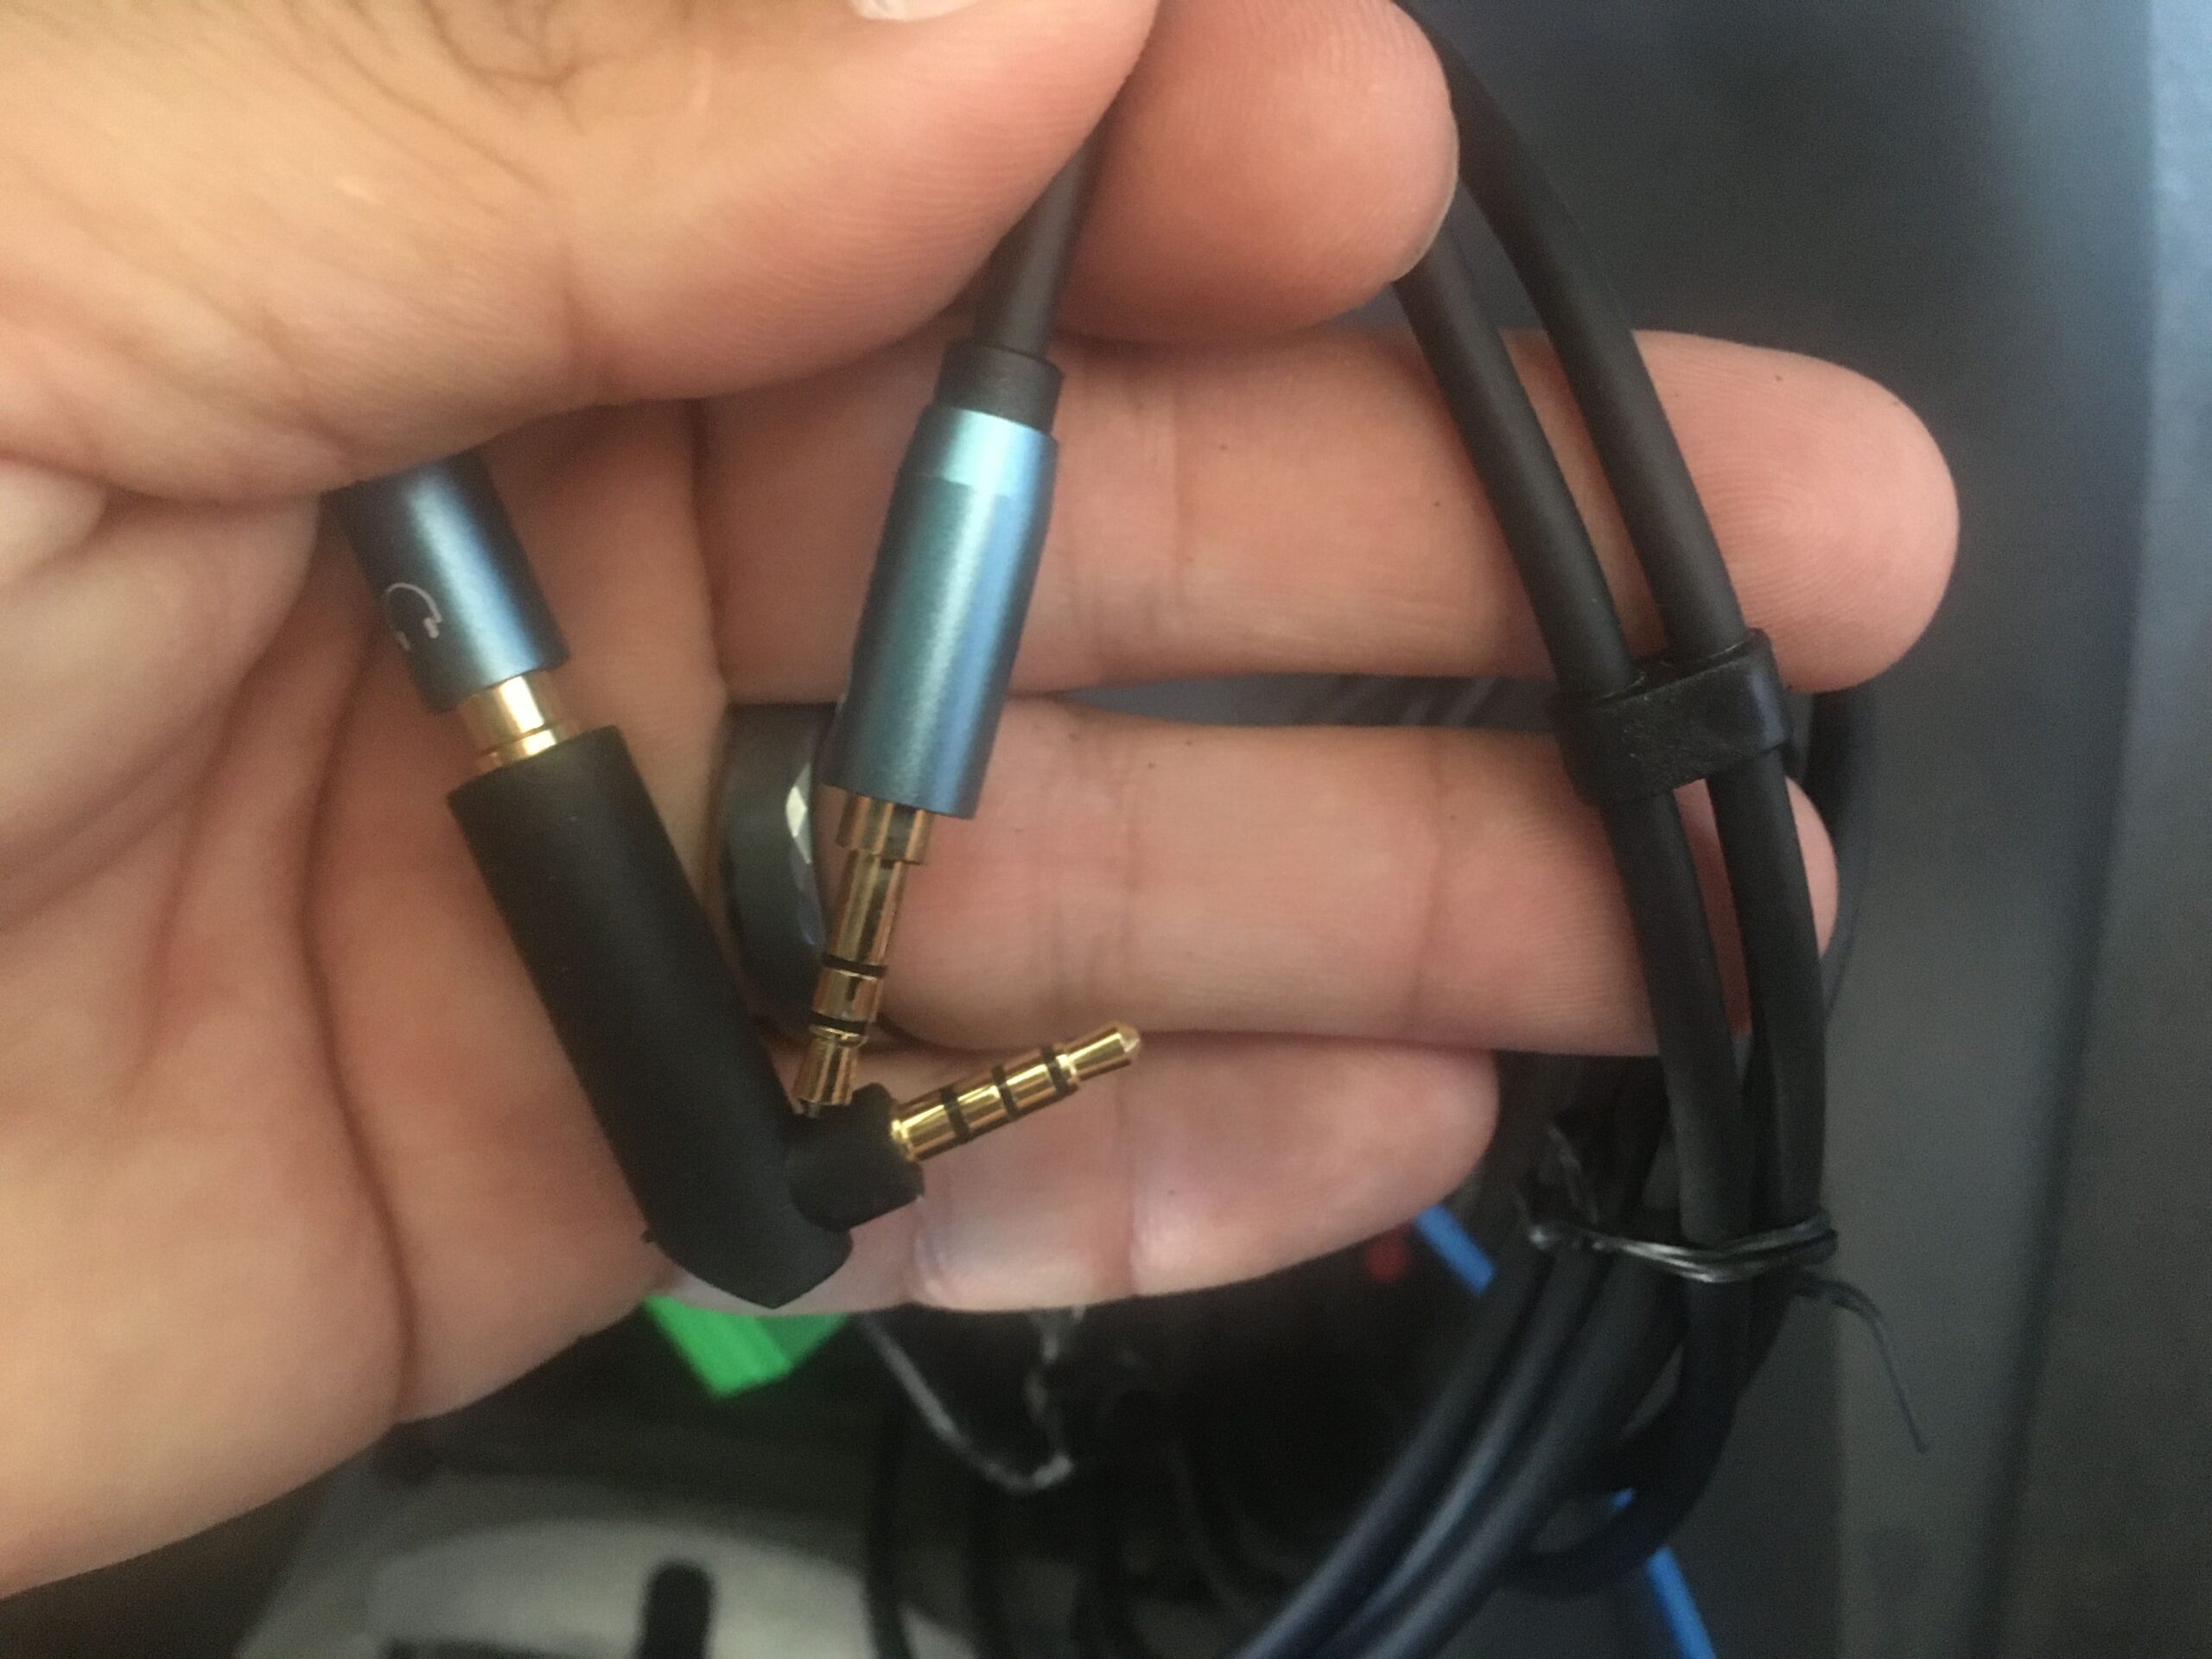
Our 3.5mm audio cable splitter ready to go.
Input into the factory aux port.
Two ends, one for the tablet and one for the iPhone.
All wired and in place.
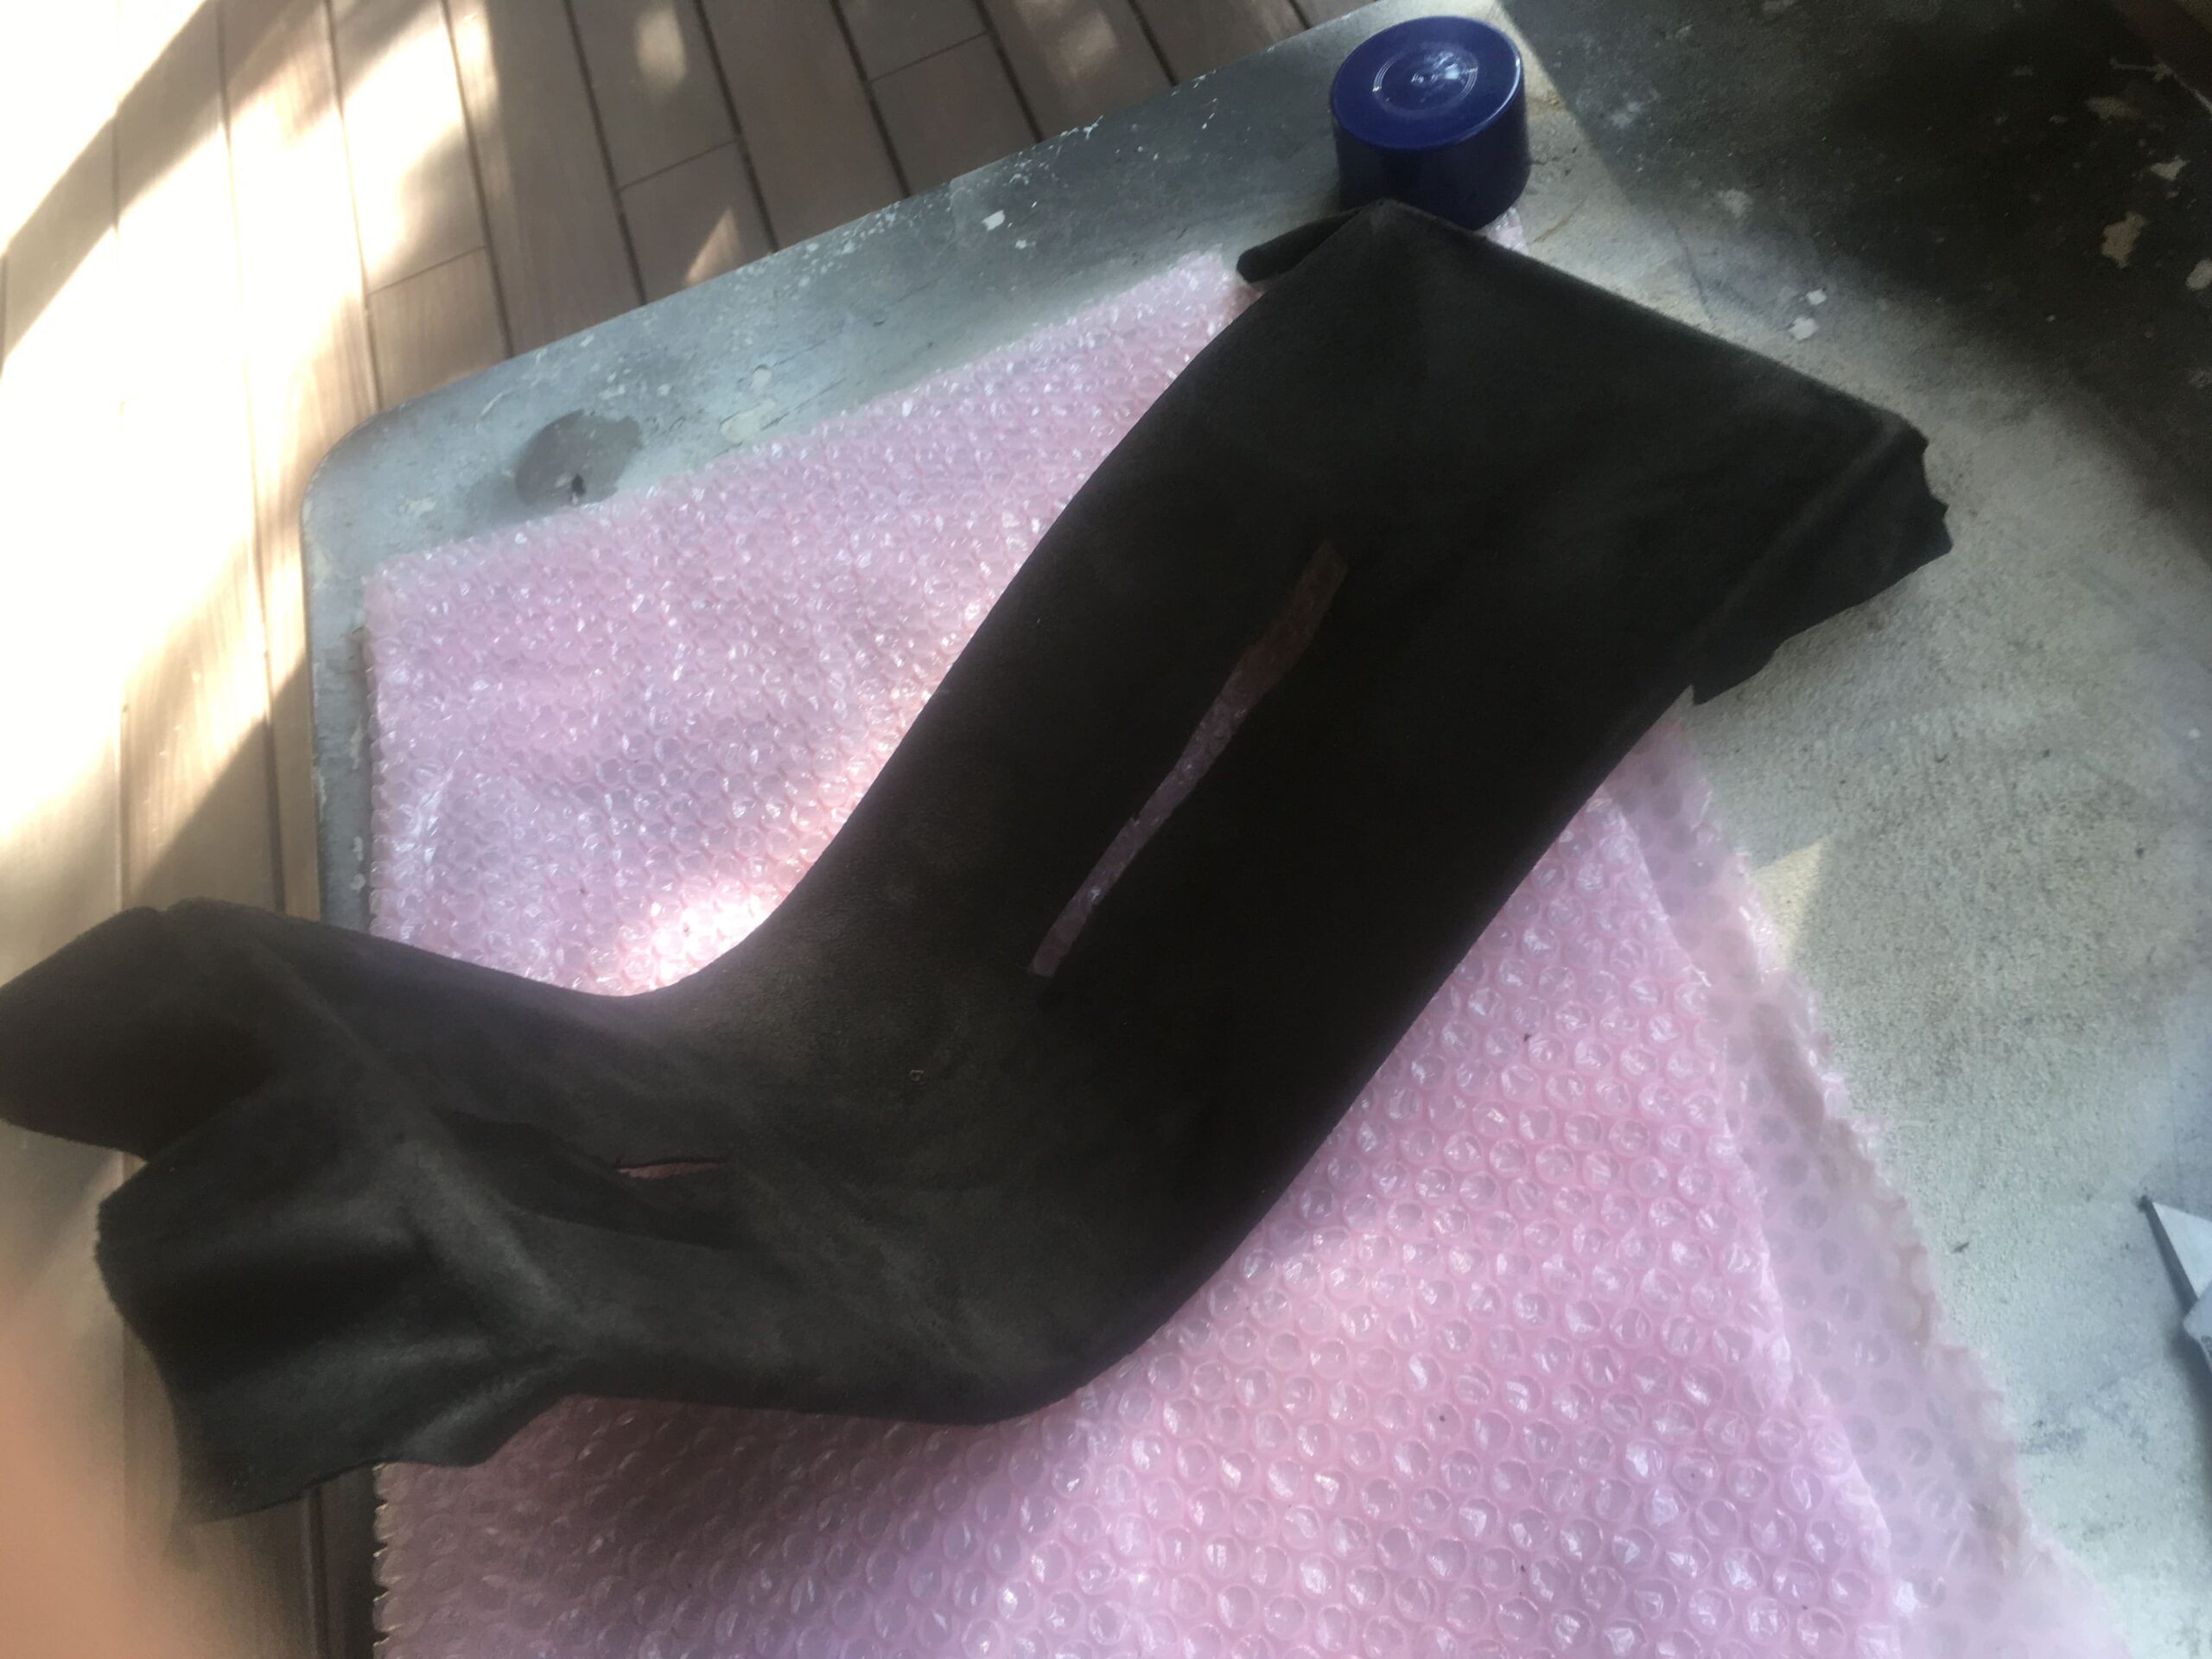
A quick upholstery with black suede sourced at the local auto upholstery store.
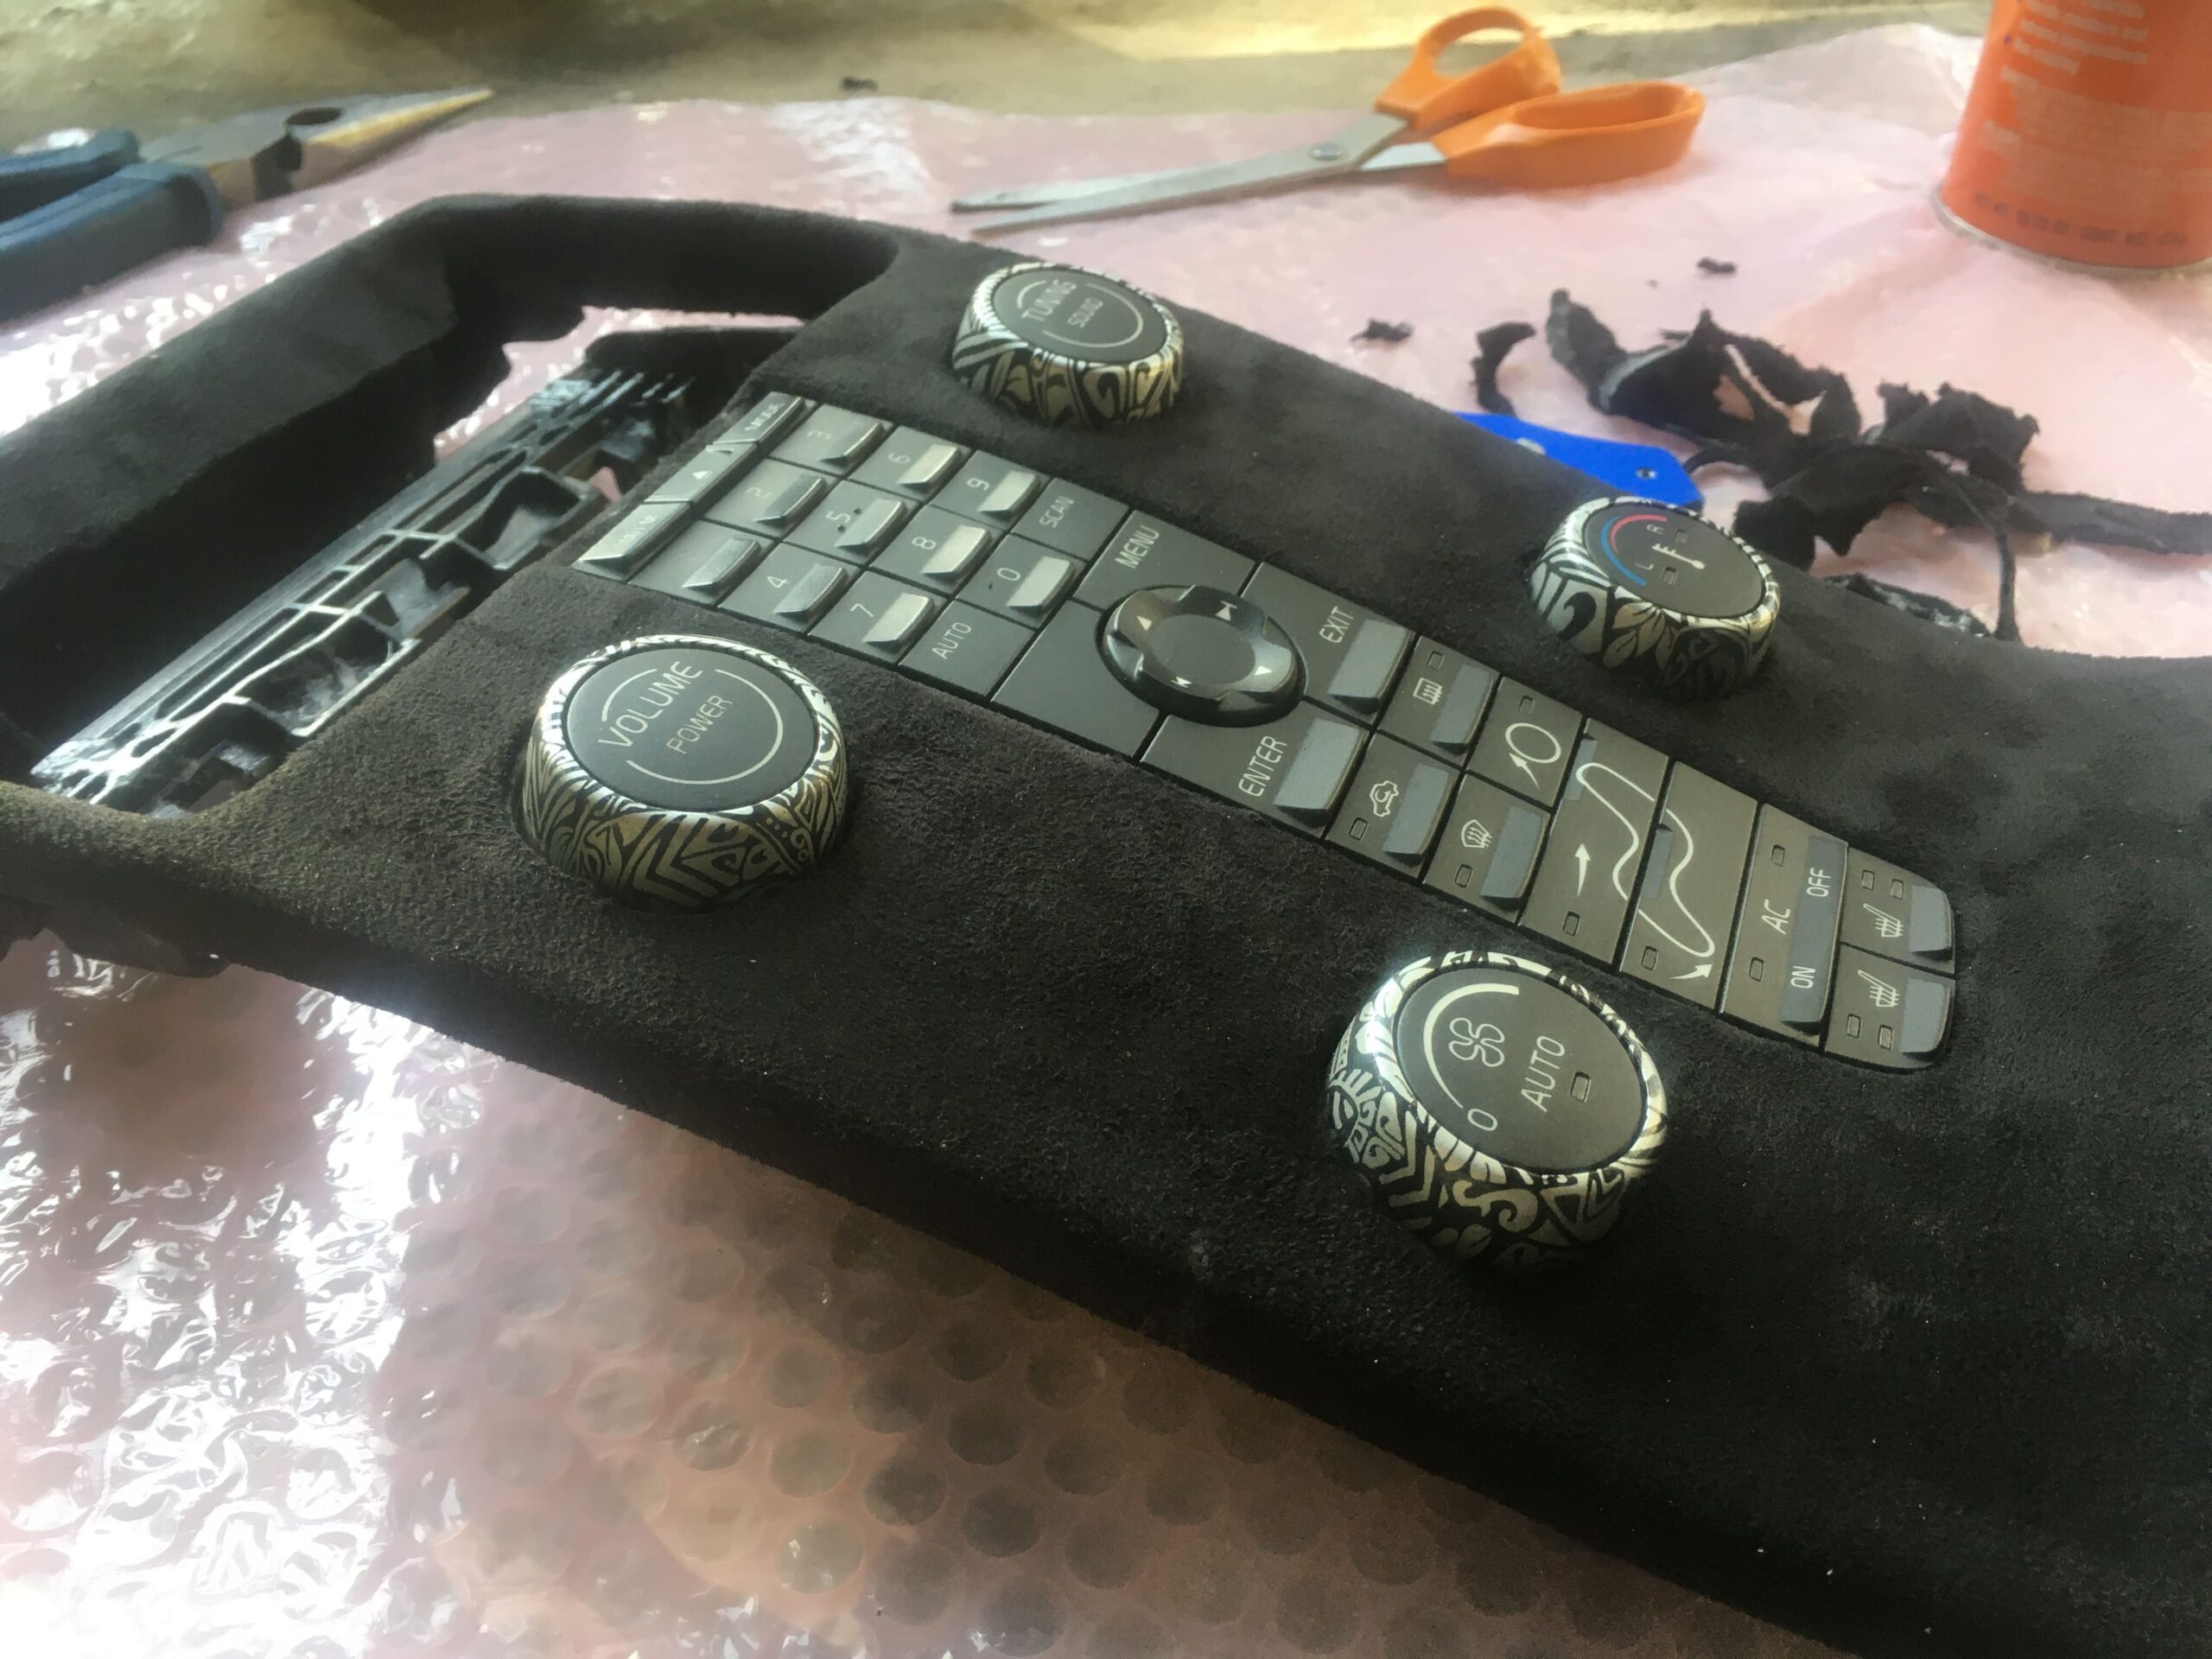
We did razor off the buttons on the tablet. When the tablet is in the waterfall, it fits snug, and these buttons were pressing themselves. You can still press the buttons when the tablet is out no problem, and now they aren’t going haywire when the tablet is mounted.
Plug in the 3.5mm and slide the tablet into place. With the fabric, that tablet is snug and doesn’t move. If we did paint match we would have to find a solution to hold the tablet in. We had anticipated this and purchased a magnetic plate. Similar the a phone holder. The back of the tablet would have a magnet and there would be a plate attached to the front of the Cd deck.
At some point soon we will pull the suede off, and do some body work and do a gloss black paint with sand and buff on the waterfall. This will give it a more factory and polished look. If we wanted stock look, we could choose the aluminum color too. For now we are going to run it this way, and circle back when we decide our final interior upgrade, and simply make sure the waterfall matches.

That’s it. Hope that helps. This is by no means the end all be all, but it is one way to attack the problem.


