


About a year or so back, we were in the market for a boost gauge for our T5 Volvo. We had settled on a cheap unit from eBay, and haven’t had any issues… until now. We were tracking down some boost issues, and if you own a Volvo P1 or Ford Focus ST MK, you can see how we fixed erratic boost here. Before we found our faulty turbo control valve, we guessed maybe our boost gauge had gone out, so were in the market for a new one.
The current unit we are using is the MATCC, and you can see our write-up on that here: MATCC Boost Gauges – A $15 eBay Buy That Isn’t Too Bad. But we decided to step up to Amazon, and step up our price point as well. This time we went with a more name brand gauge. We bought the GlowShift Tinted 7 Color 30 PSI Turbo Boost Gauge Kit for $44. It is important to note that they also sell a non-tinted version, found here for the same price. The main difference is the screen of the gauge is tinted, which appears dark/black when not in use. Pretty cool. GlowShift Calls it “stealthy“.
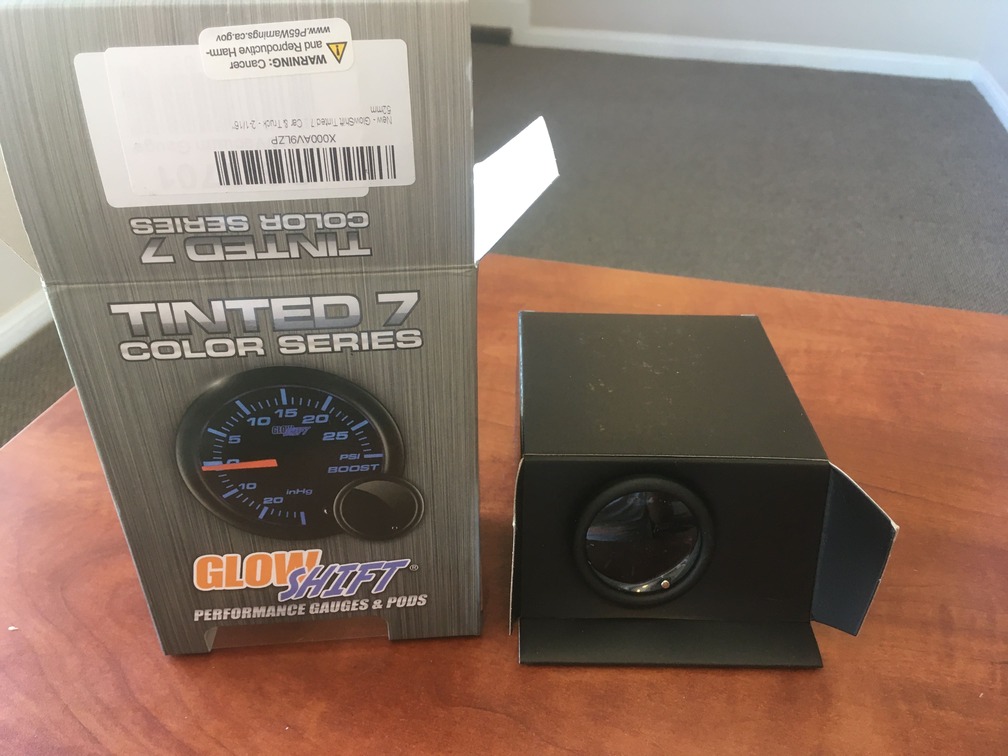
Initial unboxing shows some quality packaging and the weight of it was for sure more than our cheaper eBay alternative. This unit feels solid. Opening up the box we fid all kinds of goodies that were tucked away.
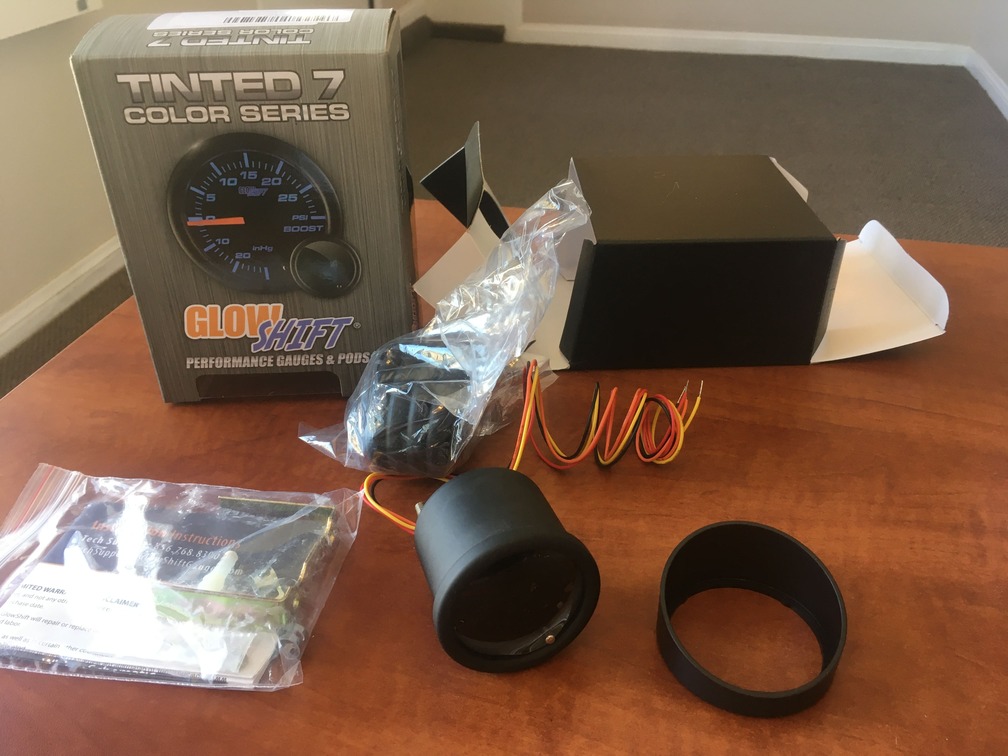
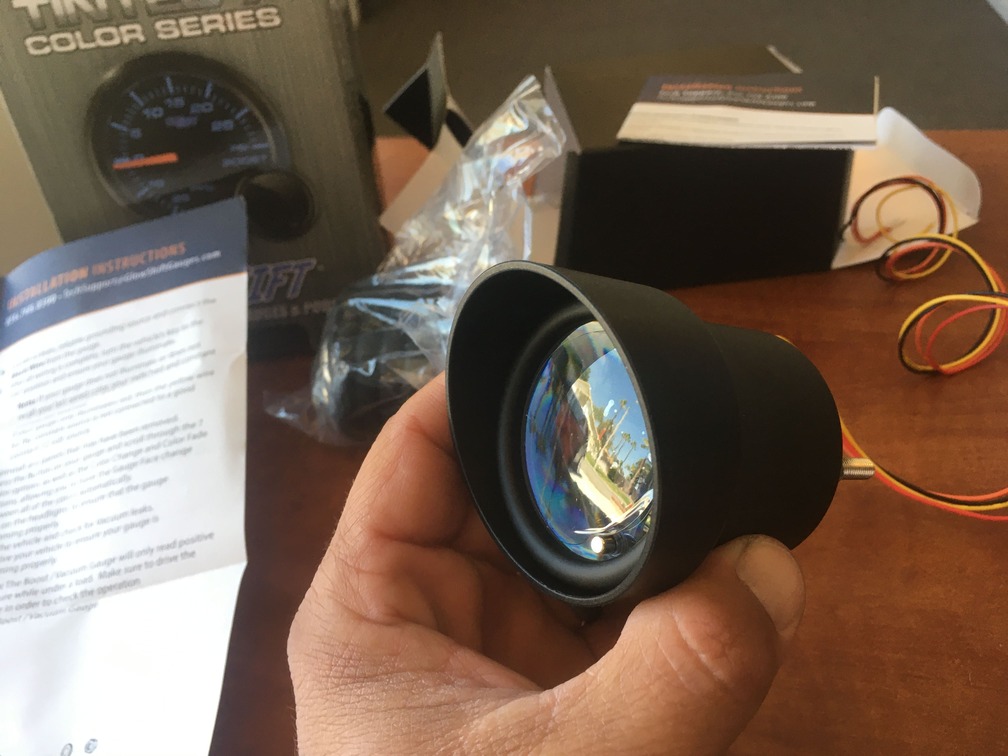
We have our boost/vacuum line. Our warranty card, full instructions and some misc. hardware for the installation. Our favorite piece was the sun visor included. I think this is going to add some depth to the visual appearance of the gauge in our pillar pod.
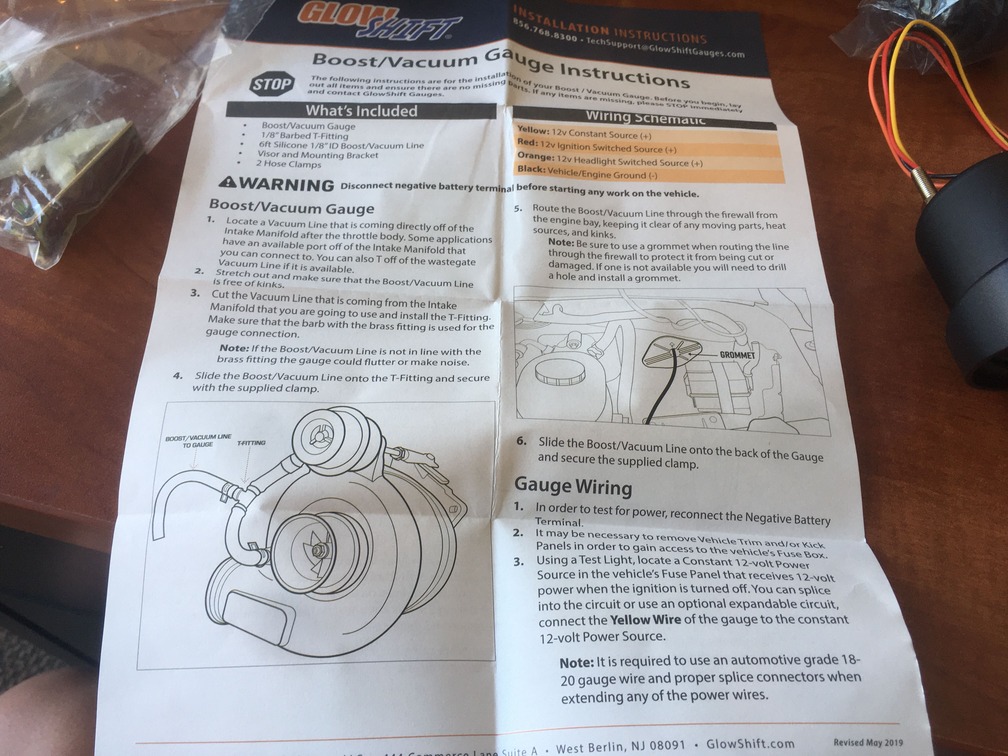
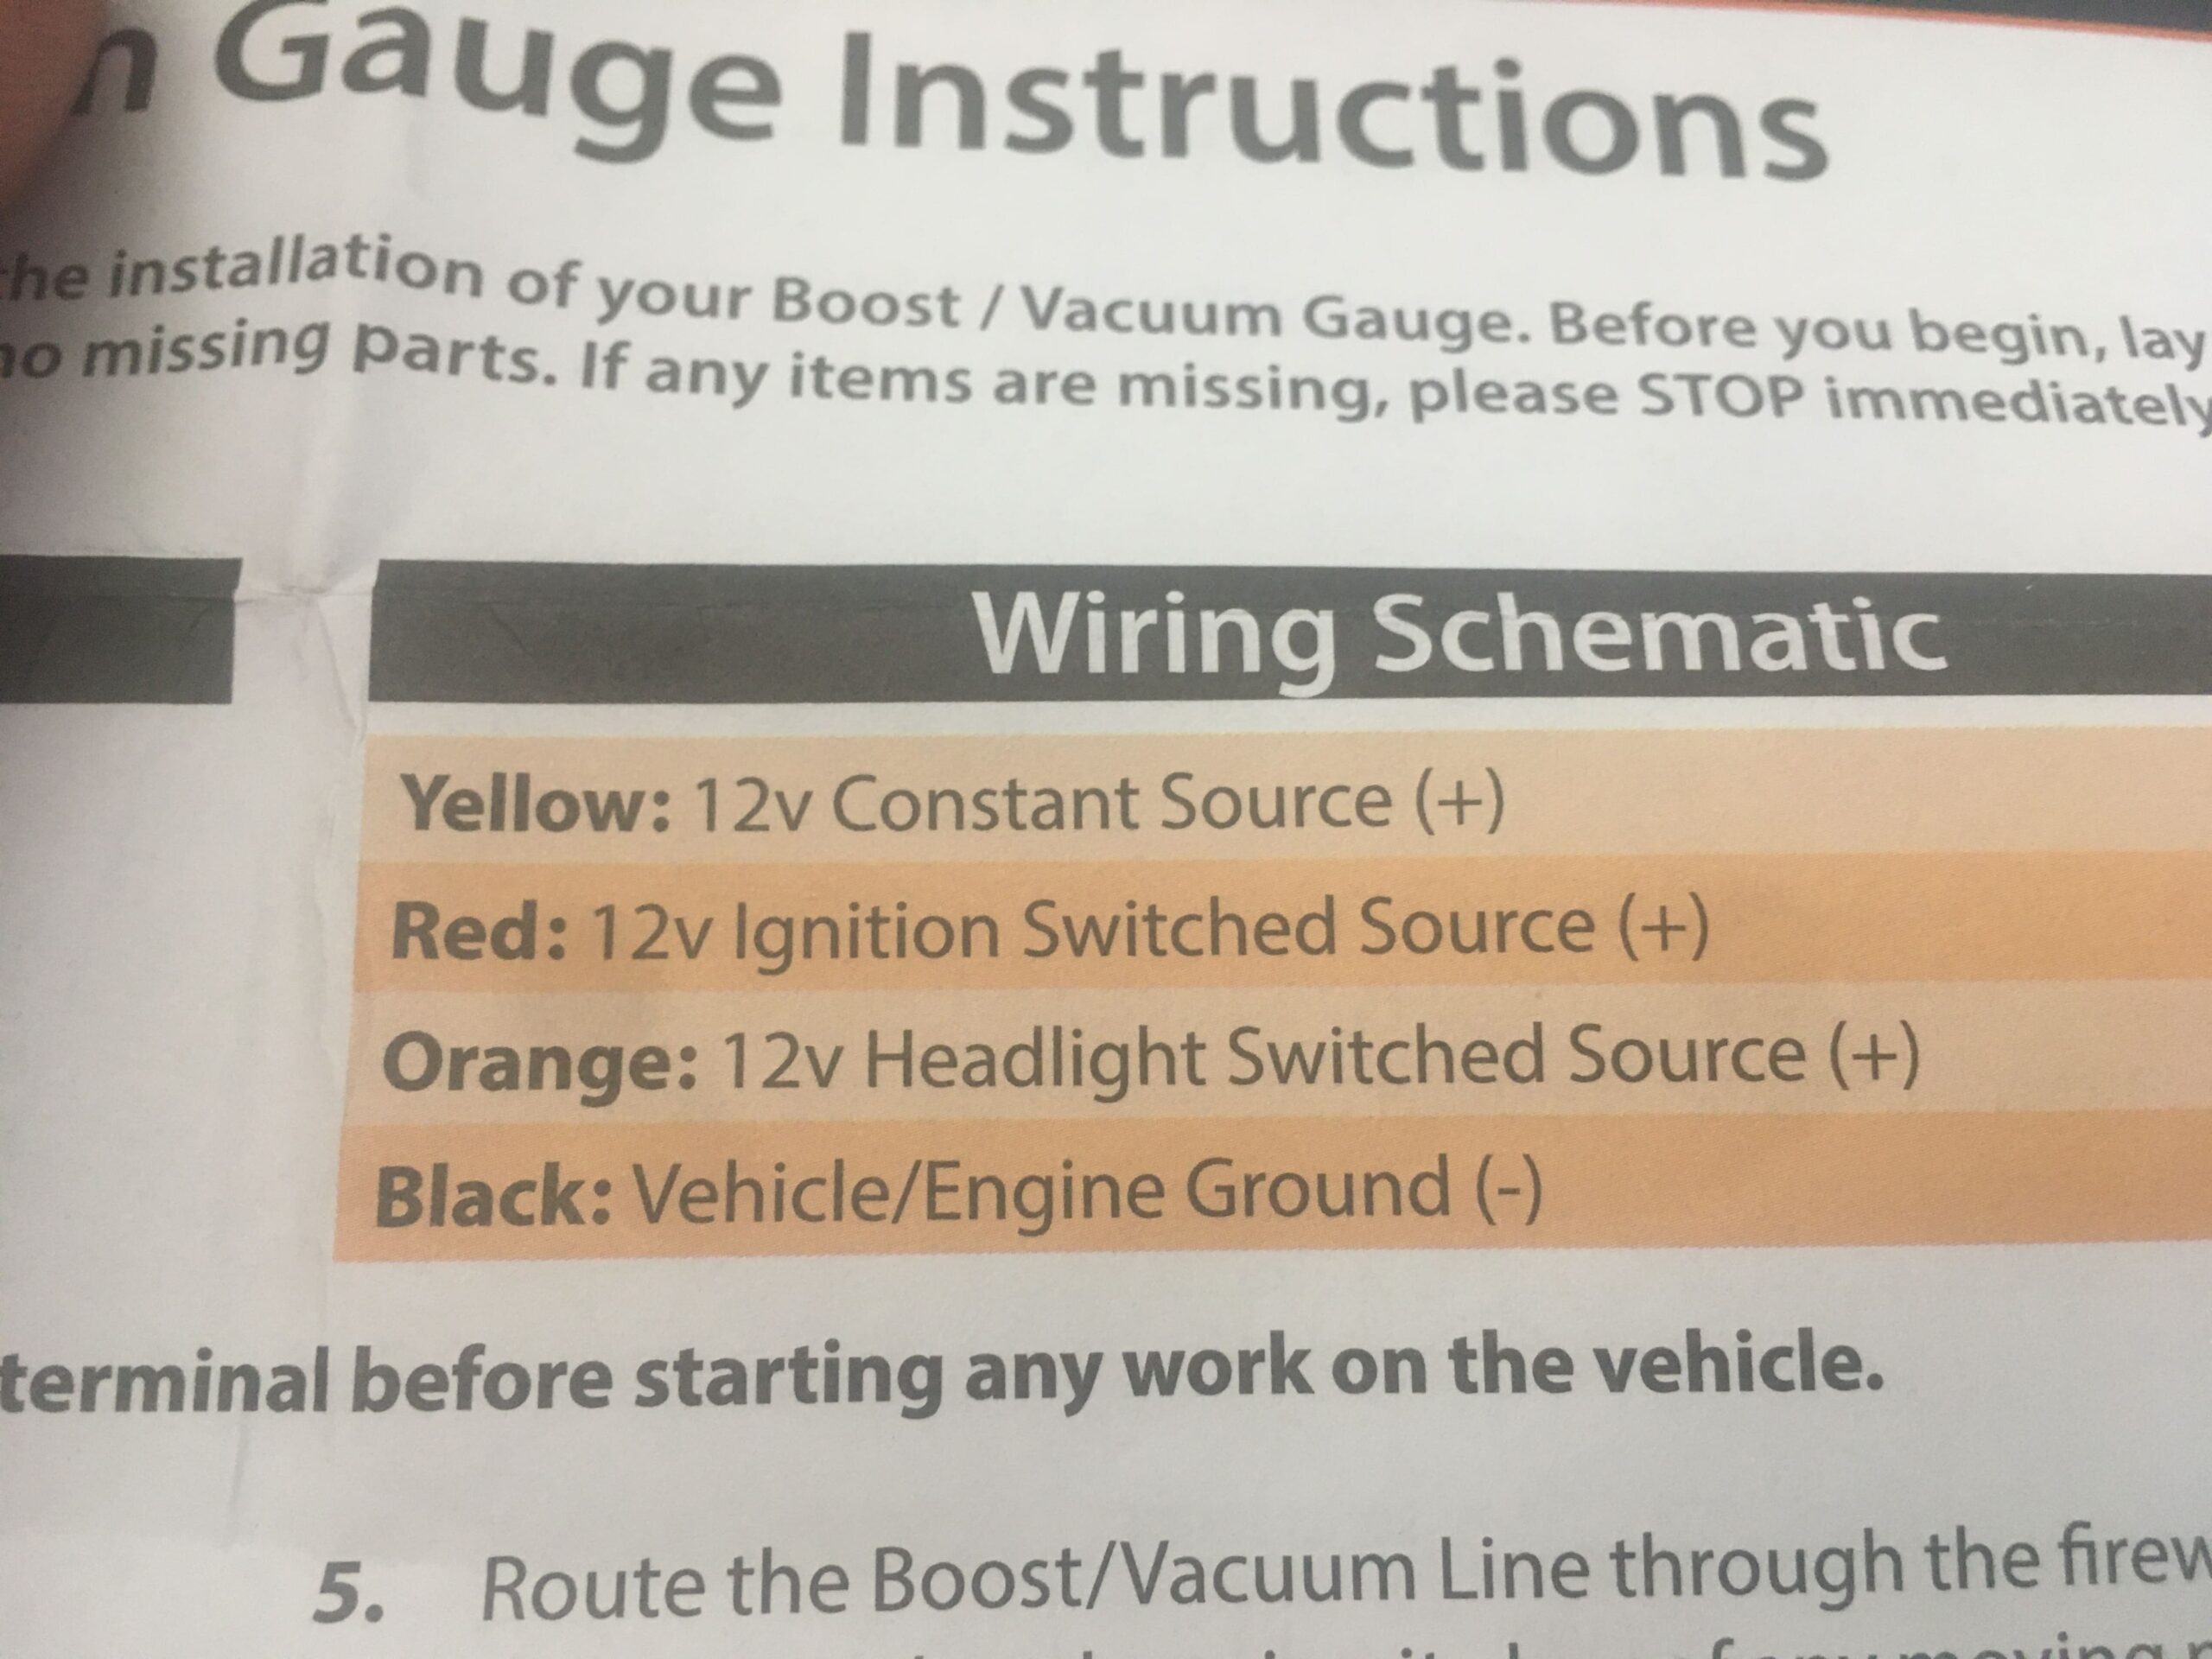
The instructions we got were spot on, we had recently done our other installation and it all lined up. These instructions however, were much more detailed than the other product we had before. It included detailed walk through for the wiring, and vacuum and the mounting. The cool thing about this gauge is that it also includes the optional orange wire, which can be tapped to your headlights so it will auto dim by 30% at night. this is useful as the bright colored LED backlights can be more of a distraction at night.
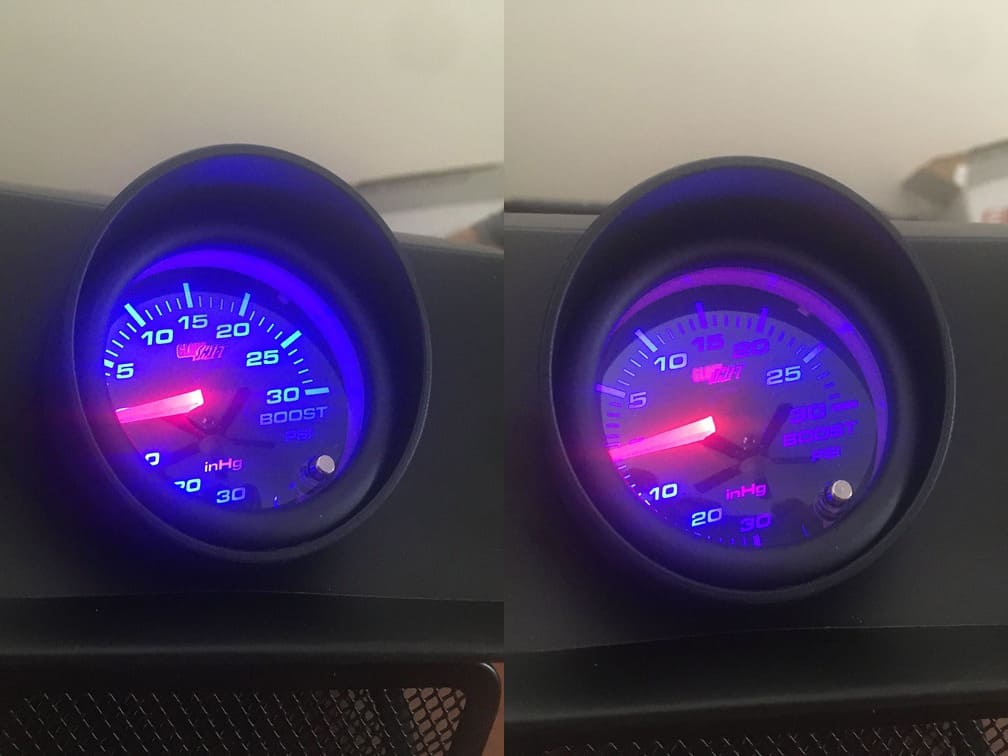
We wanted to test the brightness and color options before we actually wired it up into our gauge pod. This unit has 7 different color options, as well as 2 modes that color switch, which we think is going to be our choice. Here we simply held the wires to our battery under the hood. Black to ground, and then both the yellow (constant power) and red (ACC/ignition) together to simulate the car on. Also, the orange wire simply receives a power signal to instruct the pod to be standard or dim, so also holding this wire shows us full power and the 70% power illumination.
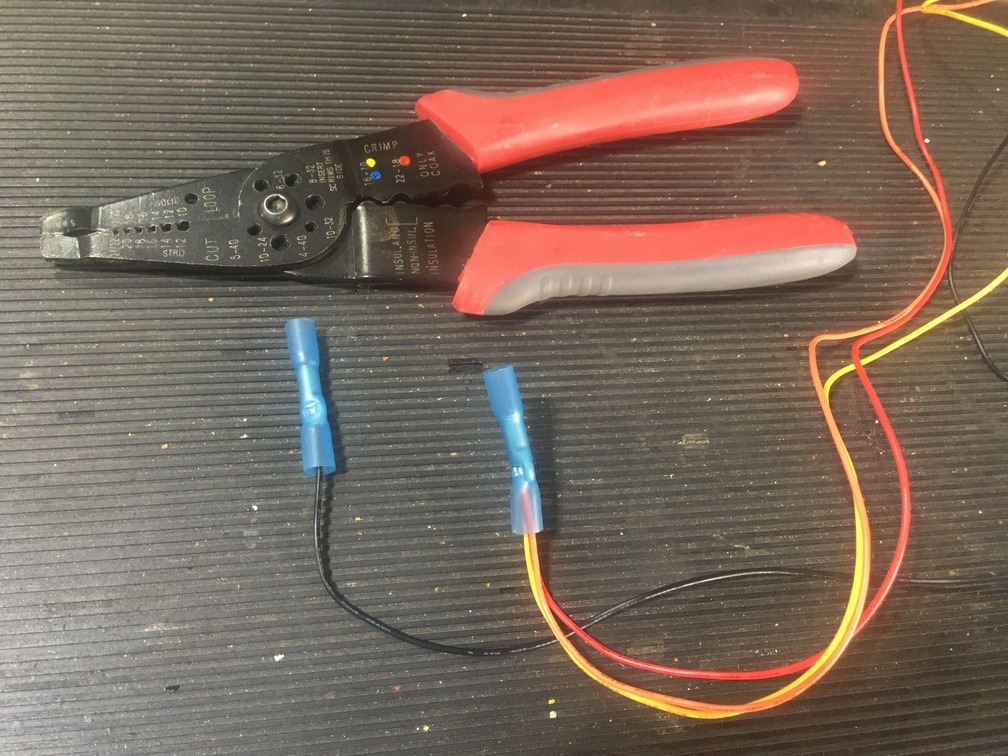
The next issue was converting the 4 wiring GlowShift to our current 2 wiring MATCC setup. The MATCC had just 2 wires. A yellow for power which we ran to the dimmer switch for adjustable power (dims with the car dimming), and a black, which was simply ground.
The new GlowShift has four wires as seen above. Our thought was to run all three power wires to the source, meaning the gauge would be on at 70% all time, maybe a bit low for day, but perfect for night driving, and still dimming on the car dim feature. If this was too low we would simply not connect the orange wire, leaving the gauge dimmable, but also running at 100% output.
It is important to note that not all 4 wires are required for a successful installation. 4 wires are required if you want to use all the features. Here are some other options depending on your configuration choice. Black wire must always be grounded, no option there. The Red wire must be always connected to the ignition/acc power source. If not, we found that the gauge is illuminated red, indicated the wire is not on a good enough 12V source. Further, you can run the red and yellow together to a single source to save some wiring and tapping, and this will simply disable the auto functioning save (if you choose purple, you will have to set to purple each time you get in the car).
The Orange wire is optional, but with multiple options as well. You can tap to headlight switch/fuse to have the gauge auto dim when your lights come on (night time). You can leave it off to always run the gauge at 100% brightness. You could connect it to the power source (yellow/red/or both) to have it always at 70% brightness. Here is a side by side comparison of full power and 70% power.
Since we have DRLs, we will hook the yellow, red and orange all together, and tap our dimmer switch. This will put the gauge at 70% brightness, and still dimmable via the car’s wheel dimmer. It will also not save our color preference on startup, so we have to select our color each time. We may plan to run a 12v constant later, but for now we are piggy backing on the wiring we already have for a quick install. If we haven’t done this by the time we upgrade to our triple pod, we will for sure do it then, as the color transition mode will match across all gauges.
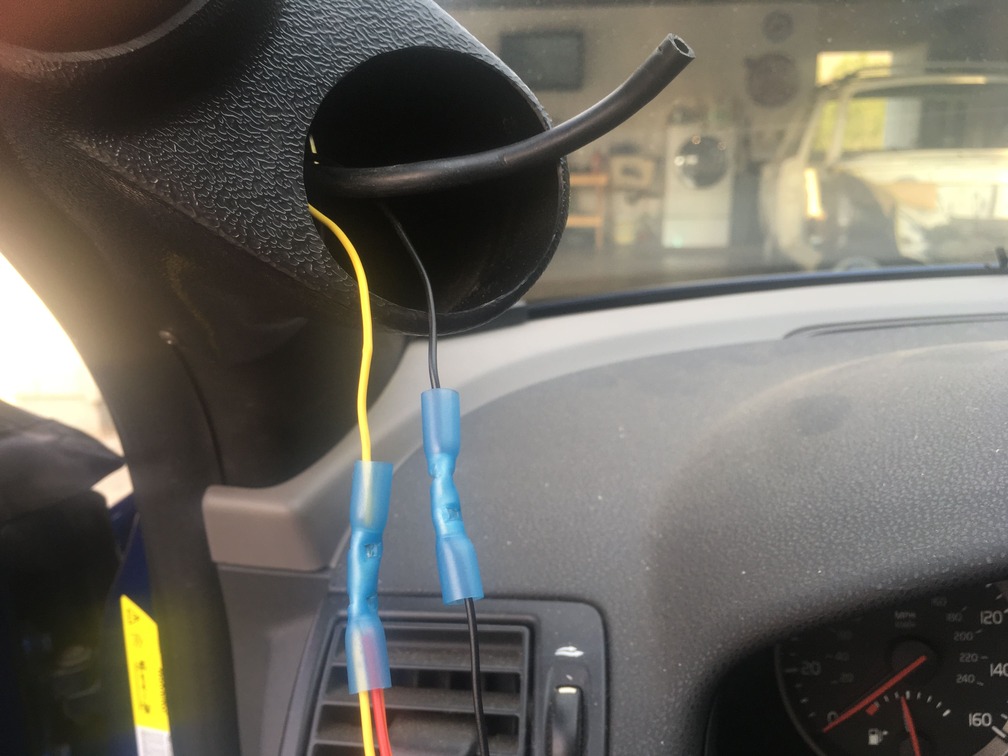
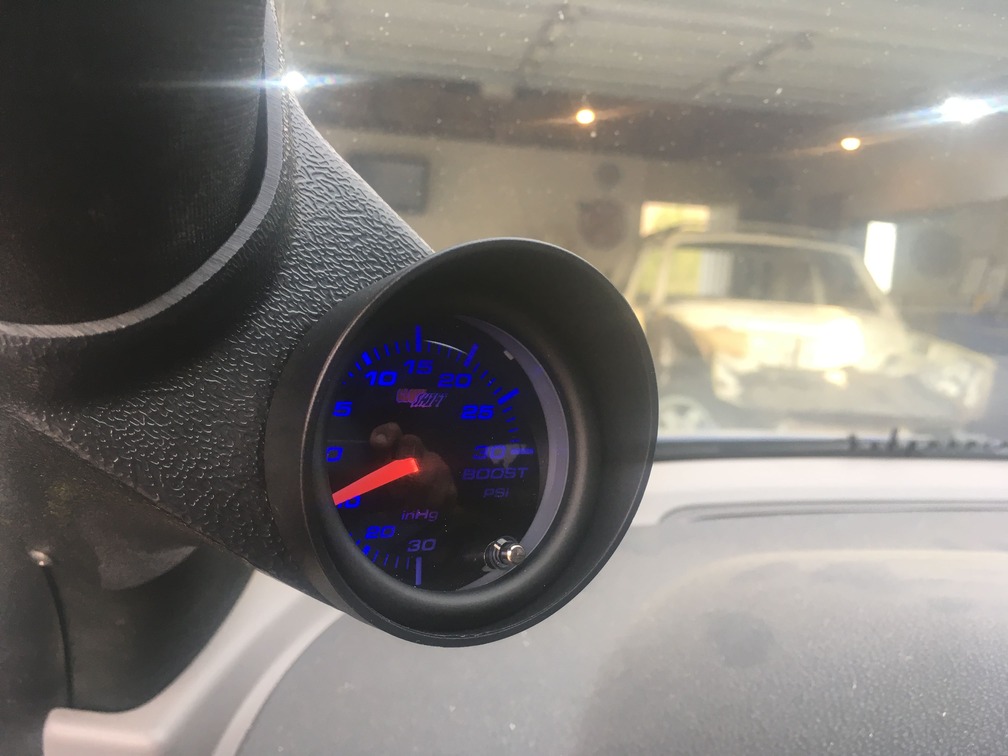
We just re-sealed the current wiring with some new connectors and then plugged in the already ran vacuum line. Done. Here we can see the gauge at day and night, perfect illumination for both settings.
All and all, we think this gauge is pretty solid. We would recommend it and we are planning to grab their triple pillar pod as well as two additional tinted gauges later on. You can get this same tinted boost gauge here, or their non-tinted here. Our if you’re looking to grab a whole bunch of different gauges, or want to see their full line-up, visit their website here: https://www.glowshiftdirect.com/.

